

Review sản phẩm
Xóa Ghi Âm Trên Amazon Echo Của Bạn Chỉ Trong Vài Bước Đơn Giản!

Th5
## Xóa Ghi Âm Trên Amazon Echo Của Bạn Chỉ Trong Vài Bước Đơn Giản!
Bạn lo lắng về việc Amazon lưu trữ các đoạn ghi âm giọng nói của bạn trên Echo? Đừng lo lắng nữa! Bài viết này sẽ hướng dẫn bạn cách xóa các bản ghi âm đó một cách dễ dàng và nhanh chóng. Bảo mật thông tin cá nhân là ưu tiên hàng đầu, và việc kiểm soát dữ liệu giọng nói của bạn cũng vậy.
Cách xóa ghi âm trên Amazon Echo:
Amazon cung cấp nhiều cách để bạn quản lý và xóa dữ liệu giọng nói của mình. Dưới đây là hướng dẫn chi tiết từng bước:
1. Thông qua Ứng dụng Amazon Alexa:
* Bước 1: Mở ứng dụng Amazon Alexa trên điện thoại thông minh hoặc máy tính bảng của bạn.
* Bước 2: Đăng nhập vào tài khoản Amazon của bạn.
* Bước 3: Nhấn vào biểu tượng Menu (thường là ba đường kẻ ngang).
* Bước 4: Chọn “Cài đặt” (Settings).
* Bước 5: Chọn “Alexa Privacy” (Quyền riêng tư của Alexa).
* Bước 6: Chọn “Review Voice History” (Xem lại lịch sử giọng nói).
* Bước 7: Bạn sẽ thấy danh sách các bản ghi âm giọng nói. Bạn có thể chọn xóa từng bản ghi âm riêng lẻ hoặc xóa tất cả lịch sử giọng nói cùng một lúc. Hãy lưu ý rằng việc xóa lịch sử giọng nói sẽ ảnh hưởng đến các tính năng cá nhân hóa của Alexa.
* Bước 8: Xác nhận việc xóa.
2. Thông qua Trang Web Amazon:
* Bước 1: Truy cập vào trang web Amazon.
* Bước 2: Đăng nhập vào tài khoản Amazon của bạn.
* Bước 3: Truy cập vào trang quản lý thiết bị Alexa của bạn.
* Bước 4: Tìm phần “Lịch sử giọng nói” và thực hiện các bước tương tự như trên ứng dụng để xóa.
Lưu ý:
* Việc xóa các bản ghi âm giọng nói là hoàn toàn miễn phí.
* Sau khi xóa, các bản ghi âm sẽ không thể khôi phục được.
* Bạn nên thường xuyên kiểm tra và xóa các bản ghi âm không cần thiết để bảo mật thông tin cá nhân của mình.
Mua ngay các sản phẩm công nghệ cao cấp tại Queen Mobile:
Cần một chiếc điện thoại thông minh mạnh mẽ để quản lý cuộc sống kỹ thuật số của bạn một cách hiệu quả? Hay một chiếc máy tính bảng để giải trí và làm việc? Queen Mobile là lựa chọn hoàn hảo! Chúng tôi cung cấp các sản phẩm chính hãng từ các thương hiệu hàng đầu như iPhone, iPad và đồng hồ thông minh Smartwatch. Truy cập website của chúng tôi ngay hôm nay để khám phá những ưu đãi hấp dẫn!
#xoaghiam #amazonecho #alexa #quyenriengtu #baomatthongtin #queenmobile #iphone #ipad #smartwatch #congnghe #dienthoai #maytinhbang
Giới thiệu How to delete voice recordings on your Amazon Echo
: How to delete voice recordings on your Amazon Echo
Hãy viết lại bài viết dài kèm hashtag về việc đánh giá sản phẩm và mua ngay tại Queen Mobile bằng tiếng VIệt: How to delete voice recordings on your Amazon Echo
Mua ngay sản phẩm tại Việt Nam:
QUEEN MOBILE chuyên cung cấp điện thoại Iphone, máy tính bảng Ipad, đồng hồ Smartwatch và các phụ kiện APPLE và các giải pháp điện tử và nhà thông minh. Queen Mobile rất hân hạnh được phục vụ quý khách….
_____________________________________________________
Mua #Điện_thoại #iphone #ipad #macbook #samsung #xiaomi #poco #oppo #snapdragon giá tốt, hãy ghé [𝑸𝑼𝑬𝑬𝑵 𝑴𝑶𝑩𝑰𝑳𝑬]
✿ 149 Hòa Bình, phường Hiệp Tân, quận Tân Phú, TP HCM
✿ 402B, Hai Bà Trưng, P Tân Định, Q 1, HCM
✿ 287 đường 3/2 P 10, Q 10, HCM
Hotline (miễn phí) 19003190
Thu cũ đổi mới
Rẻ hơn hoàn tiền
Góp 0%
Thời gian làm việc: 9h – 21h.
KẾT LUẬN
Hãy viết đoạn tóm tắt về nội dung bằng tiếng việt kích thích người mua: How to delete voice recordings on your Amazon Echo
Alexa is Amazon’s personal digital assistant, which lets you use your voice to control some of the easiest smart home devices available. It powers Amazon’s Echo line of smart speakers and is included in devices made by other manufacturers, such as Sonos. If you use an Alexa-powered device, you might know your voice interactions are recorded and saved by default.
Your voice recordings are stored on your Amazon account until you manually delete them. This guide shows you how to access your saved Alexa voice recordings and remove them.
Does Alexa record and listen to everything you say?
Some might consider the idea of smart home speakers always listening in the background as problematic or an invasion of privacy. We ask these devices personal questions throughout the day, and you want to know that your data isn’t mishandled.
Since voice recordings can contain private information about you and your family, they must stay between you and your devices and no one else. At the same time, you should be aware of what Amazon does with your voice recordings and how they handle your saved data in the cloud.

Source: Amazon
Amazon is transparent and straightforward about its privacy policy for Amazon Echo devices that use Alexa. First, your Alexa-powered devices don’t always listen since they only wake with your chosen wake word. You don’t have to randomly save private conversations to your account. It only sends data to the cloud after initiating the wake word by default. When your device starts listening and you ask it to do something, that audio clip is sent to Amazon’s cloud to process your request. From there, it’s saved to your Amazon account for viewing later.
What does Amazon do with your Alexa voice recordings?
Amazon Echo smart speakers and displays light up when listening for and processing voice commands. All Amazon Echo smart devices have a physical microphone button you can turn off when you don’t want the device to pick up your conversation.
Amazon uses your saved voice recordings to train Alexa’s speech recognition to enhance its voice assistant product. It practices what is known as supervised machine learning, which allows Amazon to review small audio samples to ensure accuracy for Alexa’s training.
.jpg)
Amazon states it has various safeguards to protect your privacy during these controlled audio reviews, so you should be safe here. Still, you’re in charge of your voice recordings and how they are saved to your account. You can opt out of the feature if you don’t like the idea of Amazon using your data for any reason.
Choosing not to save the audio to your Amazon account means your experience might differ slightly. Keeping some voice recordings can help Alexa better understand and process your requests in the future.
How to delete your voice recordings using the Alexa app
The Alexa app on your smartphone helps you manage the settings for your Echo devices. It has everything you need, from changing Alexa’s voice to picking a new default music service. You can also set up multiple user profiles, making your Echo devices more personal for each family member.
Deleting one or multiple voice recordings from your Amazon account is simple. To get started, check out the following steps.
Locate your Alexa Privacy settings in the Amazon Alexa app
- Download the Amazon Alexa app if necessary, then open it to the main screen.
- Sign in to your Amazon account with the appropriate email address and password.
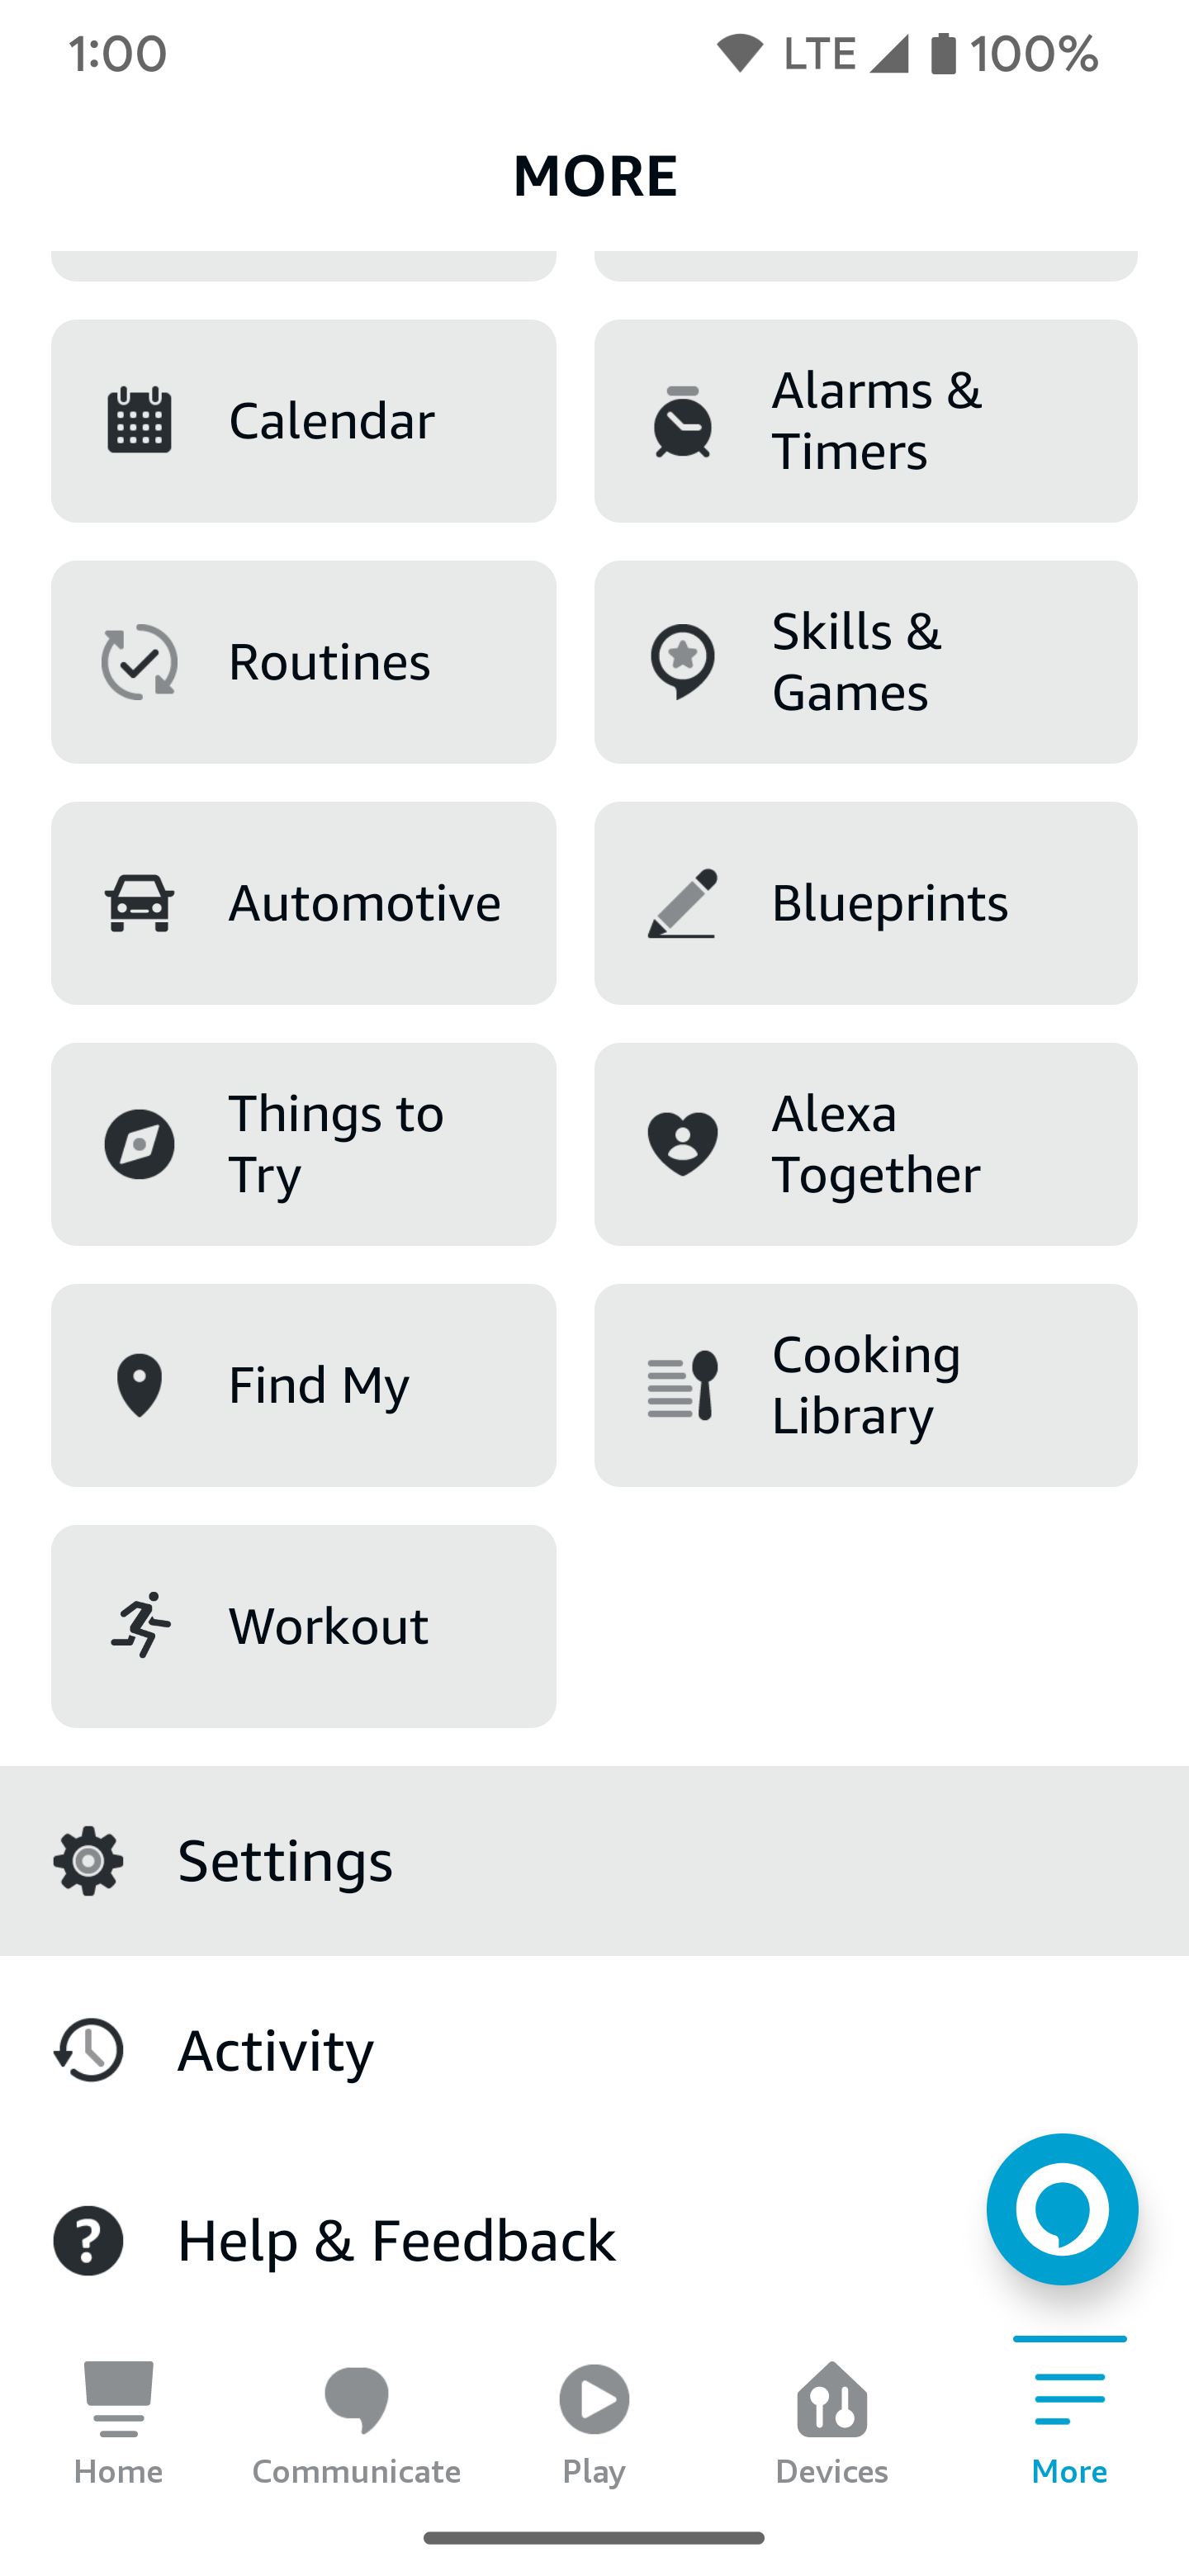
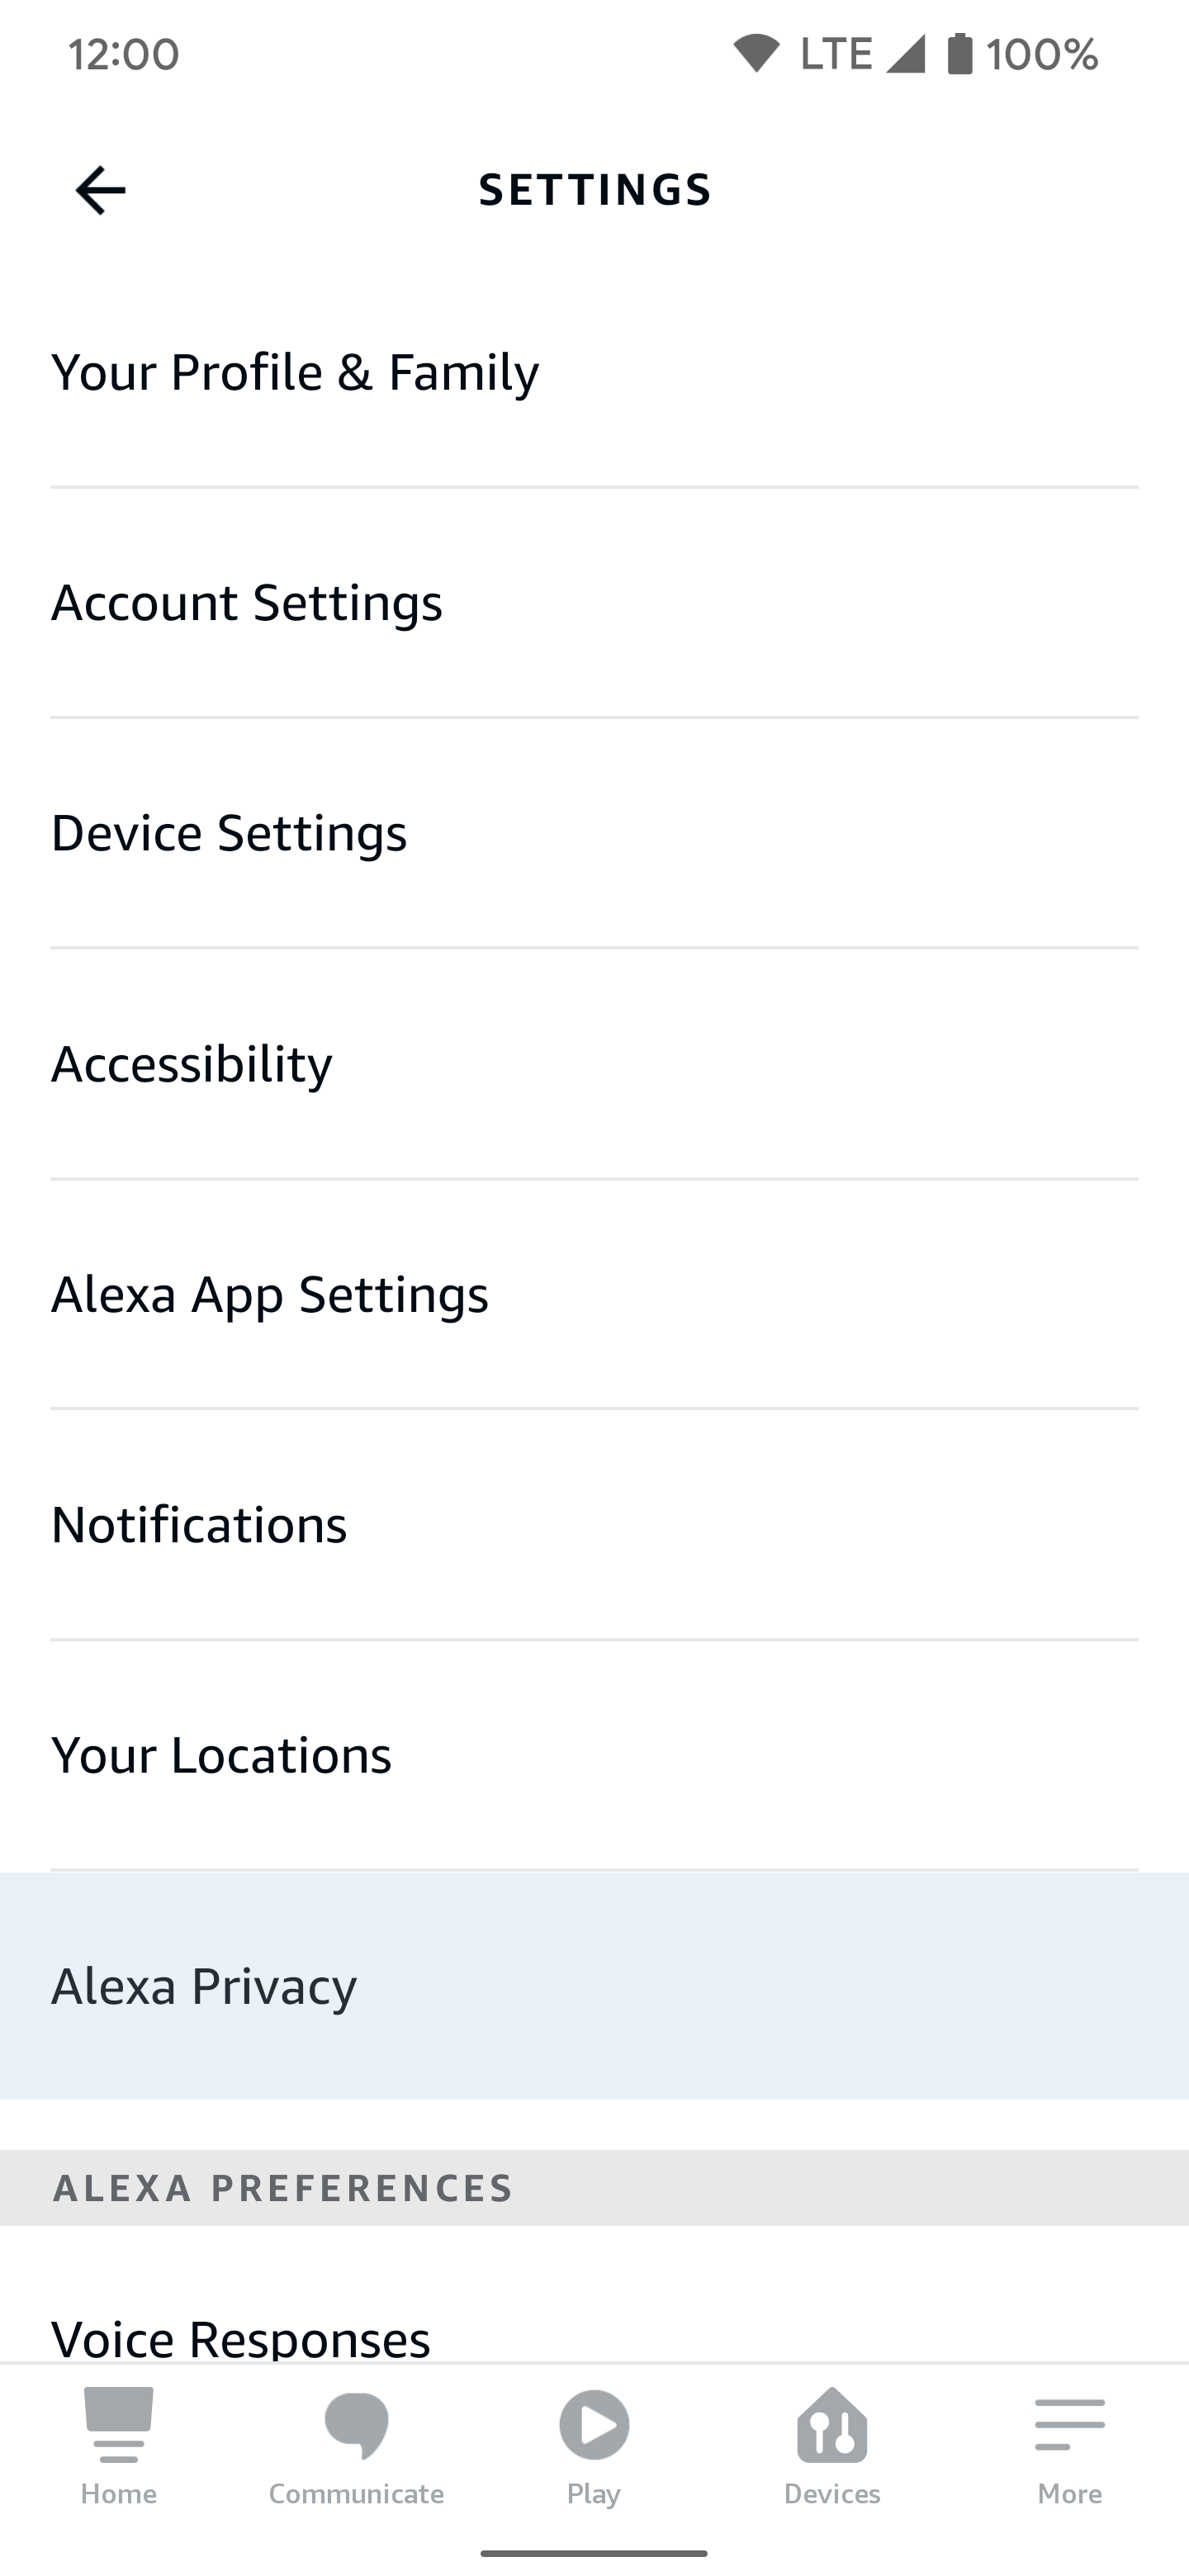
- Tap the More tab in the lower-right corner, then go to Settings.
- Go to Alexa Privacy and tap the Review Voice History section.

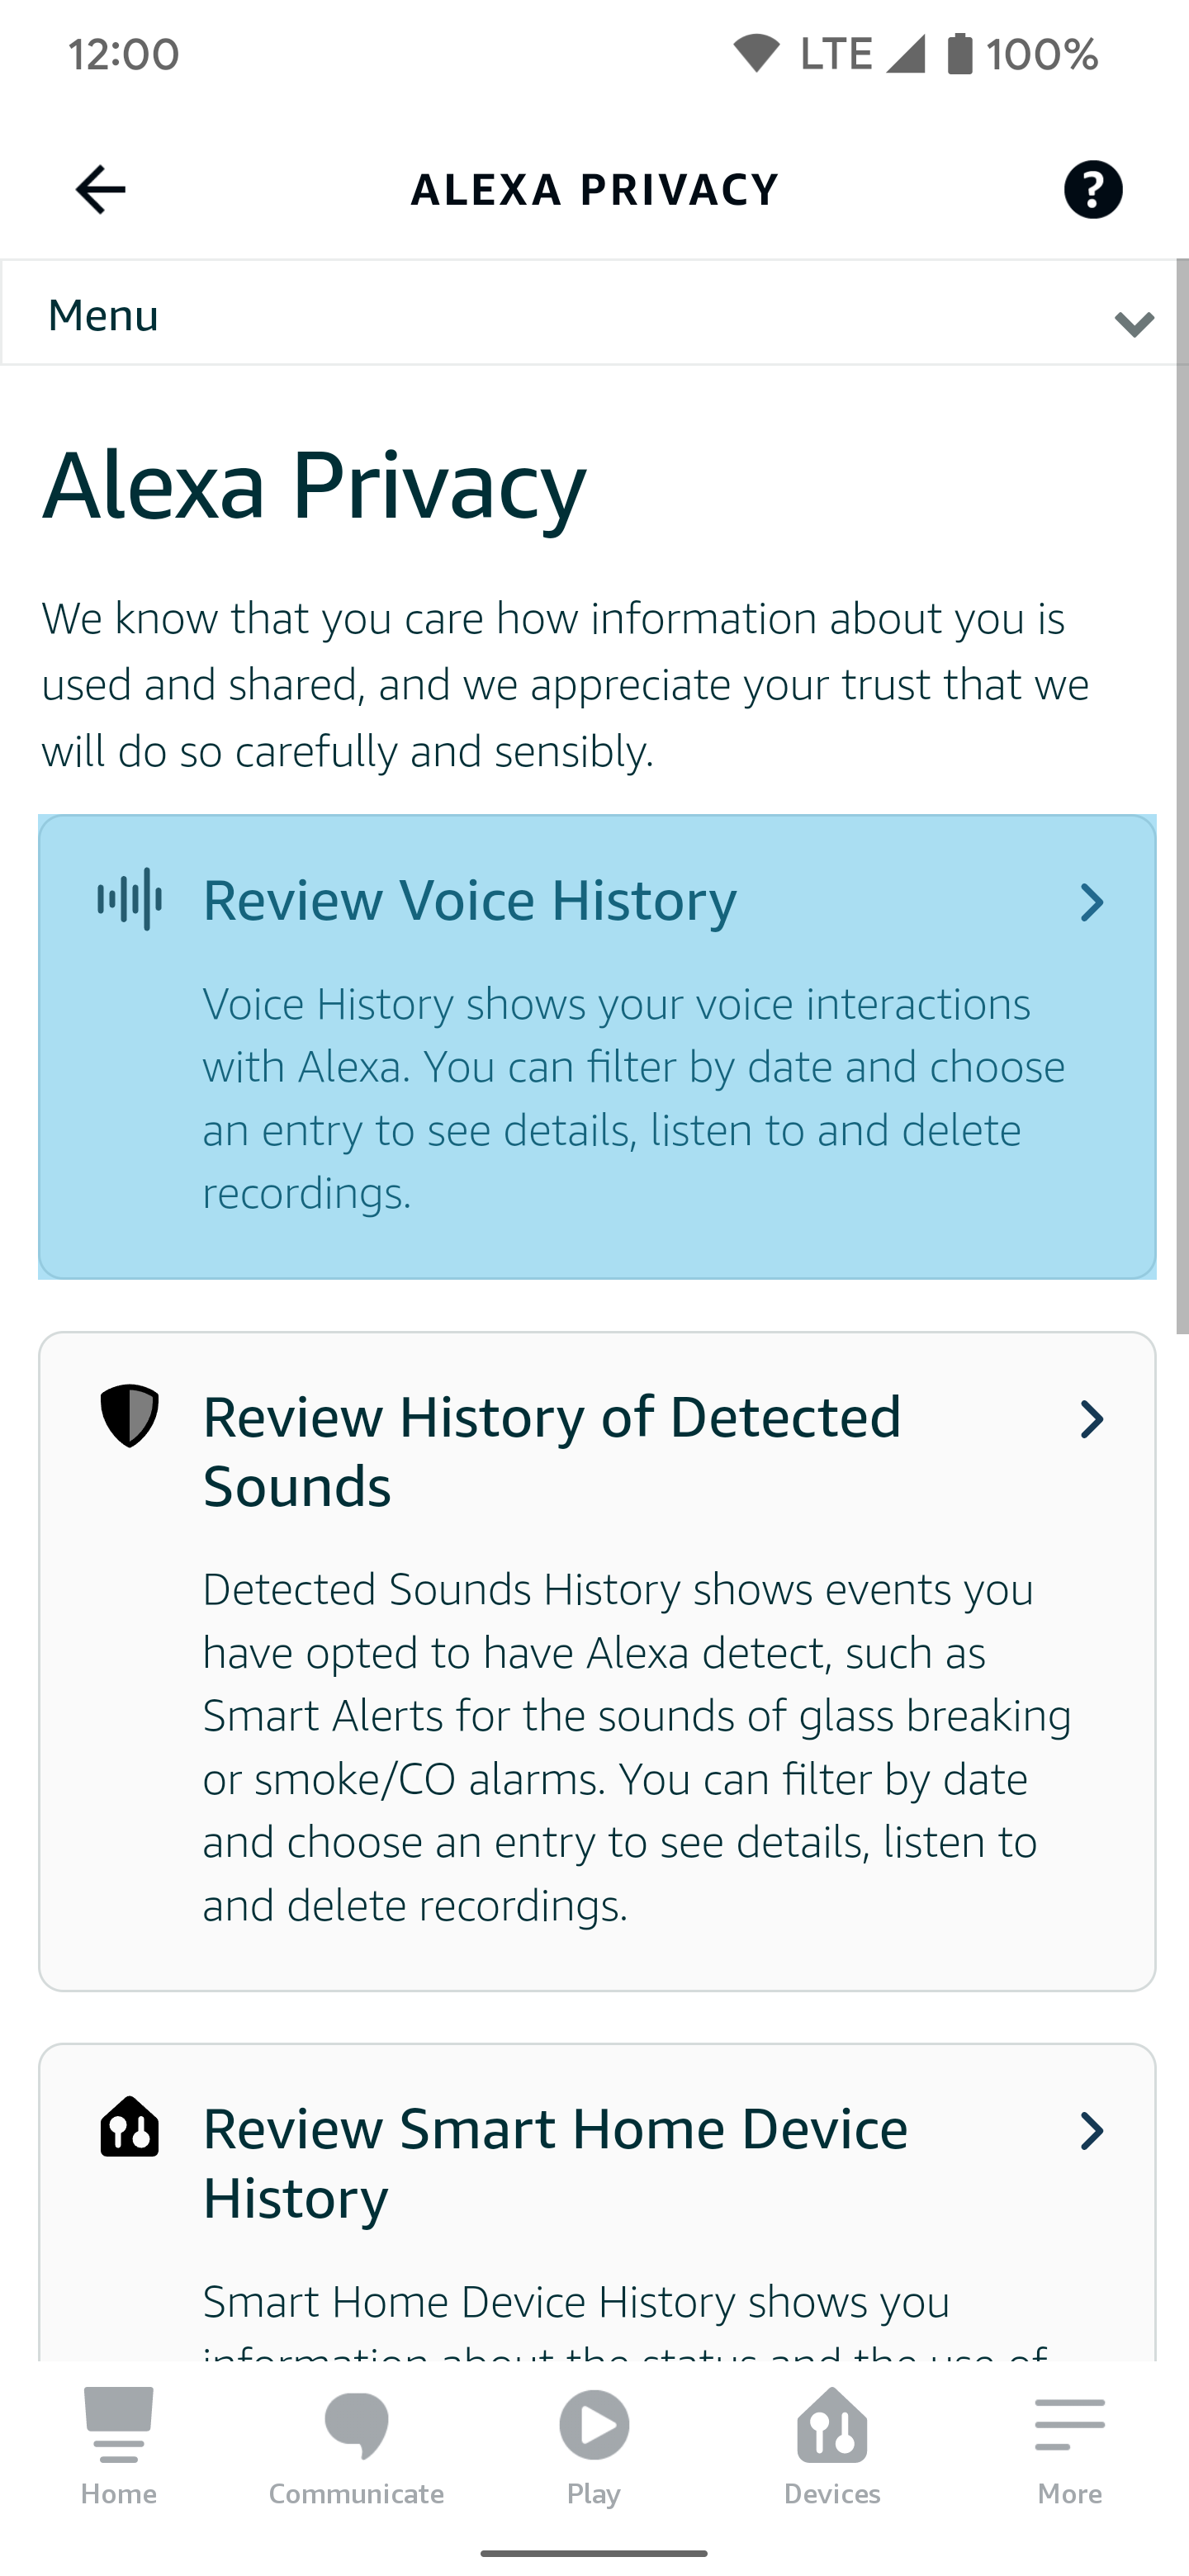
Select and delete the voice recordings of your choosing from the app
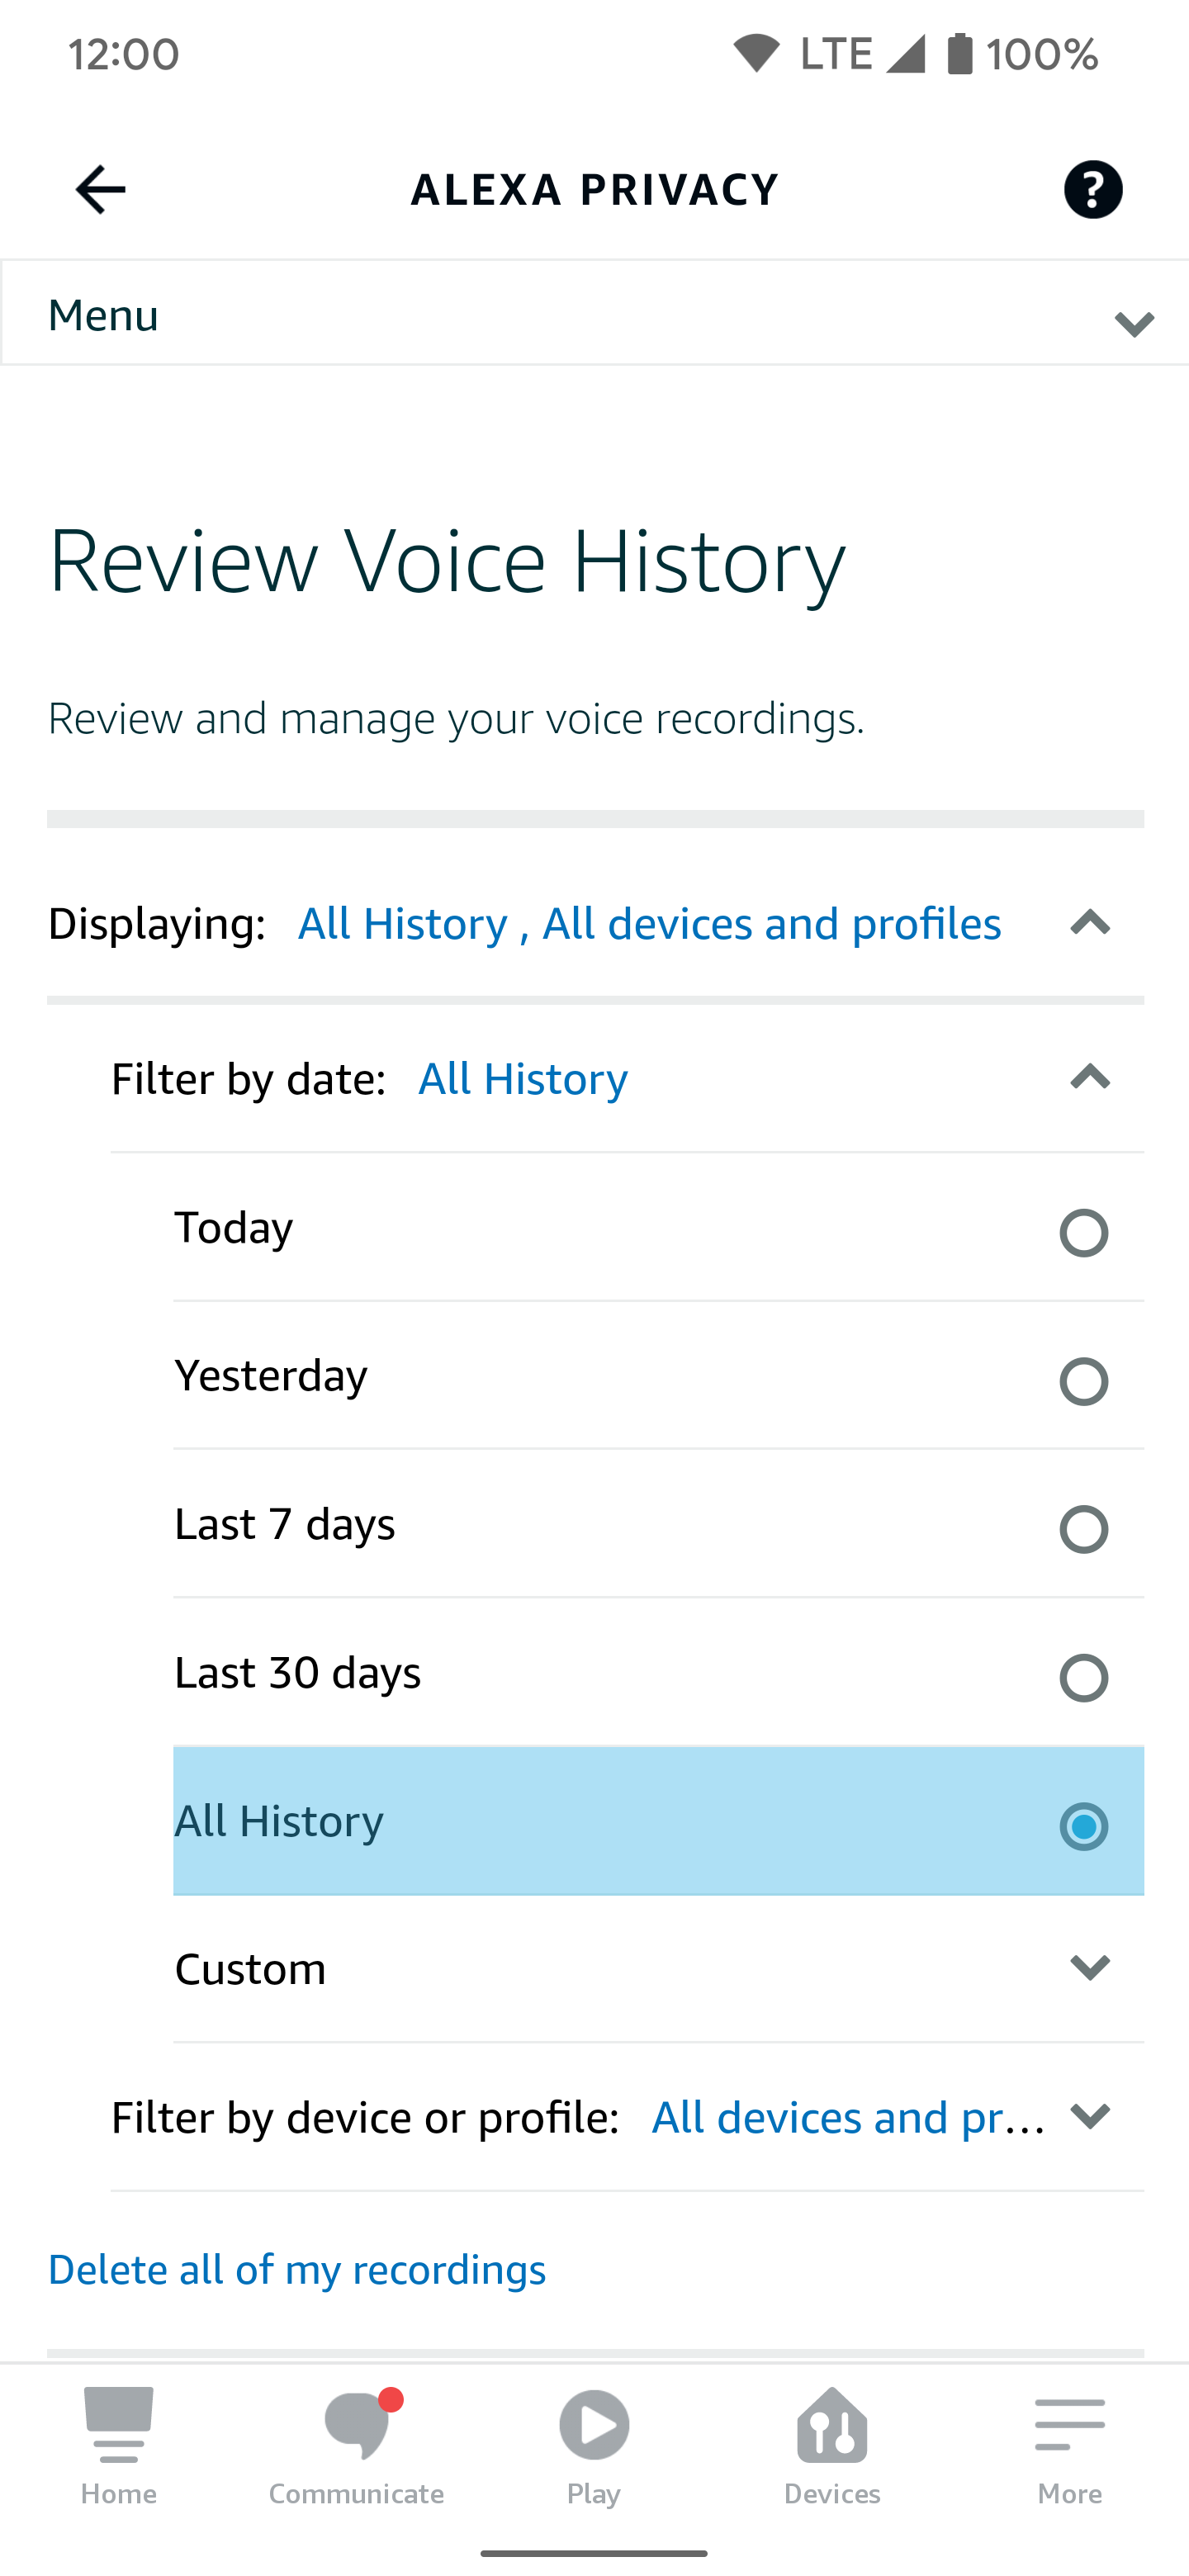
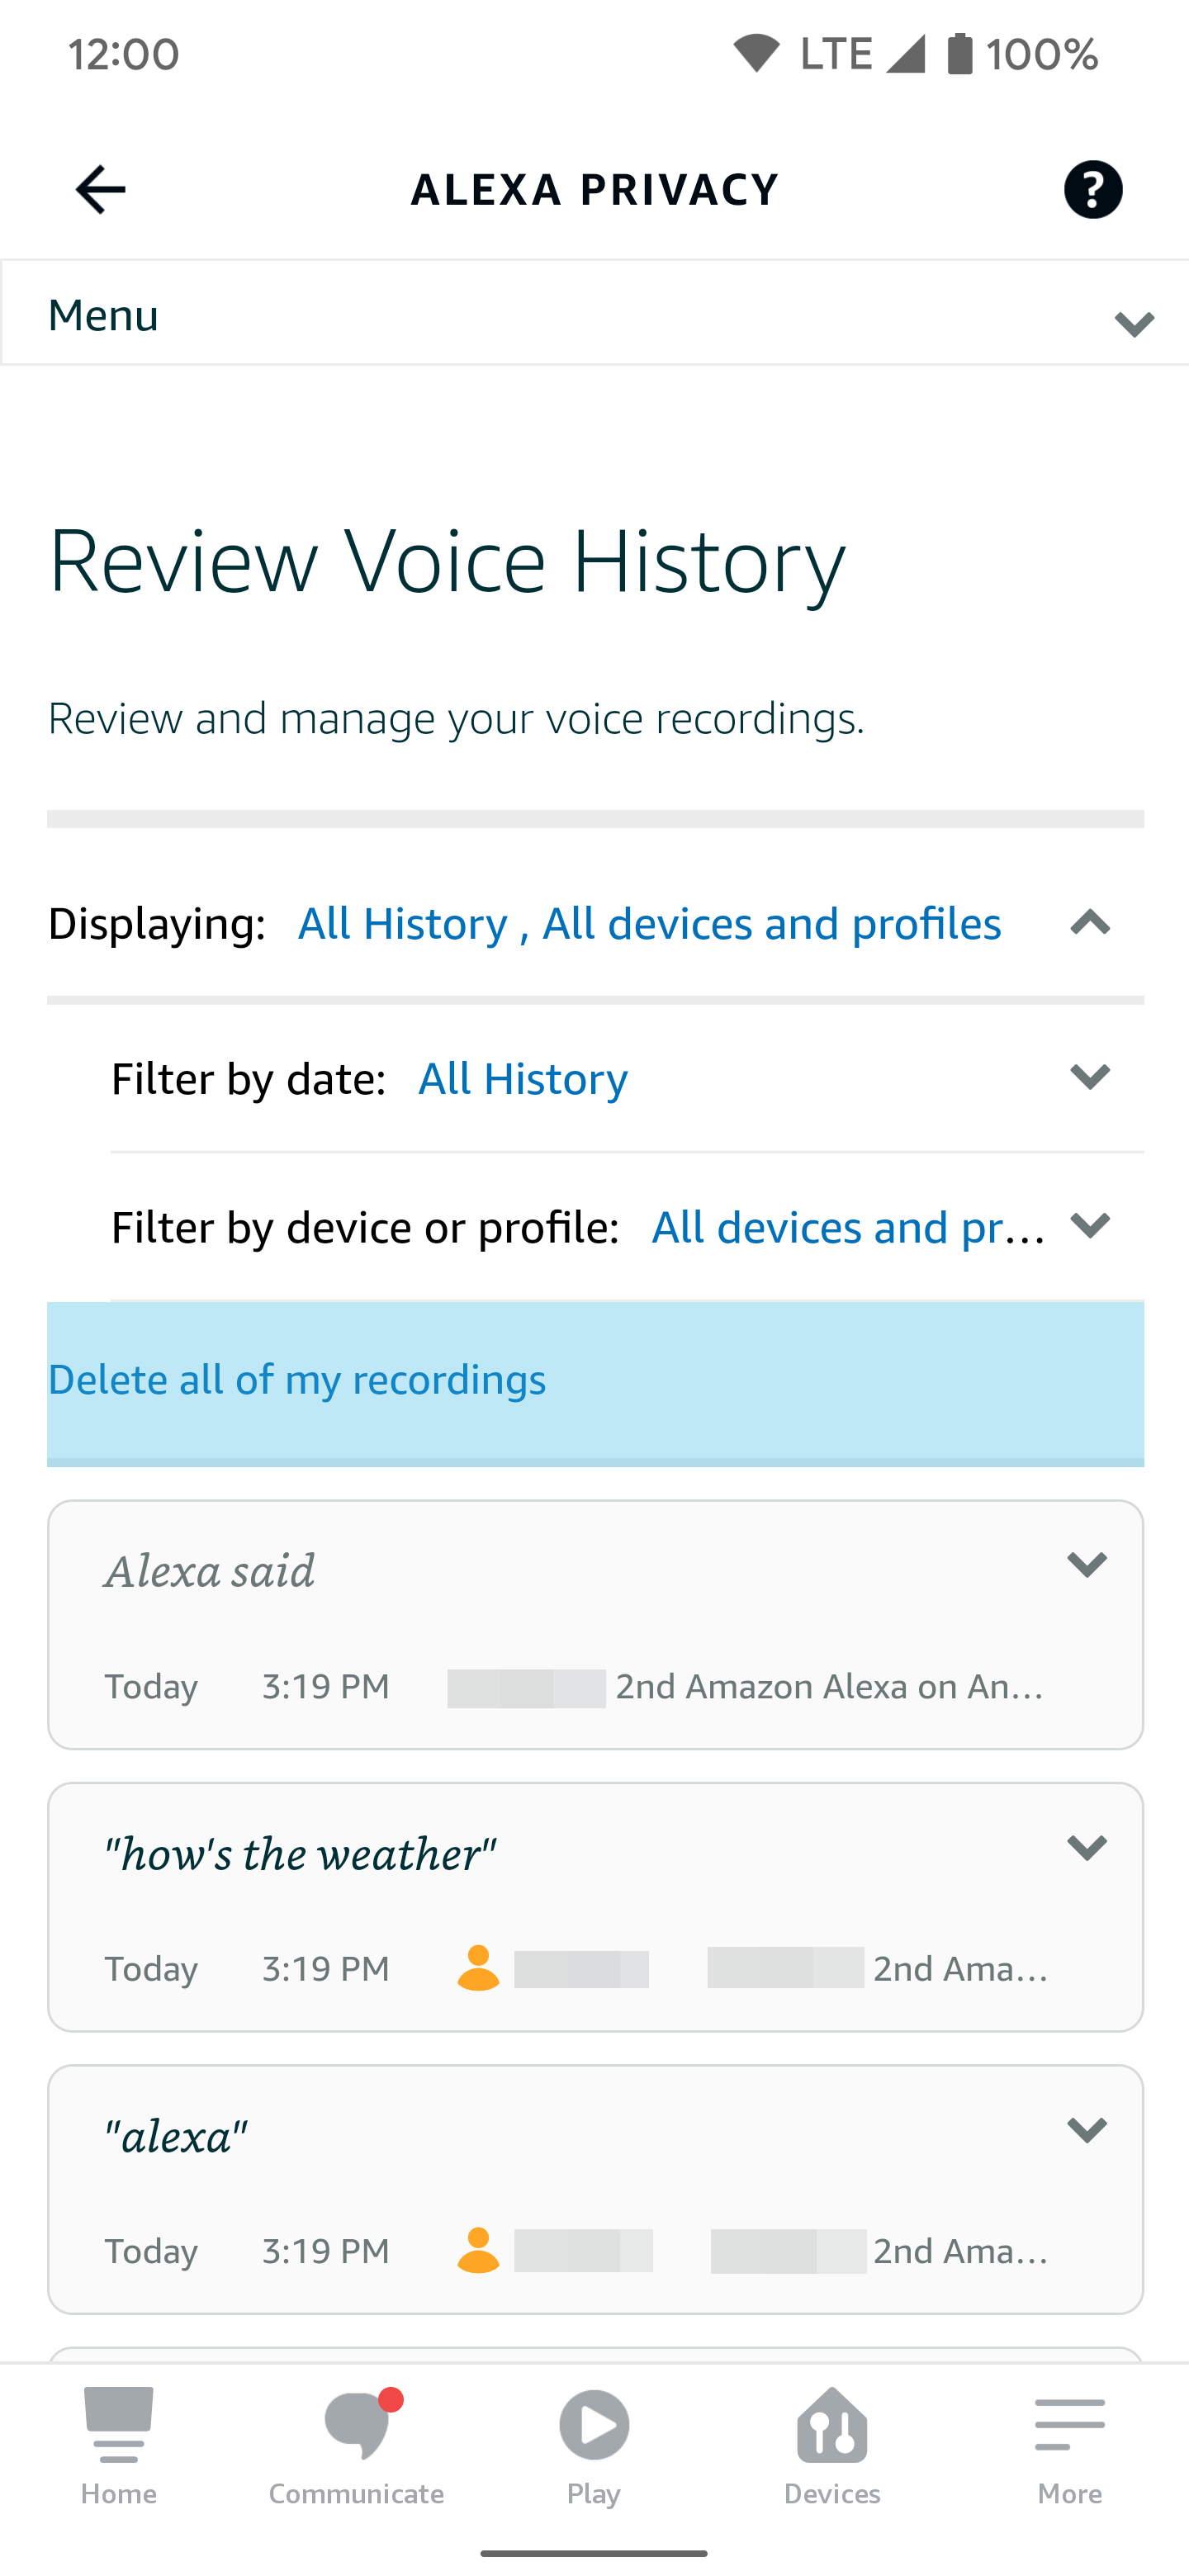
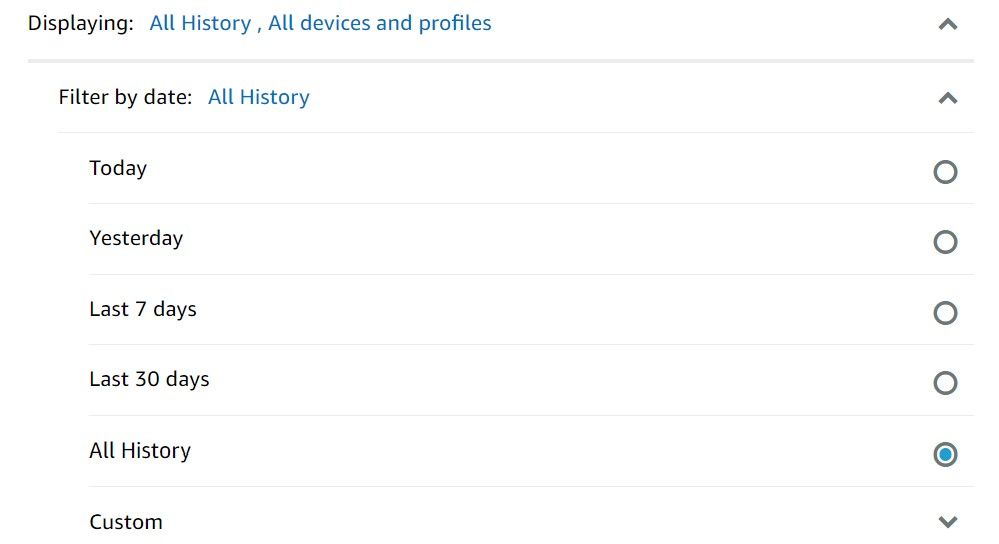
- Tap the Displaying drop-down menu, then go to Filter by date.
- Choose the date range you want to remove the voice recording. Select the All History option to remove all voice recordings at once.
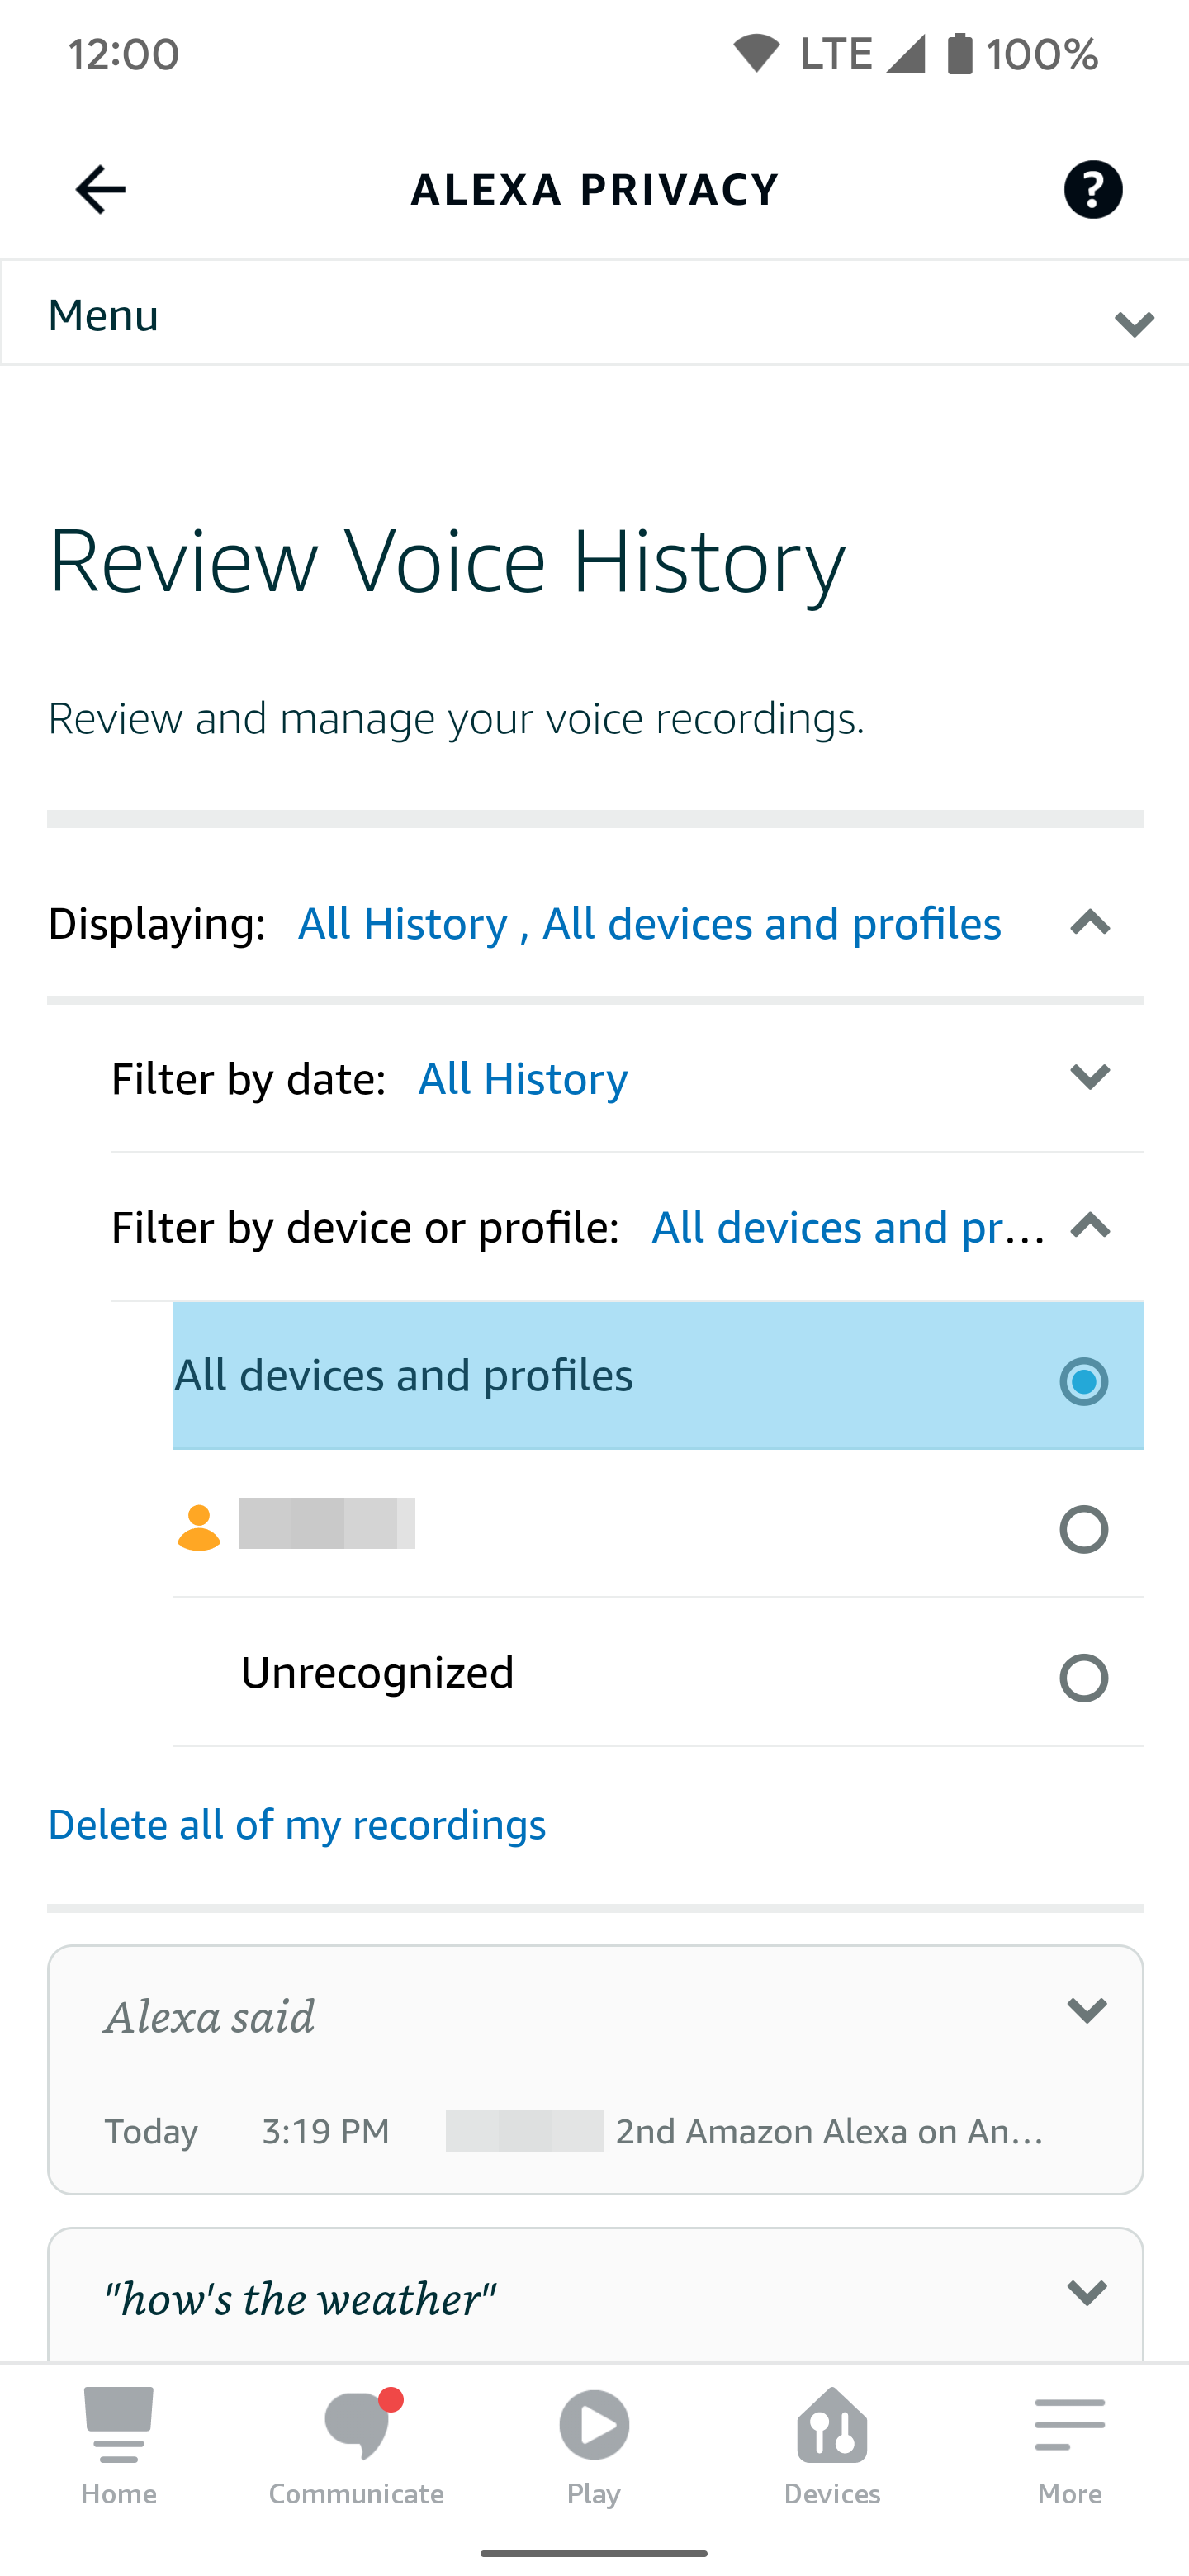
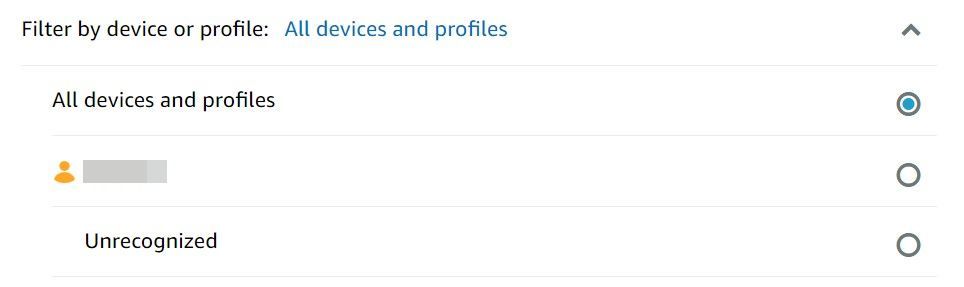
- Tap Filter by device or profile.
- Select each device and profile you want to remove the voice recordings from. Select the All devices and profiles option to remove all voice recordings from everywhere.
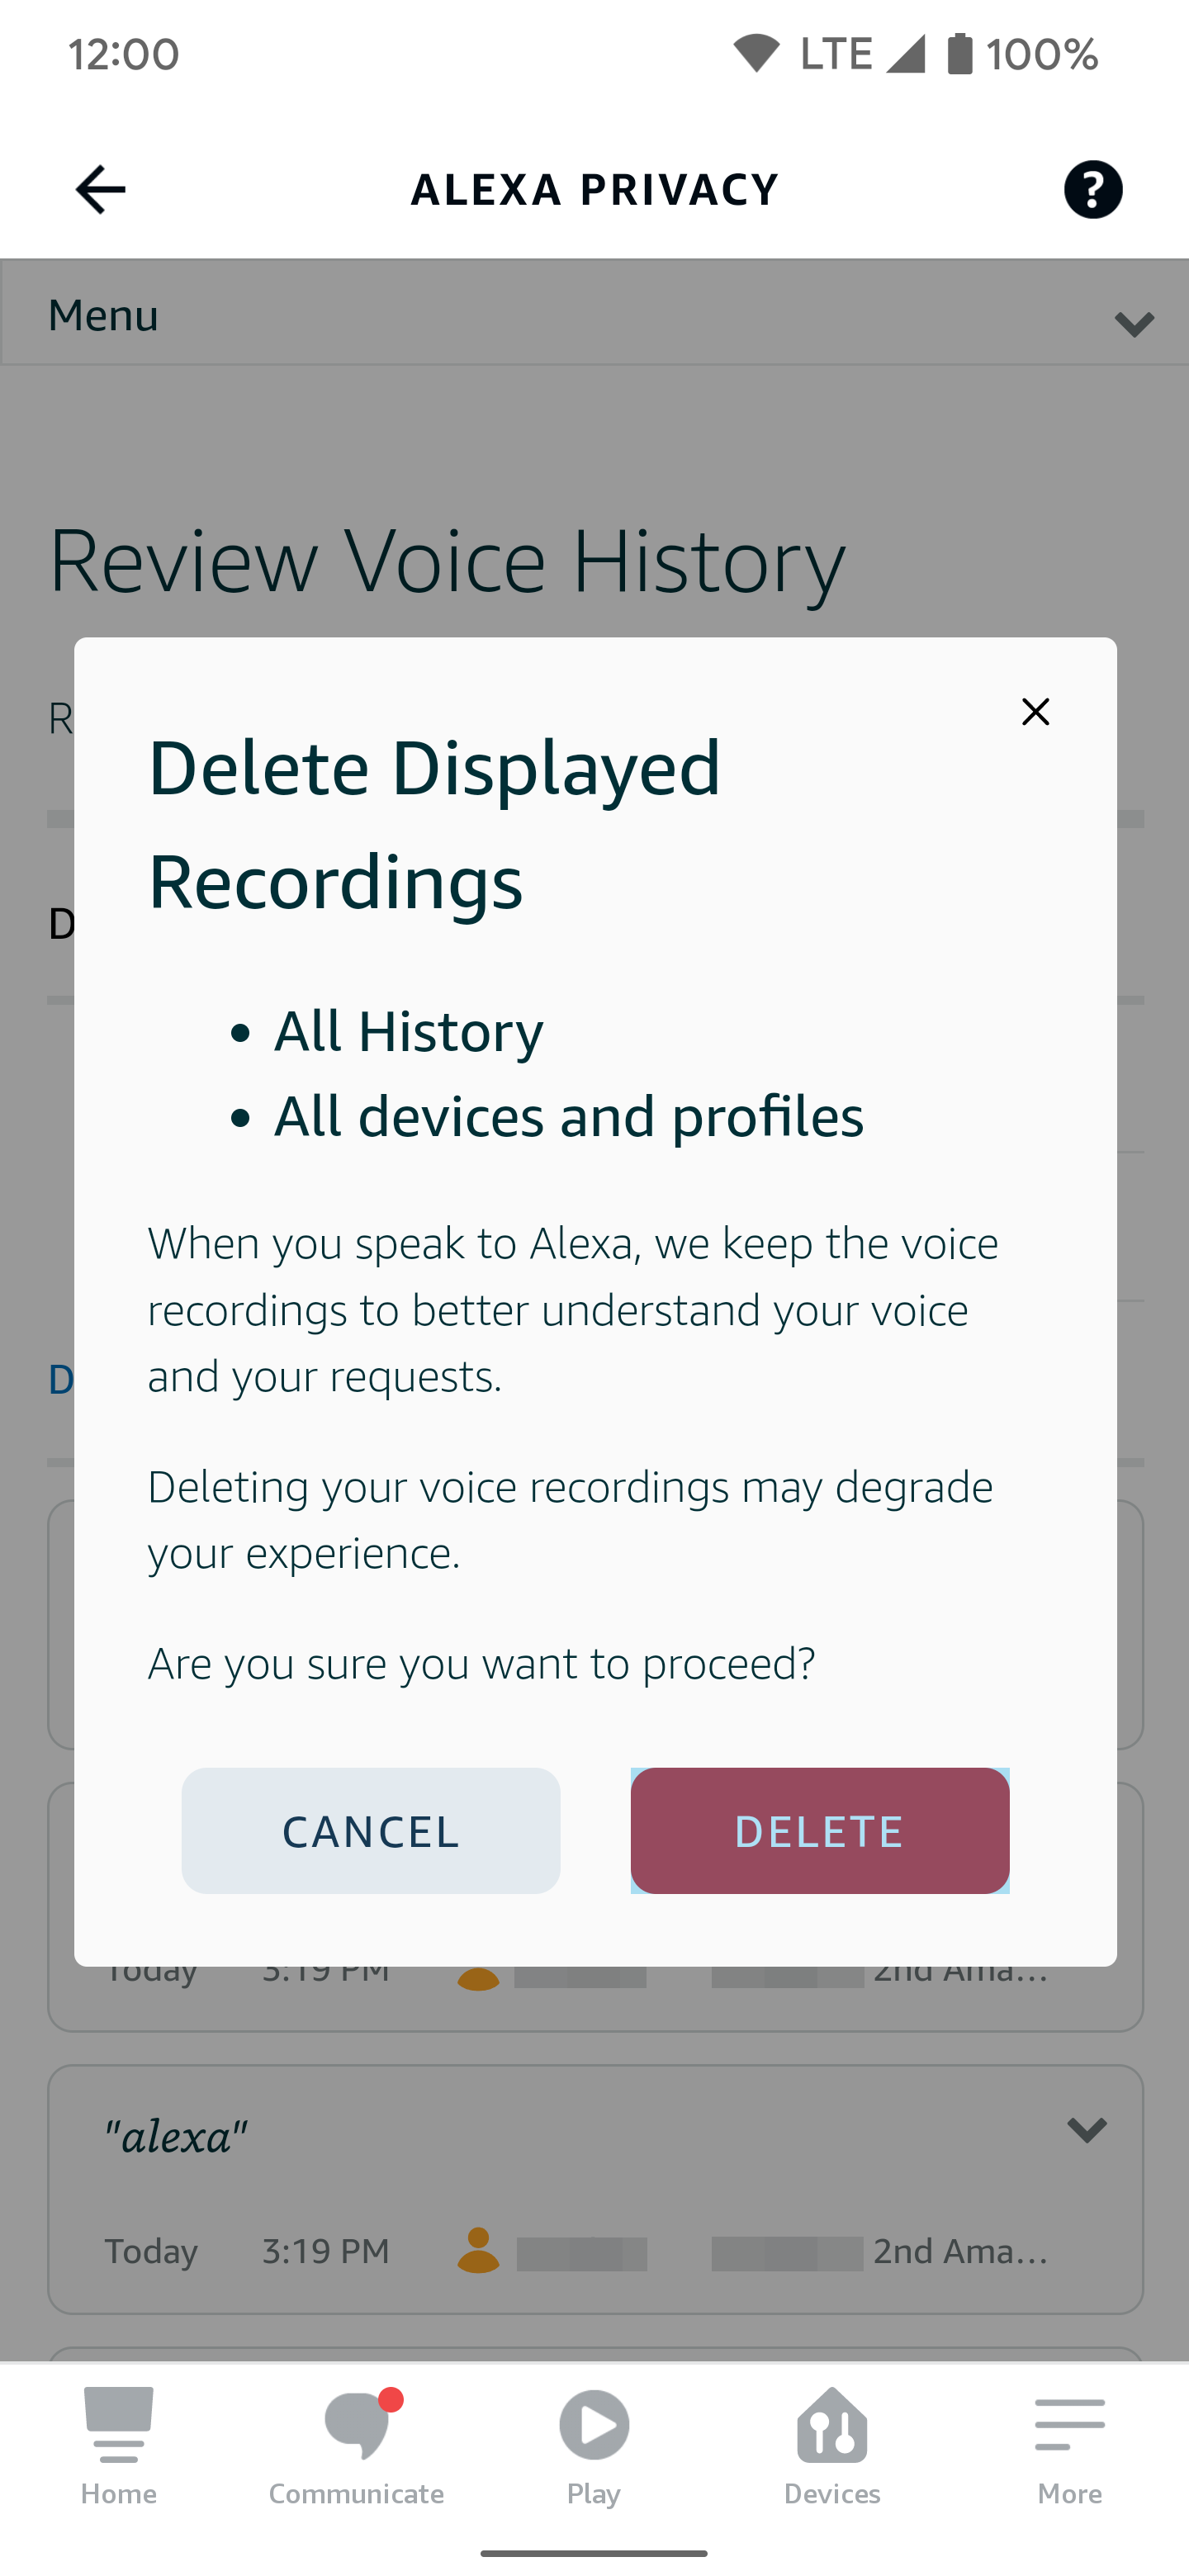
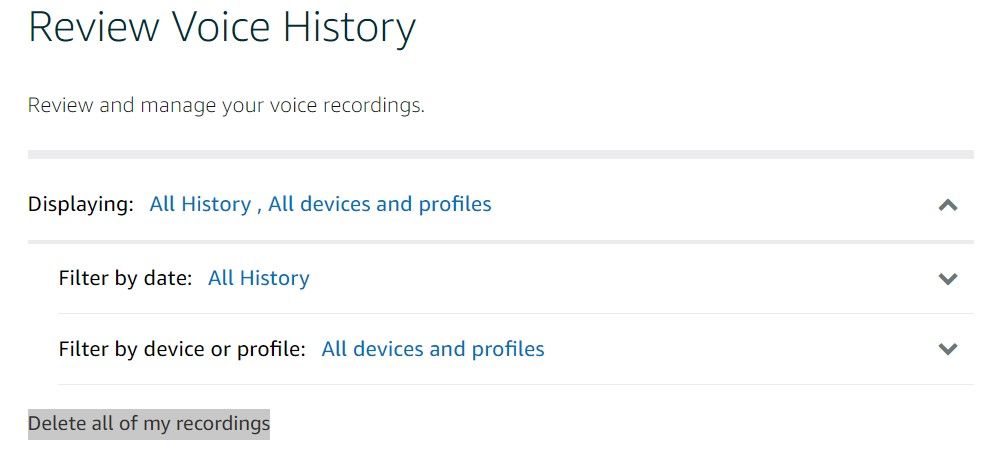
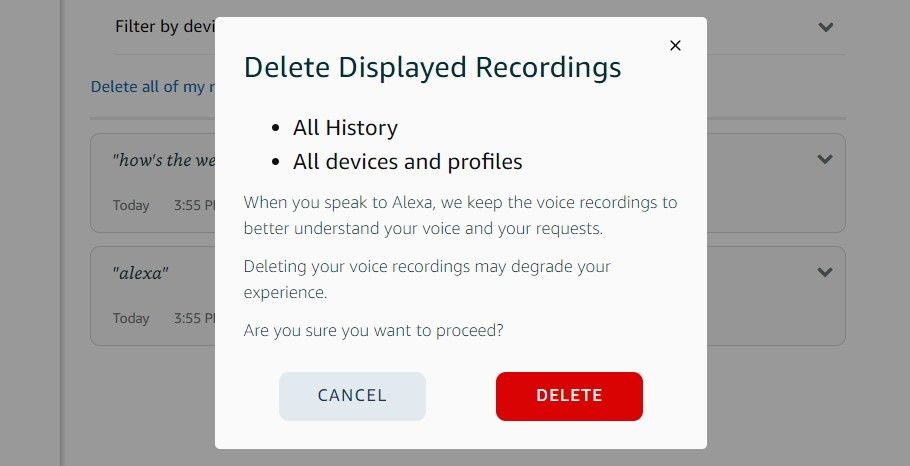
- Tap Delete all of my recordings, then review the Delete Displayed Recordings popup.
- Tap the Delete button to continue.
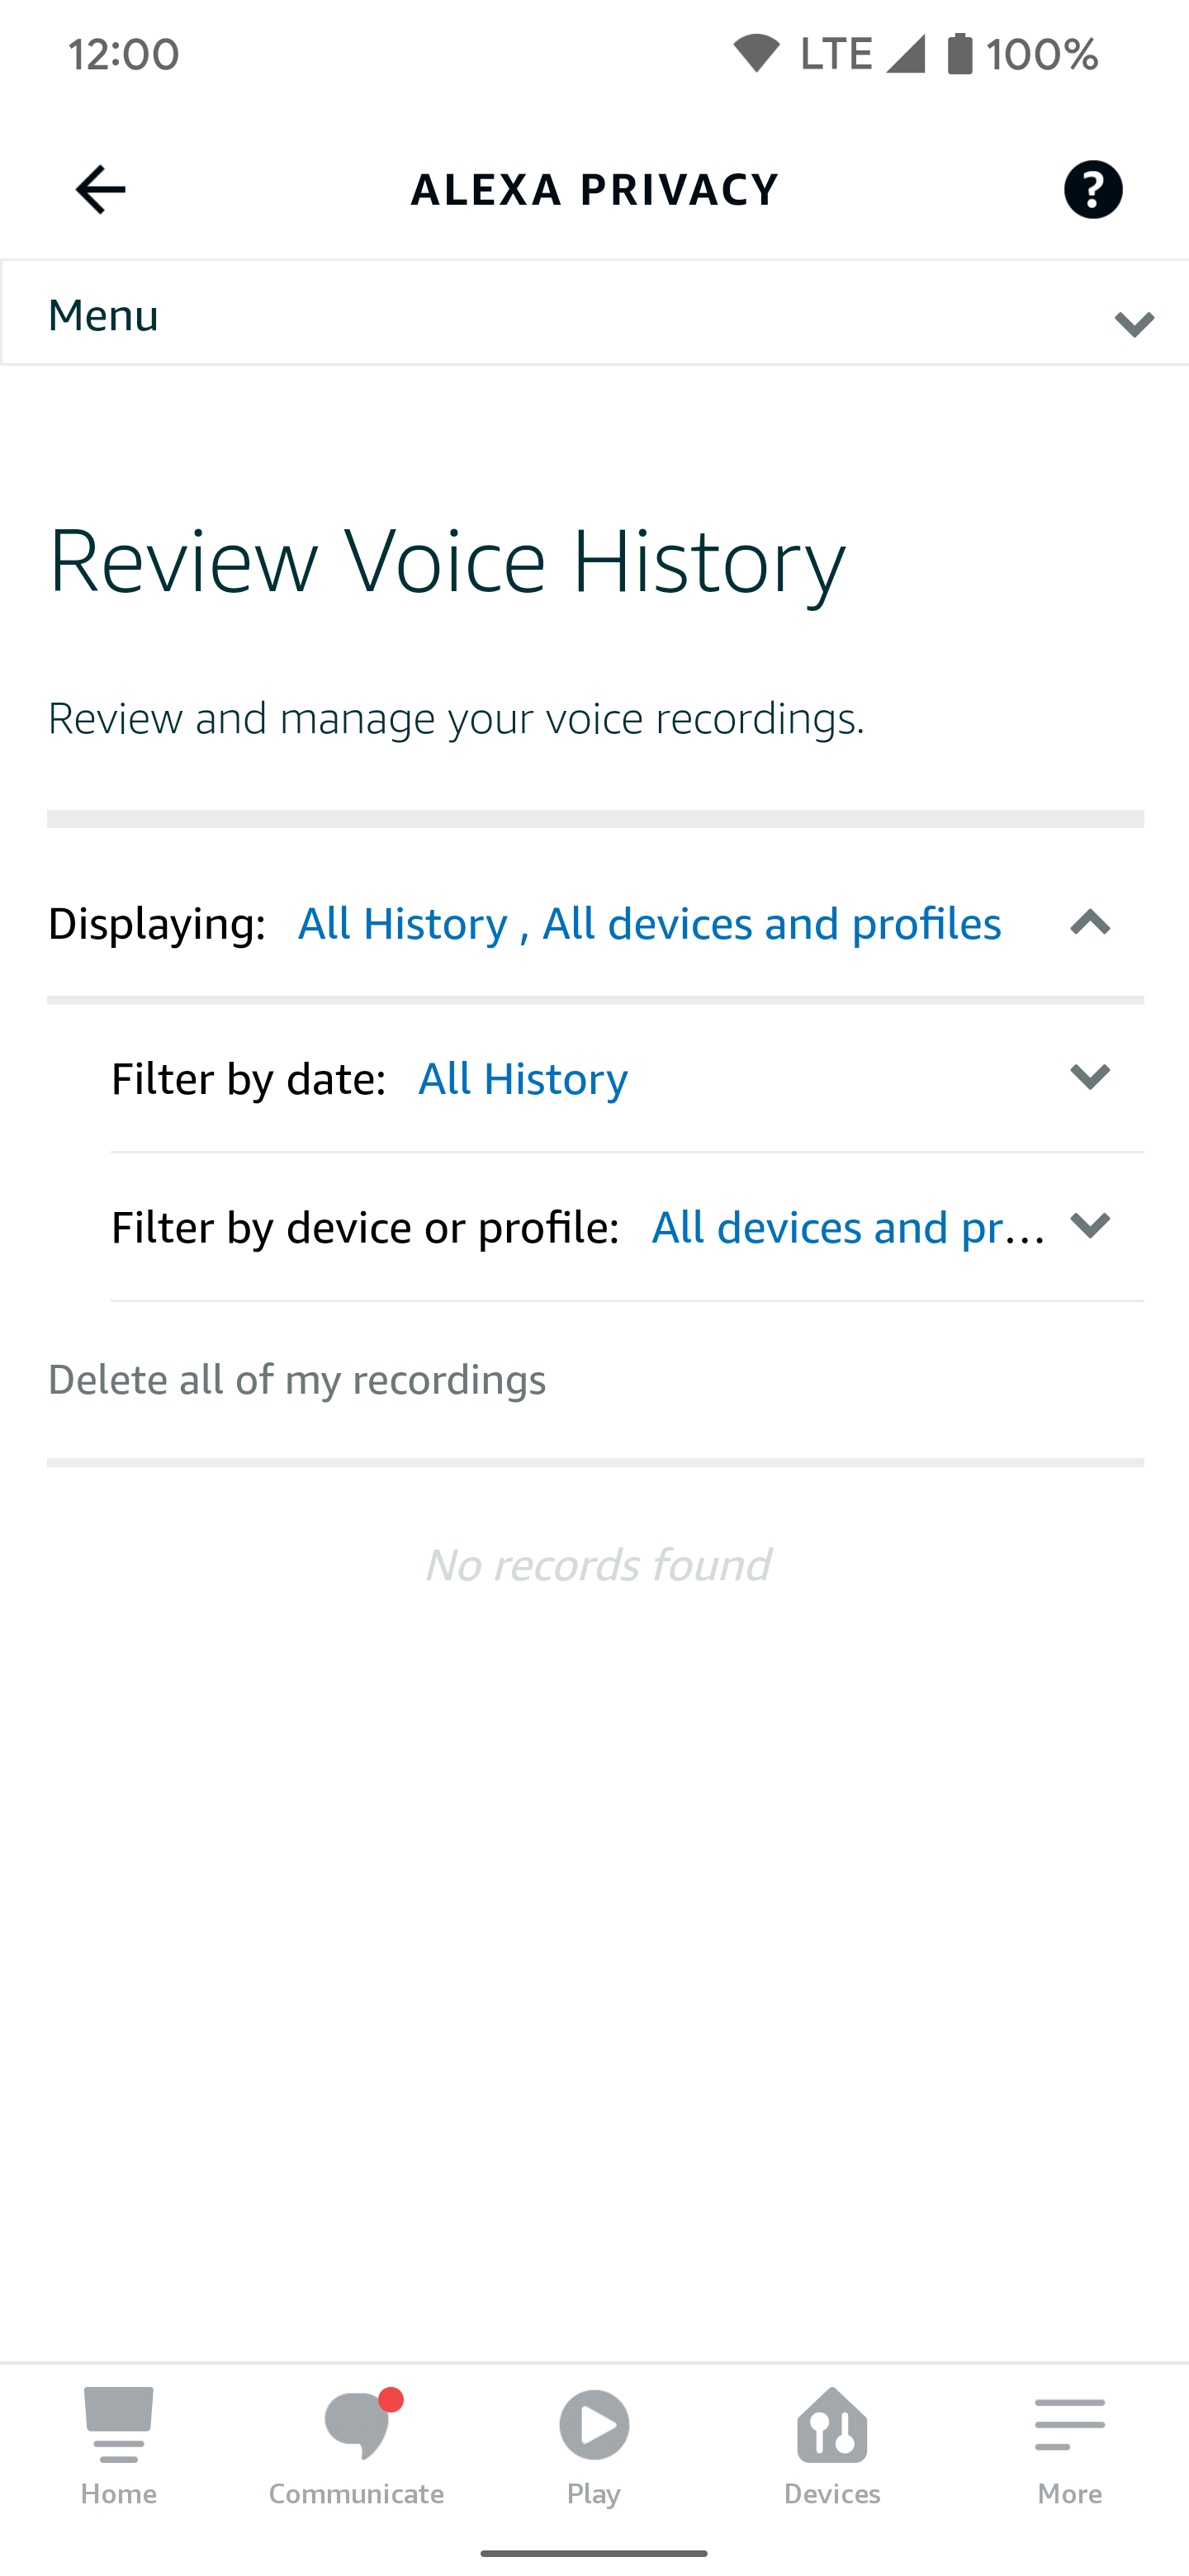
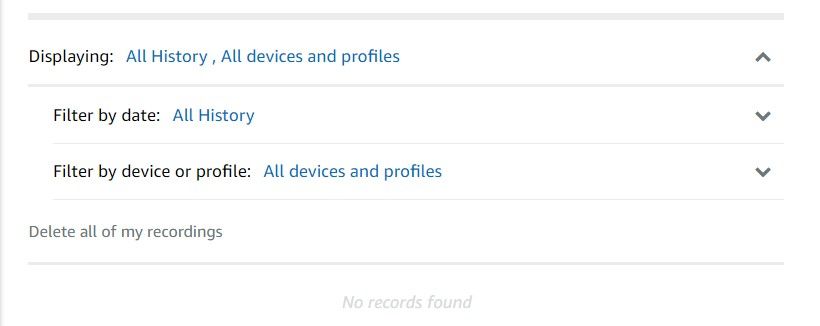
- The selected voice recordings are removed from your account.
How to delete your voice recordings using the Alexa Voice History on your web browser
You can manage most of your voice settings from the web if you don’t want to use the Amazon Alexa app on your smartphone. The instructions are similar but with fewer clicks required.
Sign in to your Amazon account and sort through your recordings
- Visit the official Alexa Voice History page in your favorite web browser.
- Sign in to your Amazon account with the appropriate email address and password.
- Select the Displaying drop-down menu and go to Filter by date.
- Choose the date range for which you want to remove the voice recording. To remove all voice recordings, select the All History option.
- Tap Filter by device or profile.
- Select each device and profile you want to remove the voice recordings from. Select the All devices and profiles option to remove all voice recordings from everywhere.

Select and delete the voice recordings to remove from Amazon’s servers.
- Tap Delete all of my recordings and then review the Delete Displayed Recordings popup.
- Tap the Delete button to continue.
- The selected voice recordings are removed from your account.
Auto-delete your Alexa recordings by voice and set up automatic deletion
Now that you’ve removed your old Alexa voice recordings, you can automate the removal process with a few quick taps. Knowing these recordings will be deleted without any effort in the future can simplify your life. After you set it, it takes care of itself from here on out. No more worrying about manually deleting voice recordings.
Check out the following steps to set an auto-delete schedule for Alexa voice recordings.
From the Alexa app
- Open the Amazon Alexa app to the main page.
- Tap the More tab in the lower-right corner and go to Settings.
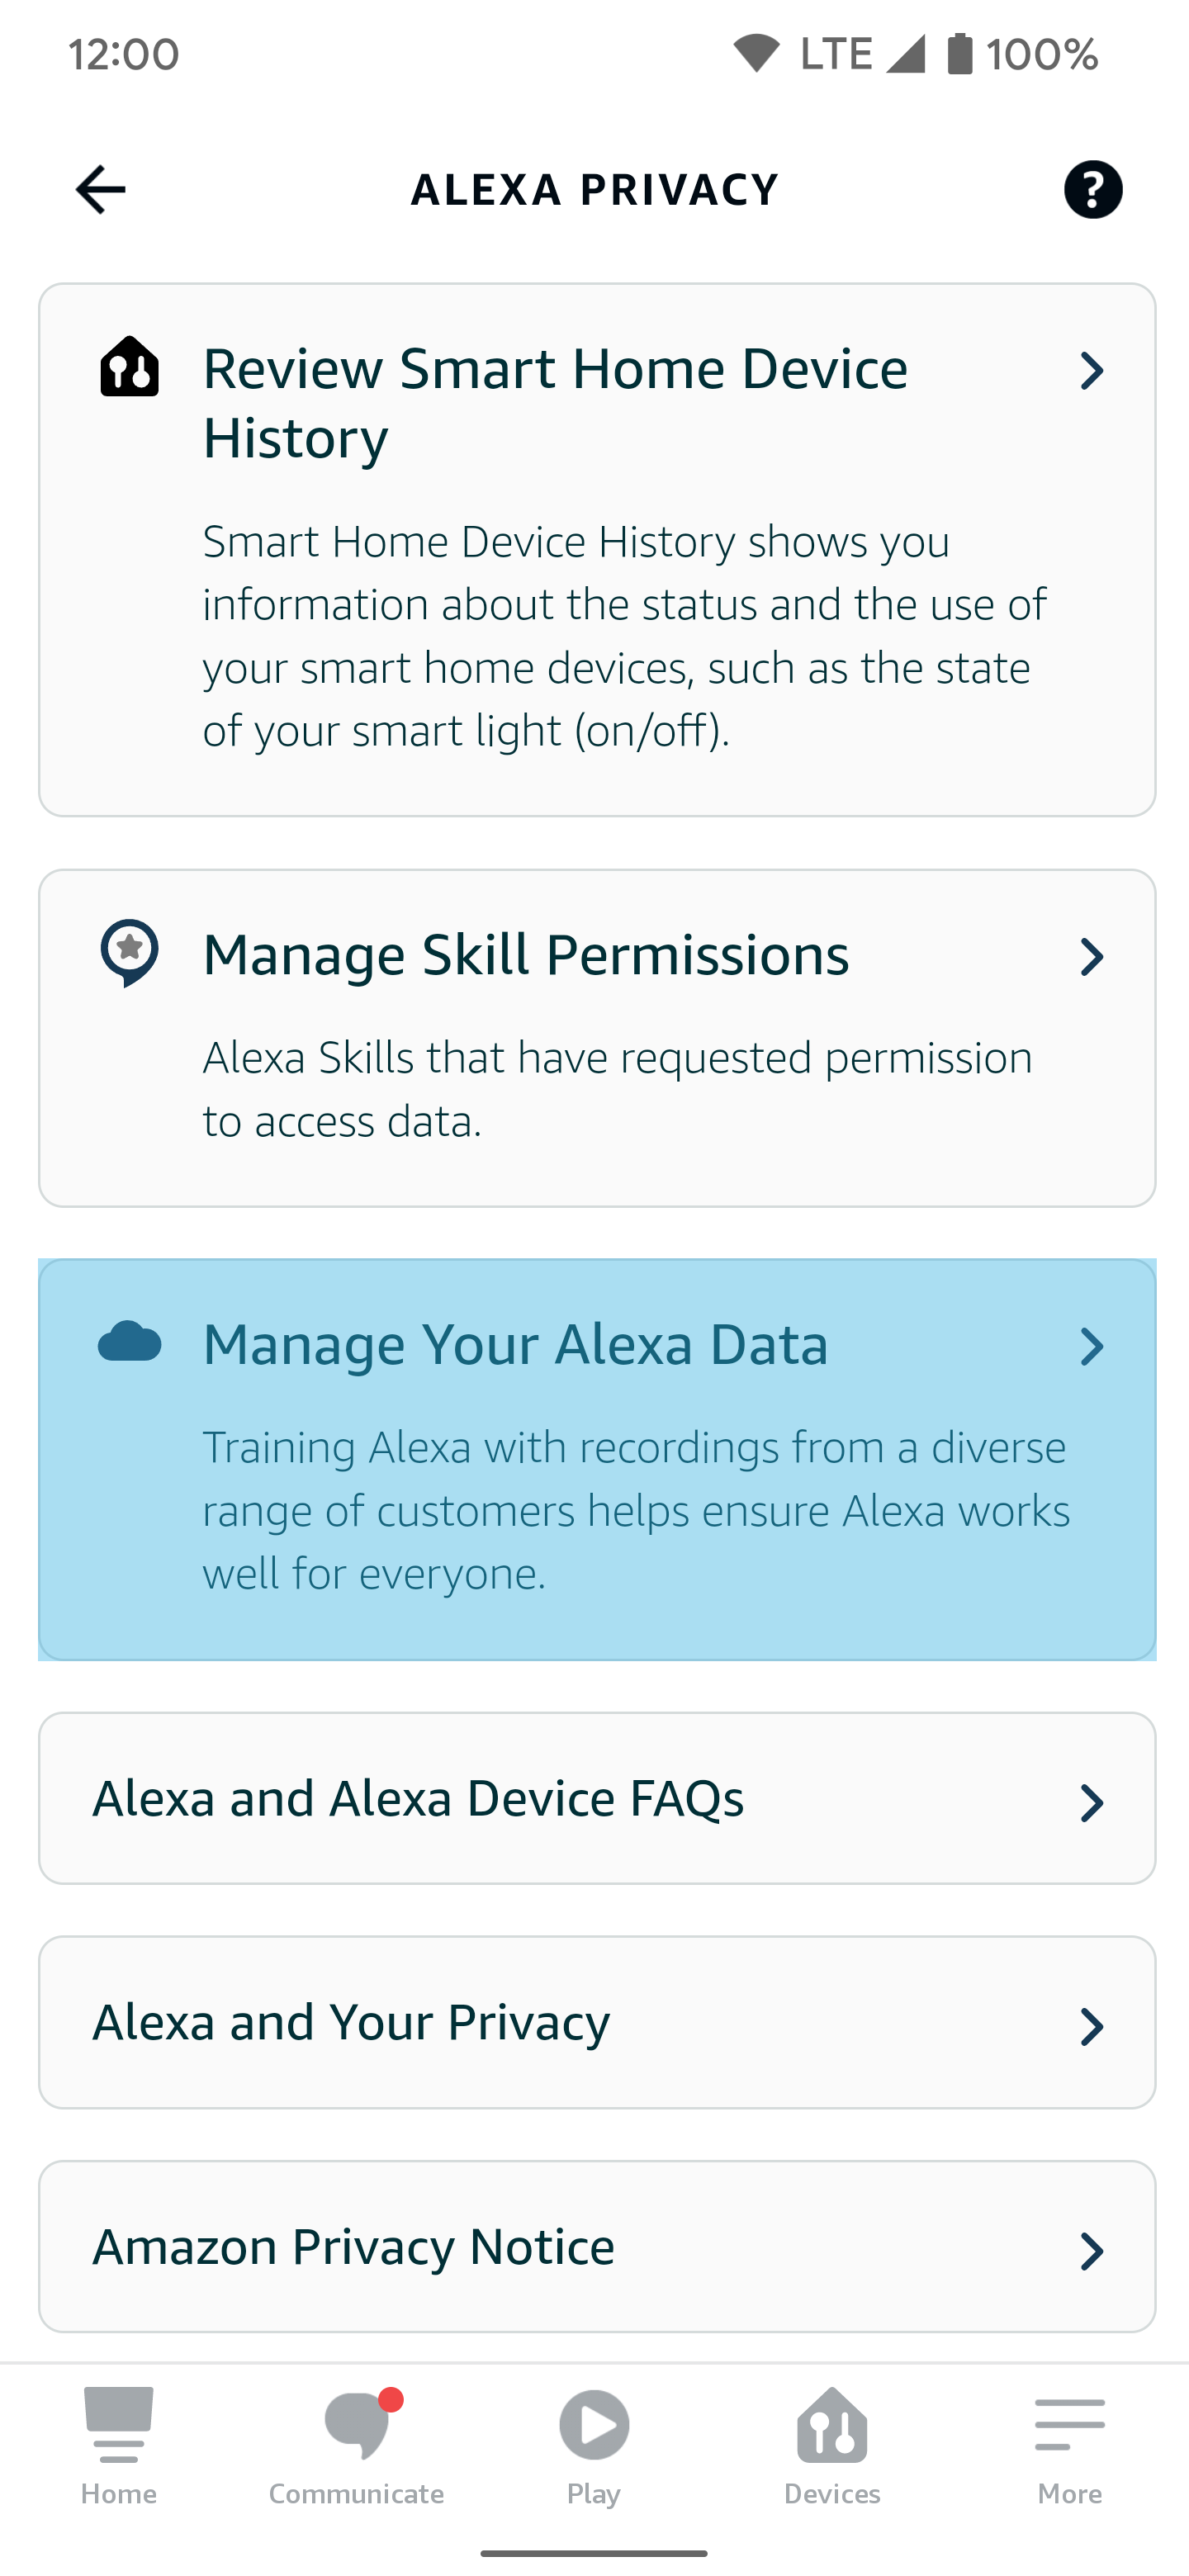
- Tap Alexa Privacy, then select the Manage Your Alexa Data section.
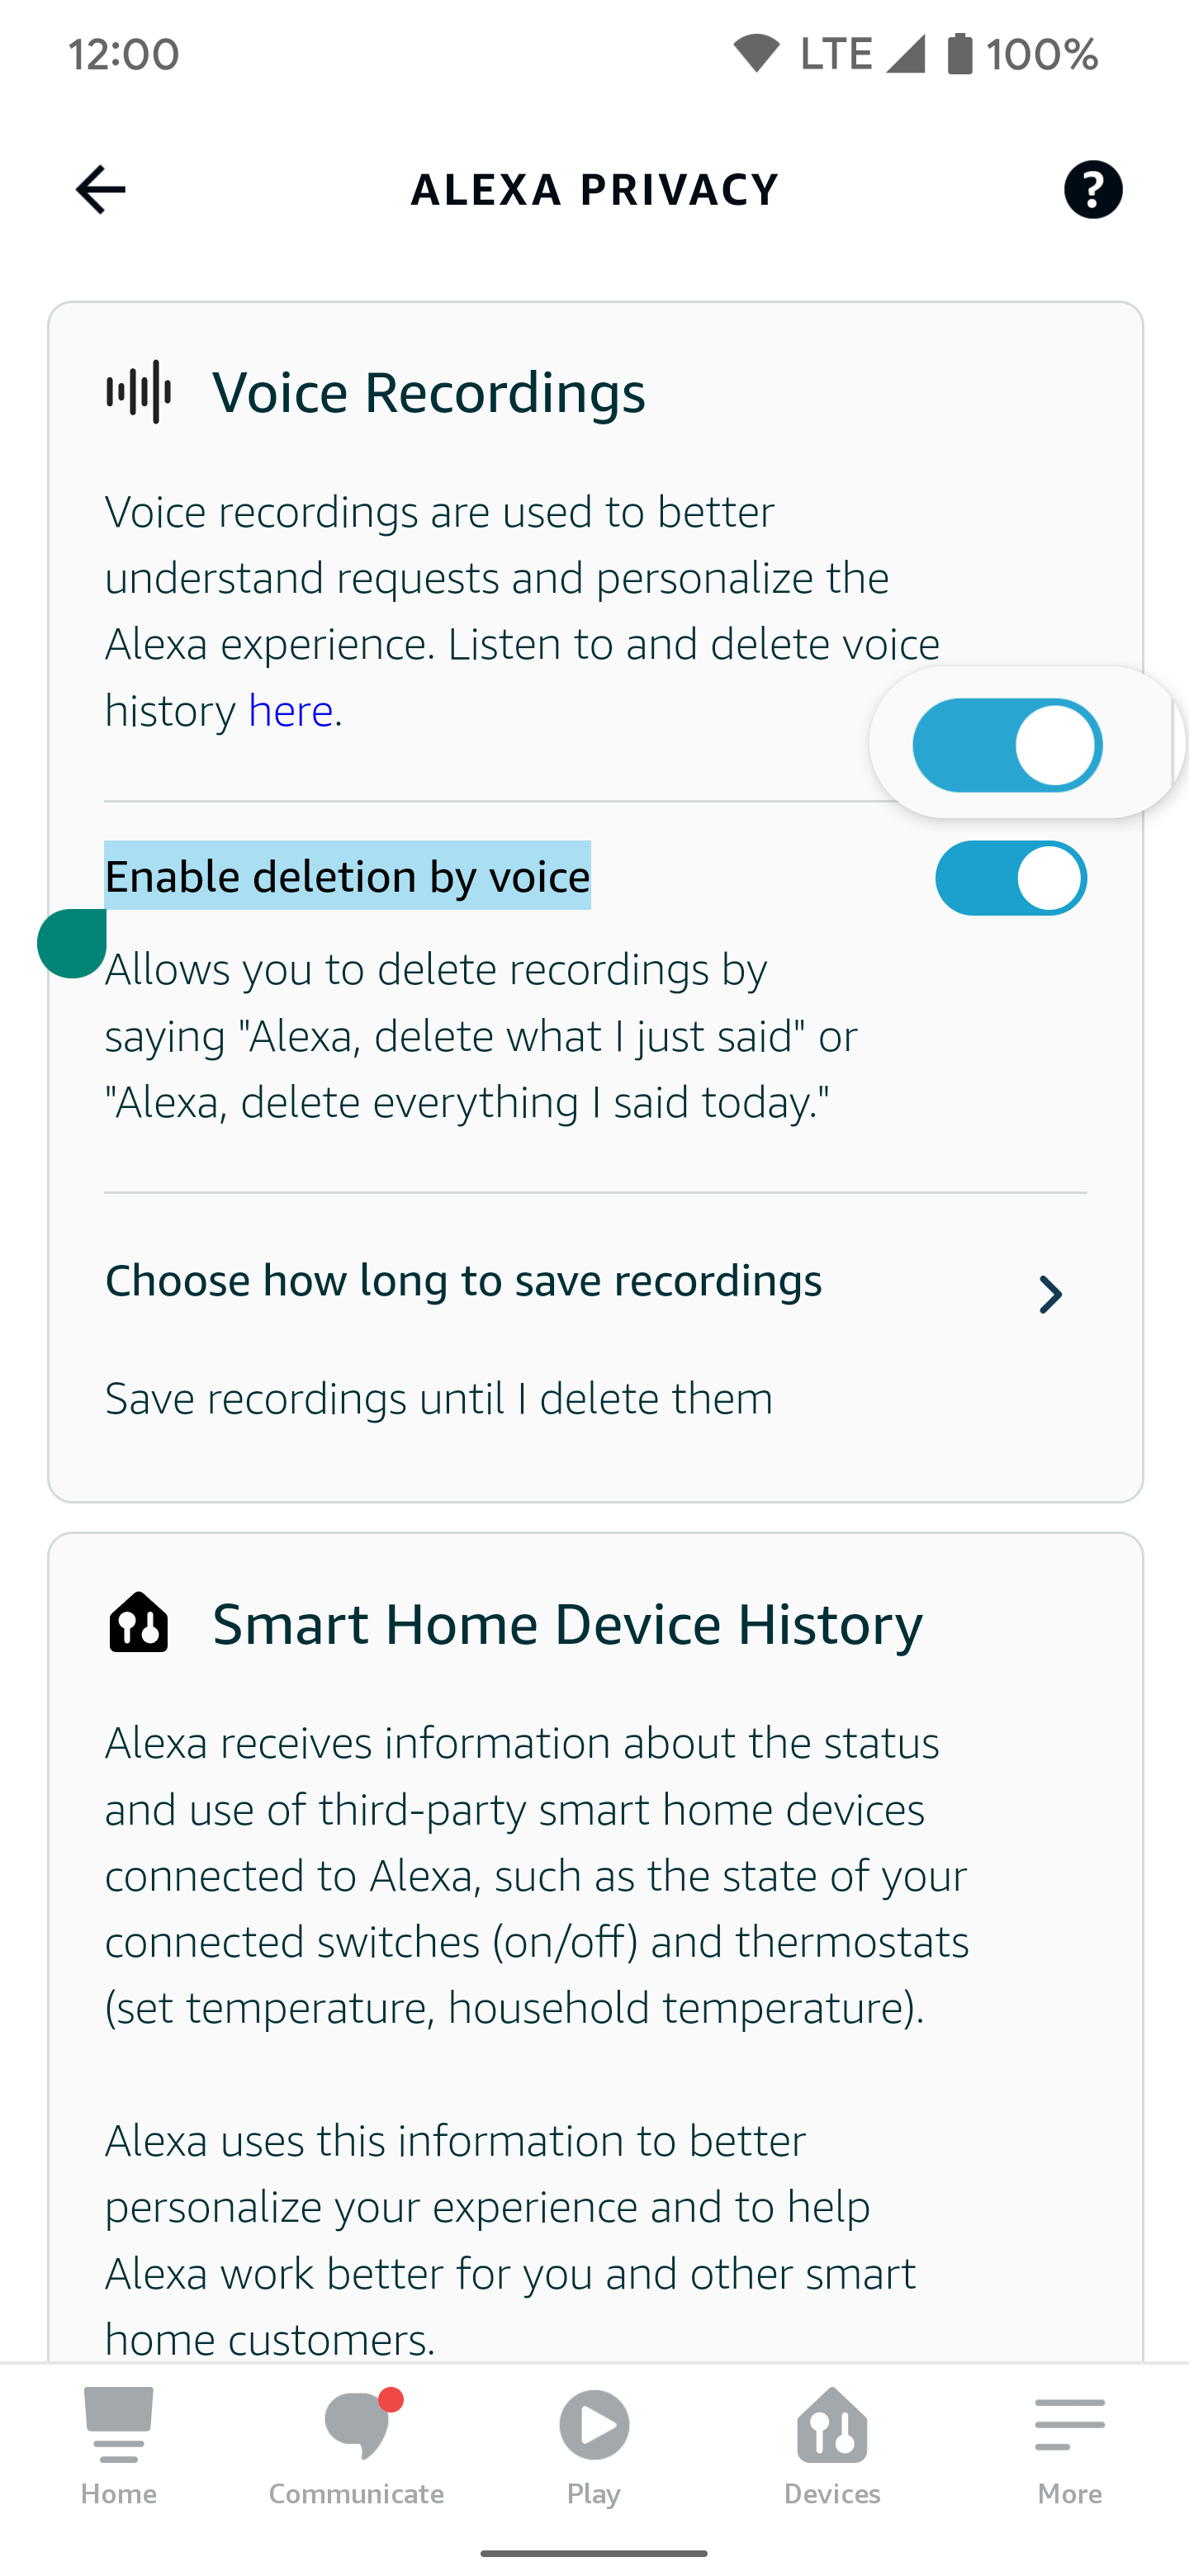
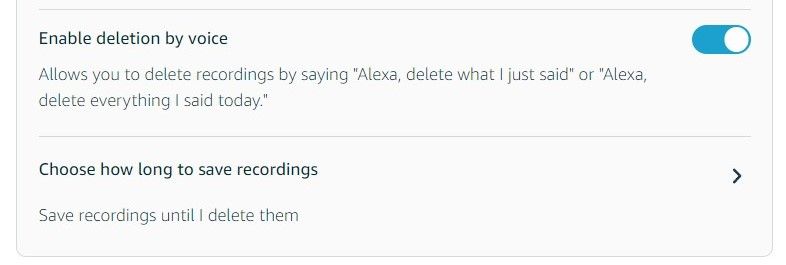
- Turn on the Enable deletion by voice option before continuing. This allows you to tell your Amazon Echo device to forget what it heard on the spot, which is helpful for short voice sessions.
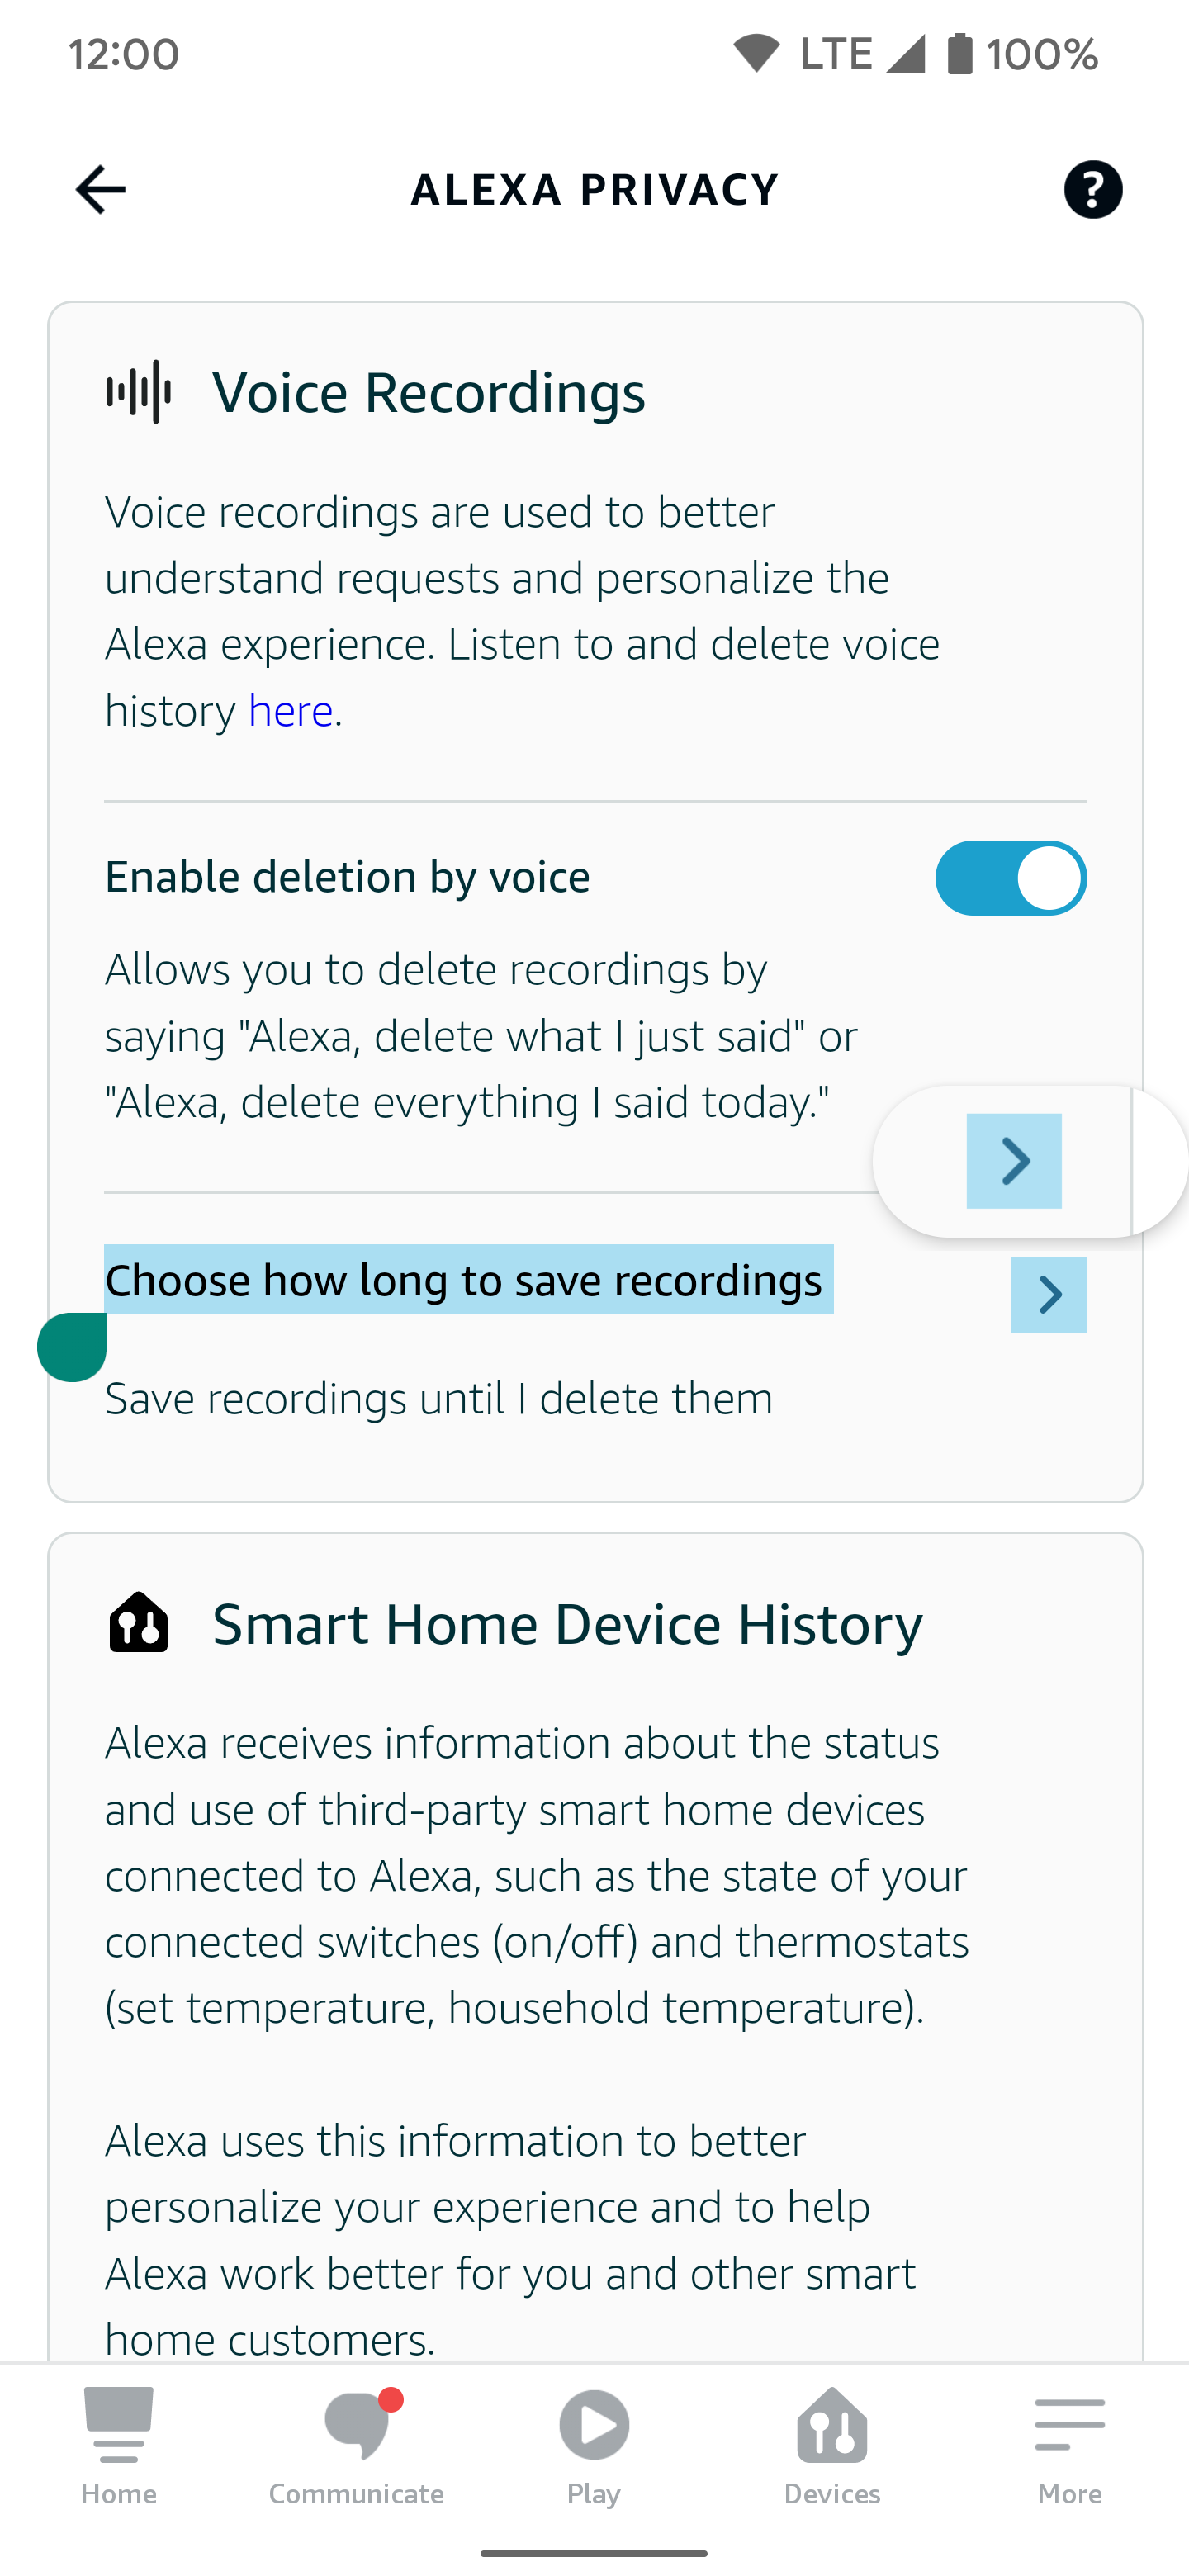
- Tap the Choose how long to save recordings arrow on the right.
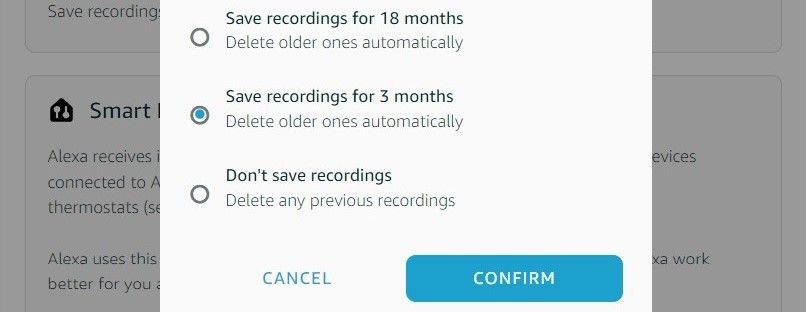
- Select Save recordings for 18 months or Save recordings for 3 months. Choose the Don’t save recordings option to prevent voice recordings from being stored on your account. Amazon notes that it can take up to 36 hours for the changes to take effect.
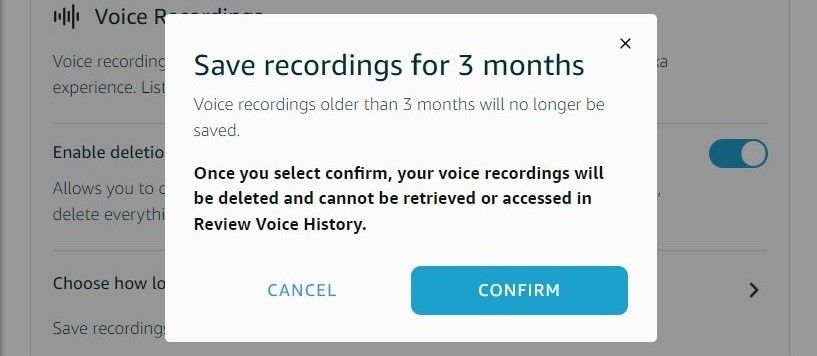
- After choosing the option that works best for you, tap the Confirm button.
- A new message states that your messages aren’t saved after the change.
- Tap Confirm to update your account settings.


From a desktop browser using the Manage Your Alexa Data page
- Visit the official Manage Your Alexa Data page in your favorite web browser.
- Sign in to your Amazon account if prompted.
- After logging in, turn on the Enable deletion by voice option before continuing. This allows you to tell your Amazon Echo device to forget what it heard on the spot, which is helpful for short voice sessions.
- Click the Choose how long to save recordings arrow on the right.
- Select Save recordings for 18 months or Save recordings for 3 months, depending on your needs. You can also select the Don’t save recordings option to prevent voice recordings from being stored on your account. Amazon notes that it can take up to 36 hours for the changes to take effect.
- After choosing the option that works best for you, click the Confirm button.
- A new message states that your messages aren’t saved after the change.
- Select Confirm to update your account settings.
Keep your privacy in check without giving up on smart speakers
The Alexa-powered Amazon Echo speakers are great, but sometimes, they might not hear your voice correctly. If this happens to you, try some tips and tricks to help your Alexa devices understand you better. Alexa can do more than you think. For instance, you can set it up for emergency calls or use it in your car.

Khám phá thêm từ Phụ Kiện Đỉnh
Đăng ký để nhận các bài đăng mới nhất được gửi đến email của bạn.

