Review sản phẩm
Thuần Thục Chế Độ Thủ Công: Bật Mí Bí Kíp Chụp Ảnh Đỉnh Cao Bằng Smartphone!
## Thuần Thục Chế Độ Thủ Công: Bật Mí Bí Kíp Chụp Ảnh Đỉnh Cao Bằng Smartphone!
Bạn ước mơ sở hữu những bức ảnh lung linh, chất lượng như ảnh chụp từ máy ảnh chuyên nghiệp? Tin vui là bạn hoàn toàn có thể làm được điều đó chỉ với chiếc smartphone trong tay! Bài viết này sẽ hướng dẫn bạn cách tận dụng tối đa chế độ chỉnh tay (manual settings) trên camera điện thoại để tạo ra những tác phẩm nghệ thuật thực sự ấn tượng.
Hiểu rõ các thông số quan trọng:
Trước khi bắt đầu, bạn cần nắm vững một số khái niệm cơ bản:
* ISO: Đo độ nhạy sáng của cảm biến. ISO càng cao, ảnh càng sáng nhưng lại dễ bị nhiễu hạt. ISO thấp lý tưởng cho điều kiện ánh sáng tốt.
* Khẩu độ (Aperture): Được đo bằng f-stop (ví dụ: f/1.8, f/2.8…). Khẩu độ nhỏ (số f lớn) tạo độ sâu trường ảnh lớn (tất cả vật thể đều nét), khẩu độ lớn (số f nhỏ) tạo độ sâu trường ảnh nông (chỉ chủ thể chính nét, hậu cảnh mờ).
* Tốc độ màn trập (Shutter Speed): Thời gian cảm biến tiếp xúc với ánh sáng. Tốc độ màn trập nhanh (1/500s trở lên) giúp “đóng băng” chuyển động, tốc độ màn trập chậm (1/30s trở xuống) tạo hiệu ứng mờ chuyển động (motion blur).
Thực hành để chinh phục:
1. Tìm hiểu chế độ chỉnh tay trên điện thoại: Hầu hết các smartphone hiện đại đều có chế độ Pro hoặc Manual cho phép bạn điều chỉnh ISO, khẩu độ và tốc độ màn trập. Khám phá ứng dụng camera của điện thoại để tìm kiếm chế độ này.
2. Bắt đầu với điều kiện ánh sáng tốt: Ánh sáng tự nhiên là bạn thân của nhiếp ảnh. Hãy bắt đầu thực hành trong điều kiện ánh sáng ban ngày để dễ dàng làm quen với việc điều chỉnh các thông số.
3. Thử nghiệm và quan sát: Hãy thay đổi từng thông số một để xem ảnh thay đổi như thế nào. Ví dụ, tăng ISO để xem ảnh sáng hơn, nhưng có thể bị nhiễu. Giảm khẩu độ để làm mờ hậu cảnh, nhưng cần chú ý đến độ nét của chủ thể.
4. Luôn giữ tay vững: Khi sử dụng tốc độ màn trập chậm, bạn cần giữ thật chắc tay hoặc sử dụng chân máy để tránh ảnh bị mờ.
5. Sử dụng lưới bố cục: Nhiều điện thoại có tính năng lưới giúp bạn căn chỉnh bố cục ảnh theo quy tắc 1/3, giúp bức ảnh cân đối và hấp dẫn hơn.
Nâng cao kỹ năng:
Khi đã quen với các thông số cơ bản, bạn có thể khám phá thêm các tính năng khác như cân bằng trắng (White Balance), bù trừ sáng (Exposure Compensation) để tinh chỉnh ảnh sao cho hoàn hảo nhất.
Mua ngay smartphone chất lượng cao tại Queen Mobile để trải nghiệm chụp ảnh chuyên nghiệp!
Queen Mobile cam kết cung cấp những sản phẩm điện thoại chính hãng, chất lượng cao với giá cả cạnh tranh. Hãy đến ngay cửa hàng Queen Mobile gần nhất hoặc truy cập website để lựa chọn chiếc smartphone ưng ý và bắt đầu hành trình chinh phục nghệ thuật nhiếp ảnh của bạn!
#chupanh #smartphone #manualsettings #congnghe #queenmobile #dienthoai #anhdep #tipsandtricks #photography #mobilephotography #review #muahe
Giới thiệu Get the perfect photo with your smartphone camera’s manual settings
: Get the perfect photo with your smartphone camera’s manual settings
Hãy viết lại bài viết dài kèm hashtag về việc đánh giá sản phẩm và mua ngay tại Queen Mobile bằng tiếng VIệt: Get the perfect photo with your smartphone camera’s manual settings
Mua ngay sản phẩm tại Việt Nam:
QUEEN MOBILE chuyên cung cấp điện thoại Iphone, máy tính bảng Ipad, đồng hồ Smartwatch và các phụ kiện APPLE và các giải pháp điện tử và nhà thông minh. Queen Mobile rất hân hạnh được phục vụ quý khách….
_____________________________________________________
Mua #Điện_thoại #iphone #ipad #macbook #samsung #xiaomi #poco #oppo #snapdragon giá tốt, hãy ghé [𝑸𝑼𝑬𝑬𝑵 𝑴𝑶𝑩𝑰𝑳𝑬]
✿ 149 Hòa Bình, phường Hiệp Tân, quận Tân Phú, TP HCM
✿ 402B, Hai Bà Trưng, P Tân Định, Q 1, HCM
✿ 287 đường 3/2 P 10, Q 10, HCM
Hotline (miễn phí) 19003190
Thu cũ đổi mới
Rẻ hơn hoàn tiền
Góp 0%
Thời gian làm việc: 9h – 21h.
KẾT LUẬN
Hãy viết đoạn tóm tắt về nội dung bằng tiếng việt kích thích người mua: Get the perfect photo with your smartphone camera’s manual settings
The best camera phones offer a similar photography experience to many dedicated cameras. But they can fail to capture a scene the way you would expect. Many Android devices allow you to dial in the look of your photos with manual camera settings. You can adjust the aperture and shutter speed or play with white balance and focal length to capture the perfect shot. We walk you through a list of common manual camera settings, what they do, and how to use them.
Does my phone have manual camera settings?
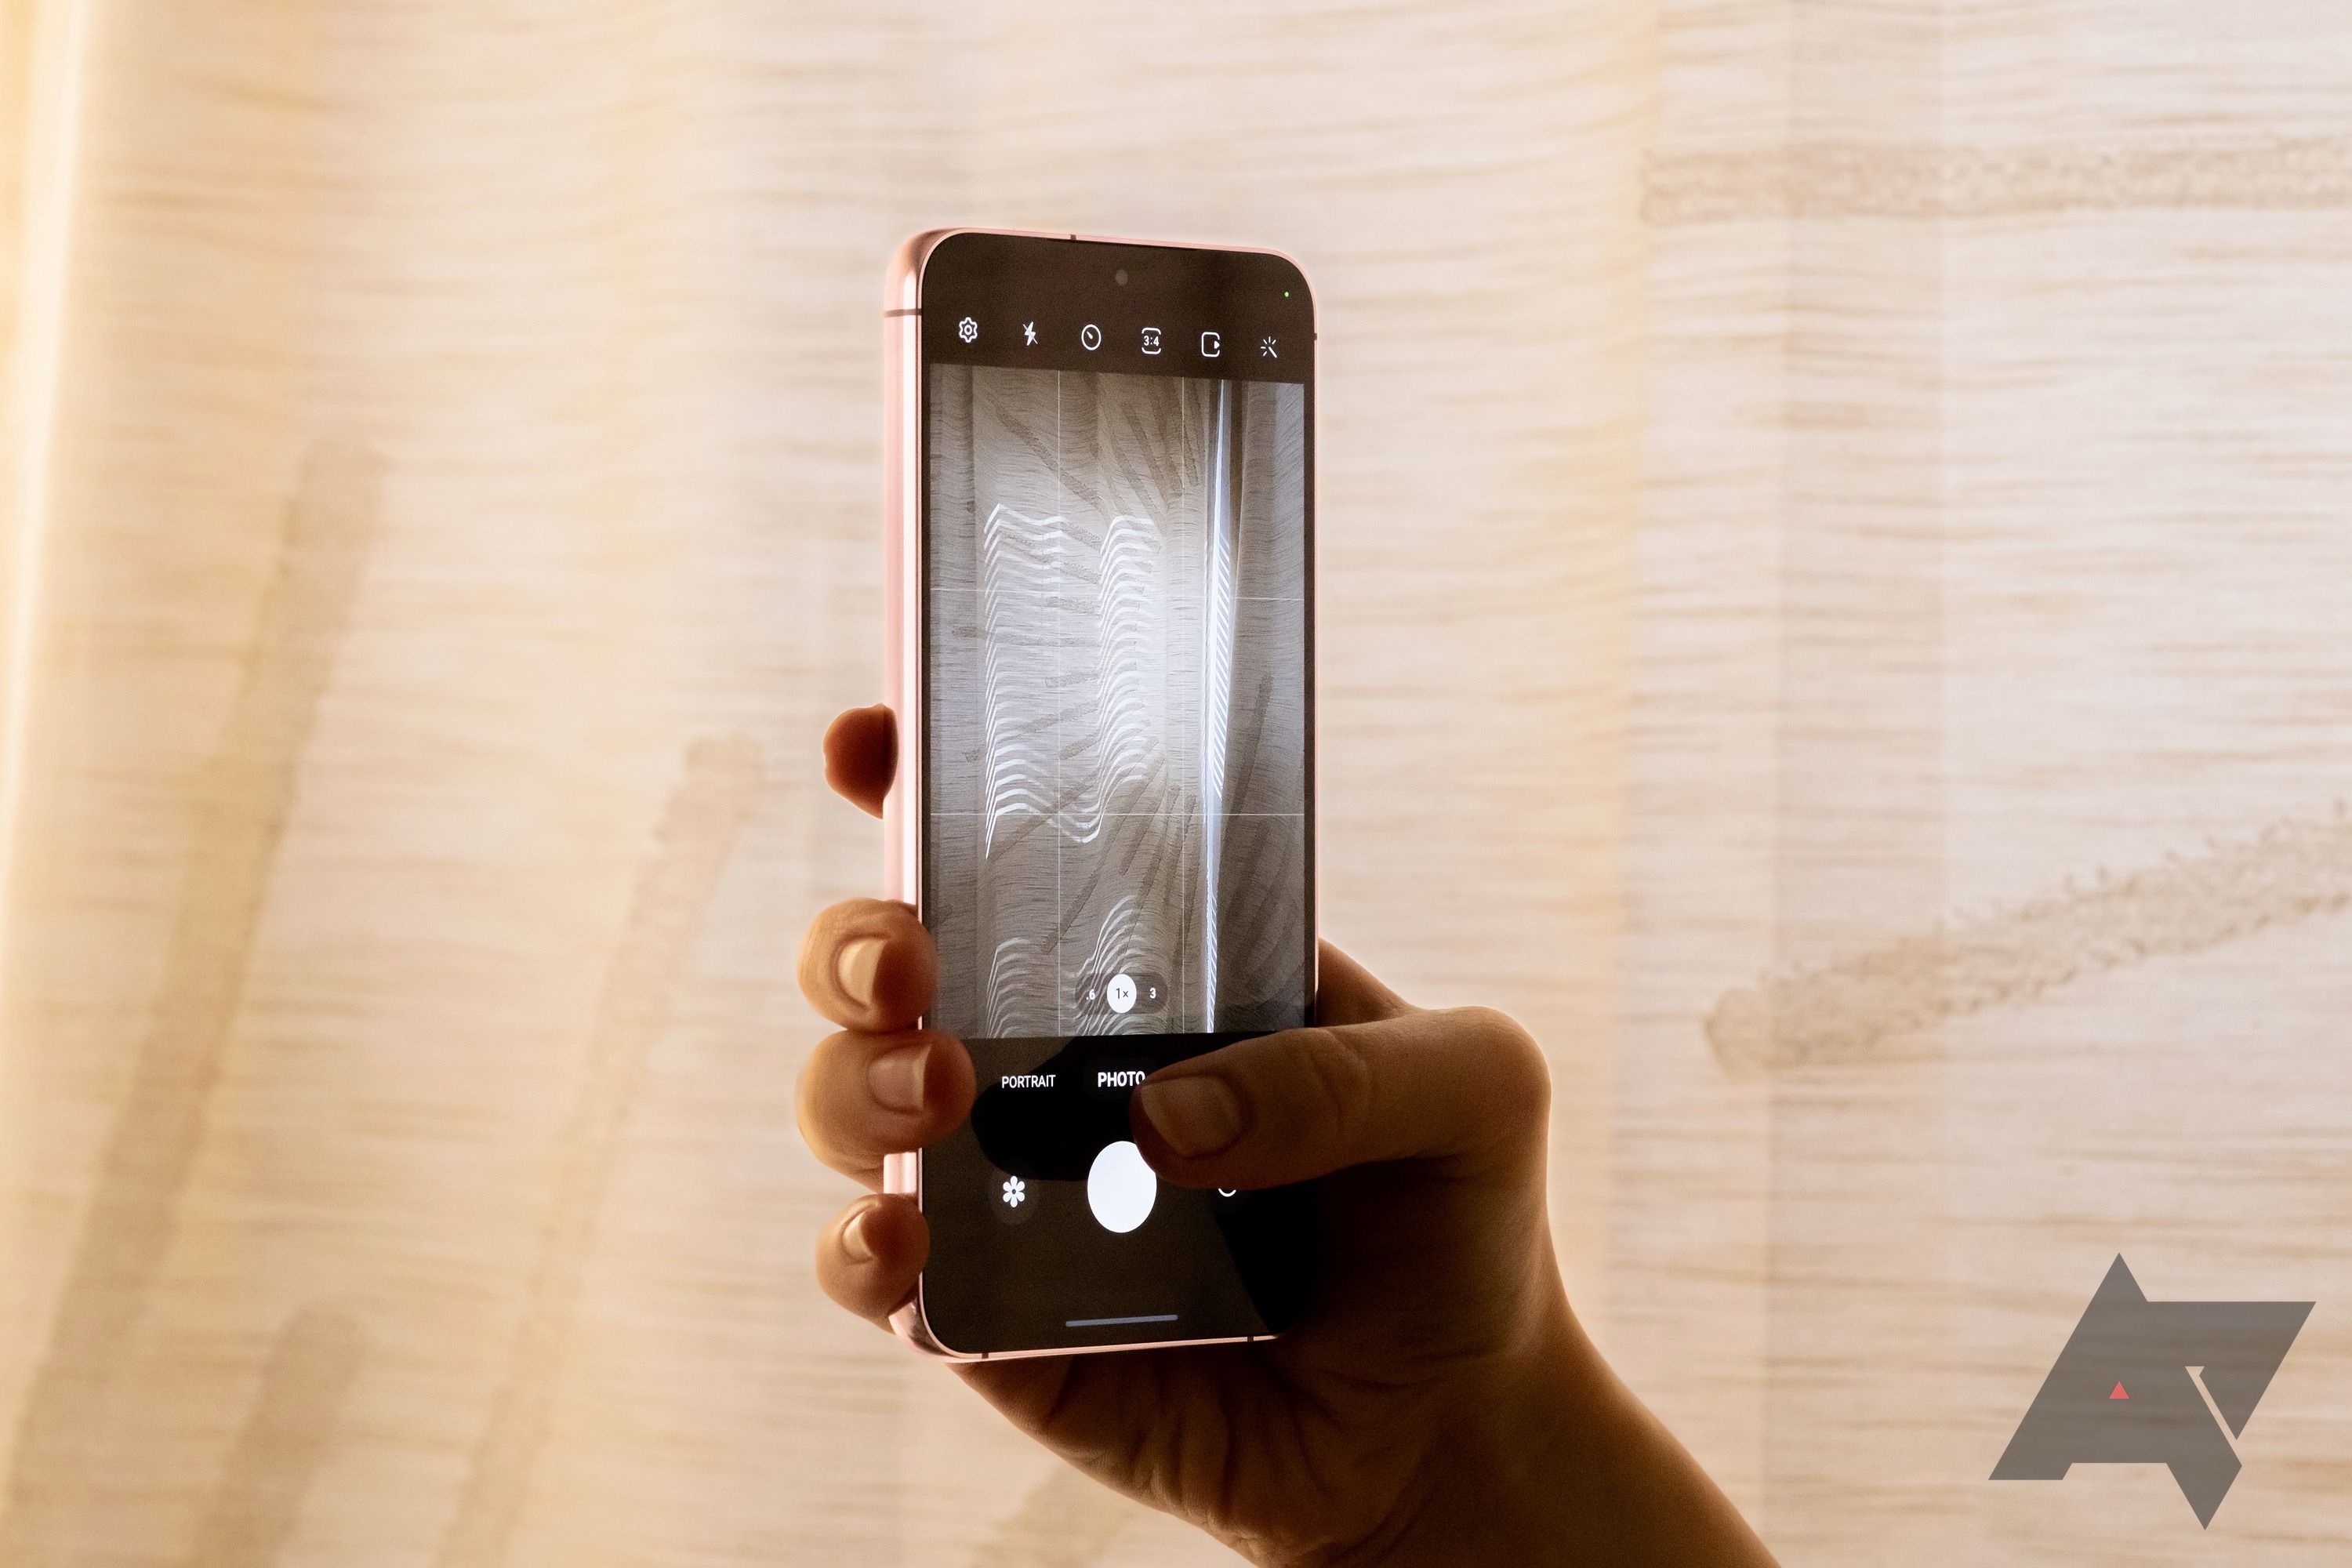
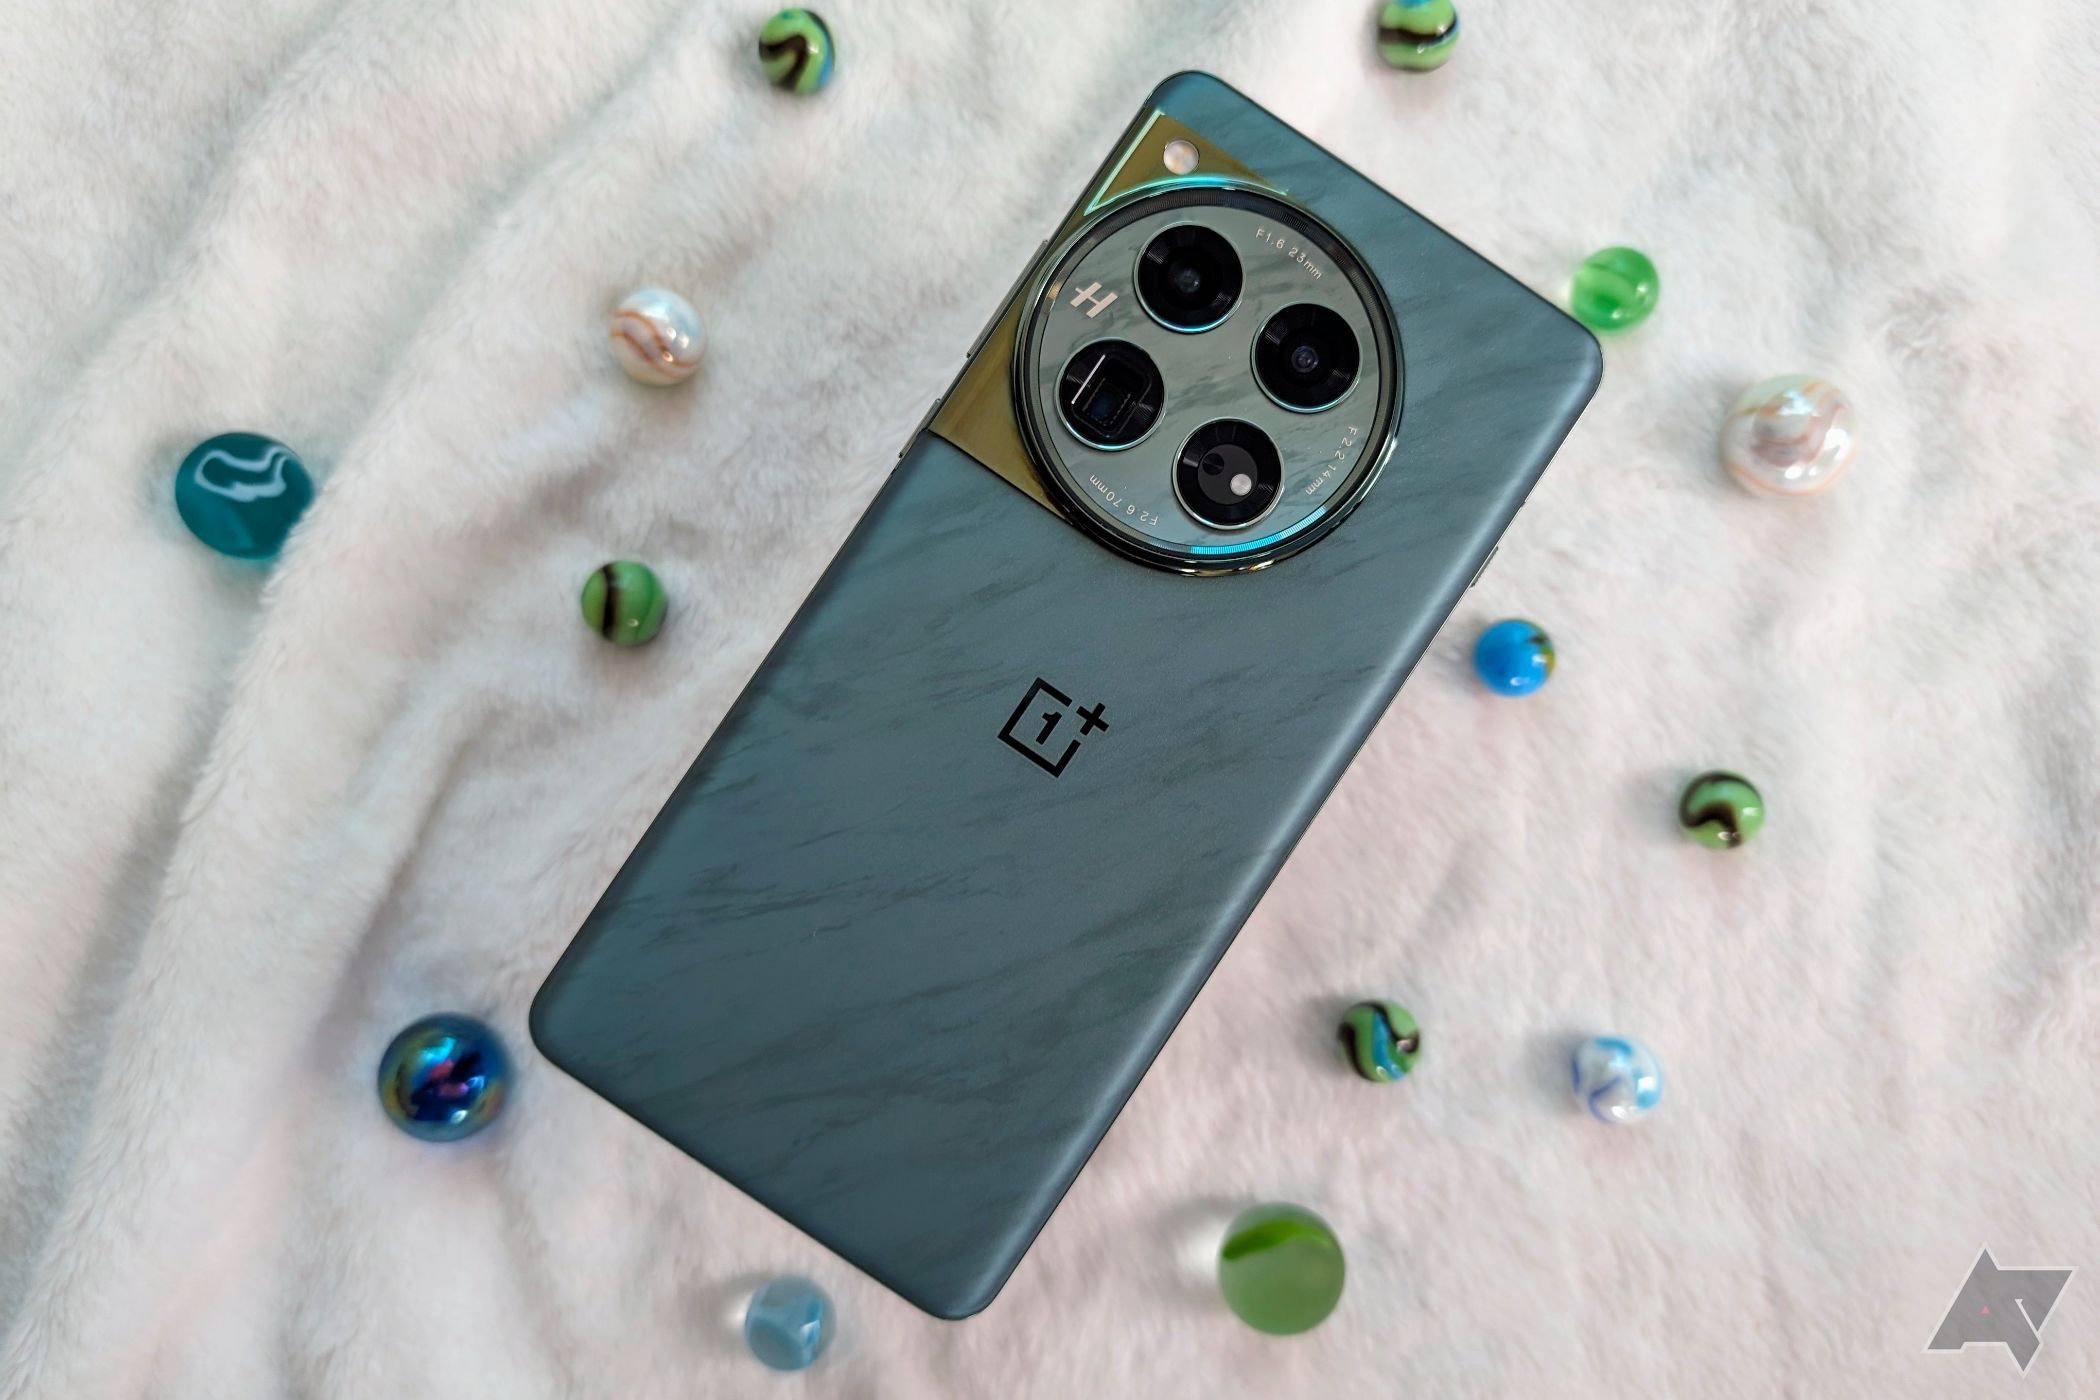
Not every phone provides access to its manual camera settings, but many do. Many Samsung phones are compatible with the company’s Expert RAW app, which presents several manual settings. OnePlus’s recent Hasselblad-branded flagships, like the OnePlus 12, have a camera mode that works similarly. Sony flagships like the Xperia 1 V do their best to imitate Sony’s dedicated Alpha cameras with the Photo Pro app.
Google Pixel phones don’t provide full access to the manual camera settings. Instead, they present sliders in the camera viewfinder to adjust brightness, shadows, and warmth independently. Several manual camera apps are available through the Play Store, but many of them are bad, offering spotty feature compatibility across phone models. If your phone’s manufacturer doesn’t provide a dedicated manual camera app, chances are you can’t easily shoot with manual settings.
Related
How to take a perfect selfie: 16 tips for a killer self portrait
Taking a good selfie is harder than it looks
How do manual camera settings work?
When you tap the shutter button on your phone’s camera app, the camera captures what’s in front of you as it appears to your eyes. While that experience is mostly automatic from your end, the phone does a lot of work in real time to figure out what the resulting photo should look like. You can do that work with manual camera settings and customize how your photo looks.
Terminology and where each setting is located vary from device to device, but the principles of how they work are universal. Here are the most common manual camera settings, what they do, and how to use them.
Shutter speed
In mobile photography, shutter speed is a measure of how long your phone’s image sensor gathers light to create a photo. (Phones don’t have shutters, so you might see this setting referred to as speed.) Shutter speed is represented as a fraction. For example, 1/60 means the image sensor gathers light for one-sixtieth of a second.
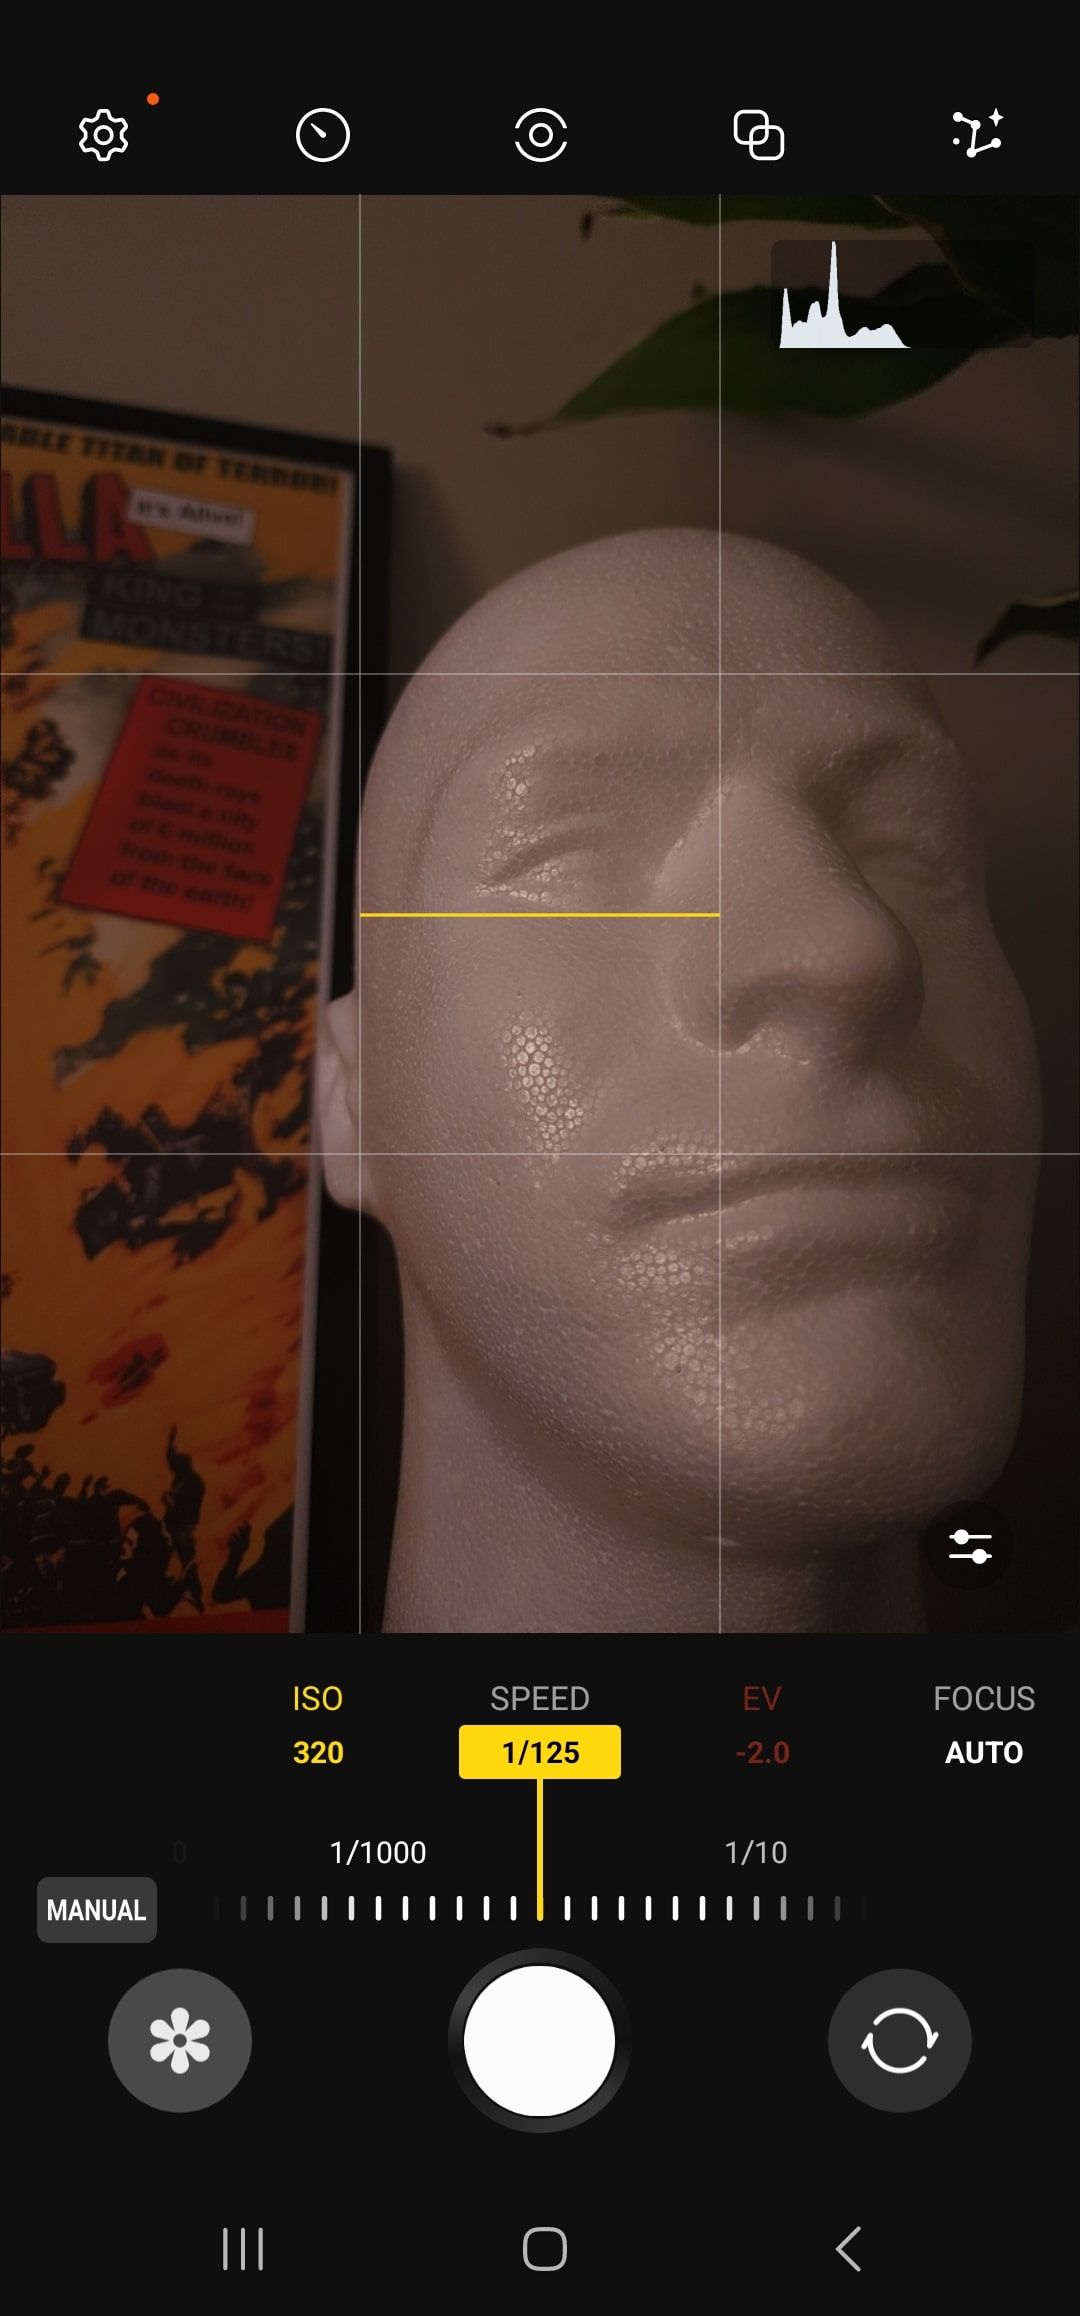
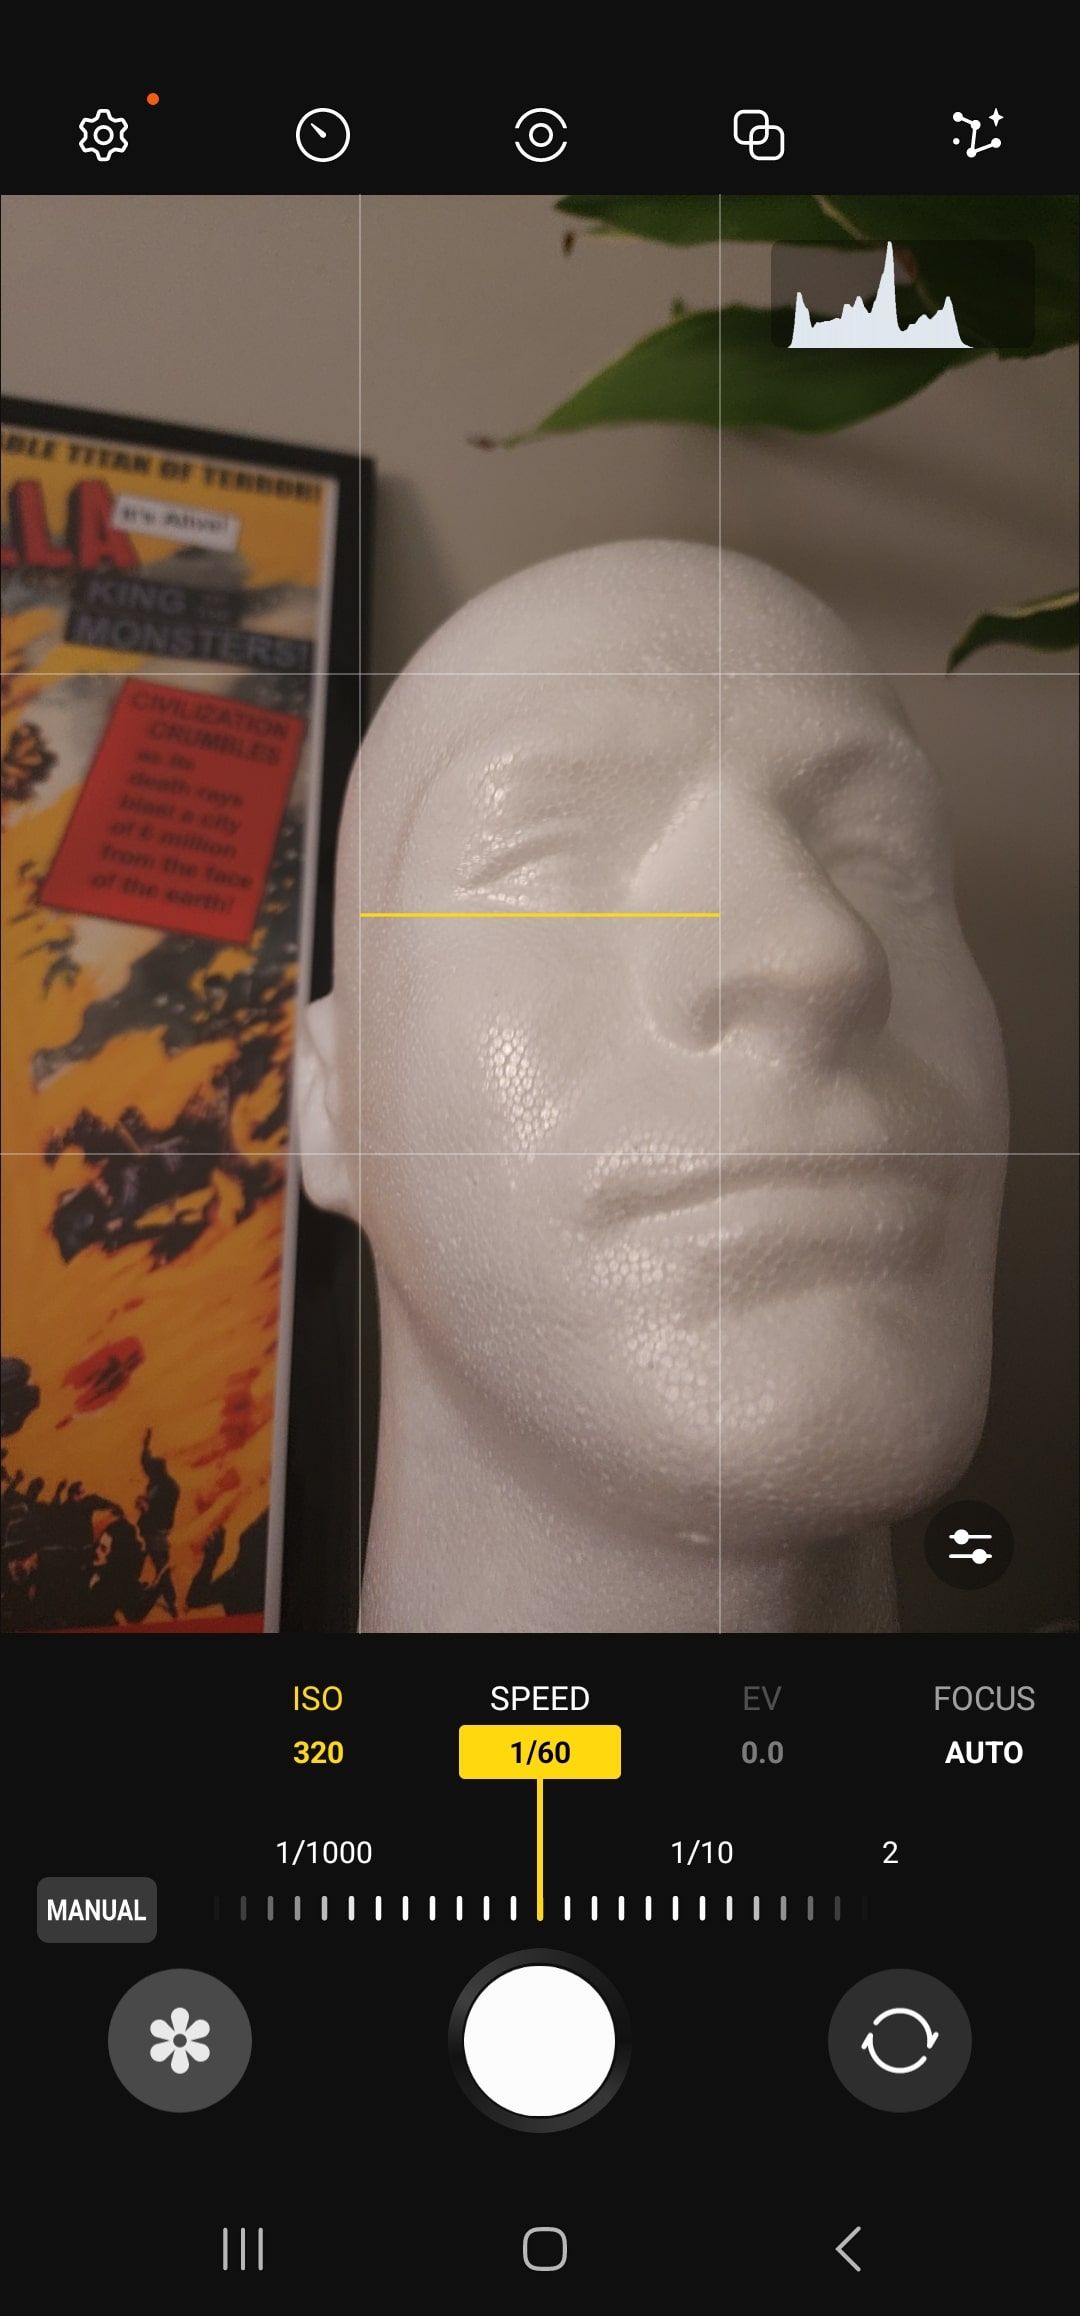
Fast and slow shutter speeds in the Samsung Expert RAW app.
Slower shutter speeds gather more light. A photo taken at a shutter speed of 1/100 is brighter than one taken at 1/500. Your phone combines everything it sees while the image sensor collects light into one image, so slow shutter speeds are also prone to motion blur. This balance can make choosing a shutter speed tricky. As a rule of thumb, darker environments require slower shutter speeds, and brighter settings require faster shutter speeds.
ISO
The ISO setting adjusts how sensitive the image sensor is to incoming light (ISO stands for International Organization for Standardization, a term that dates back decades to film photography). Higher ISOs result in brighter images and increased noise, the discolored, grainy quality seen in some photos taken in dark settings. A low ISO results in a darker photo with less visible noise.
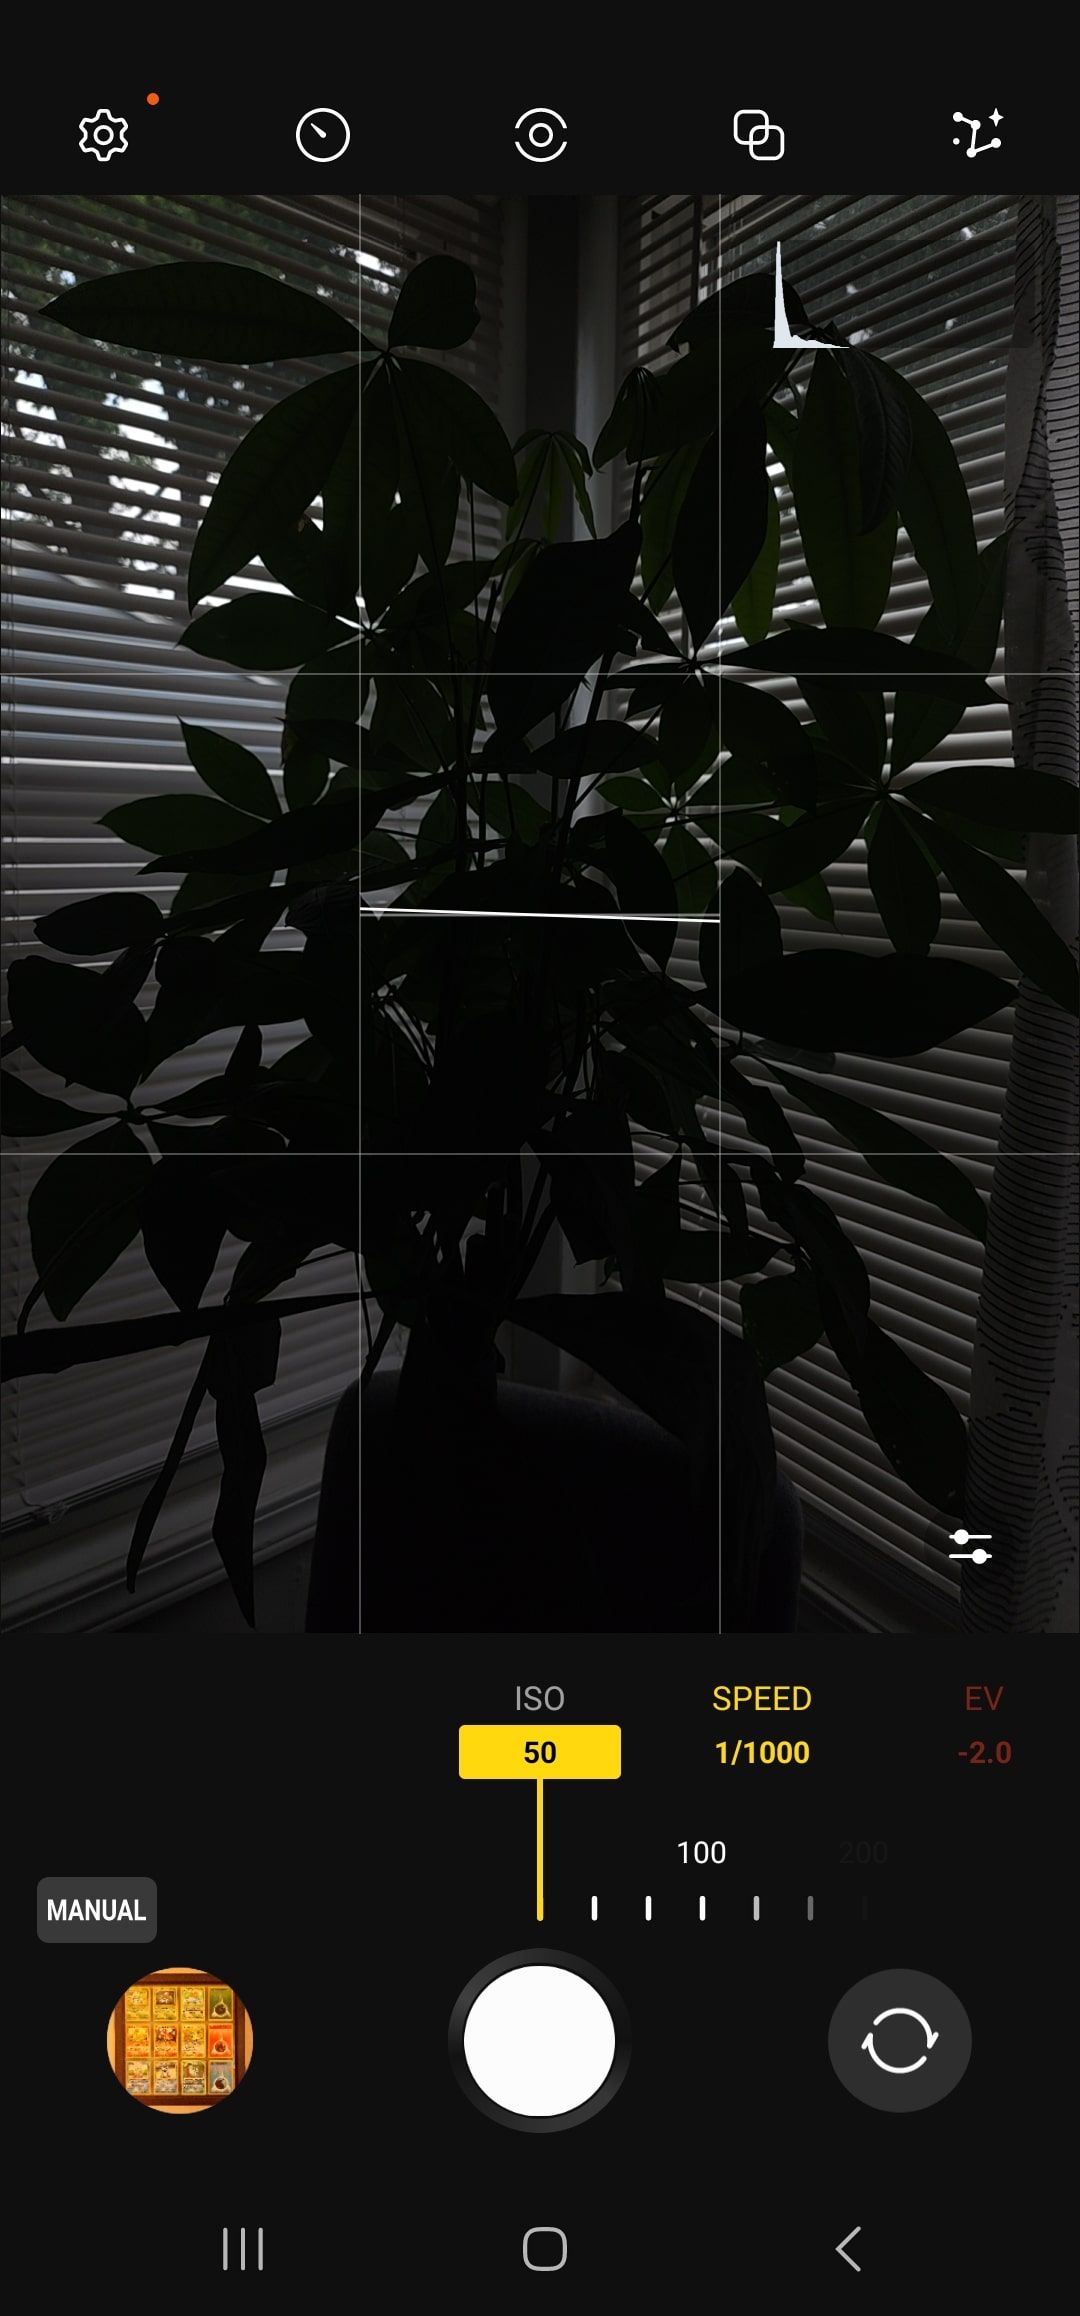
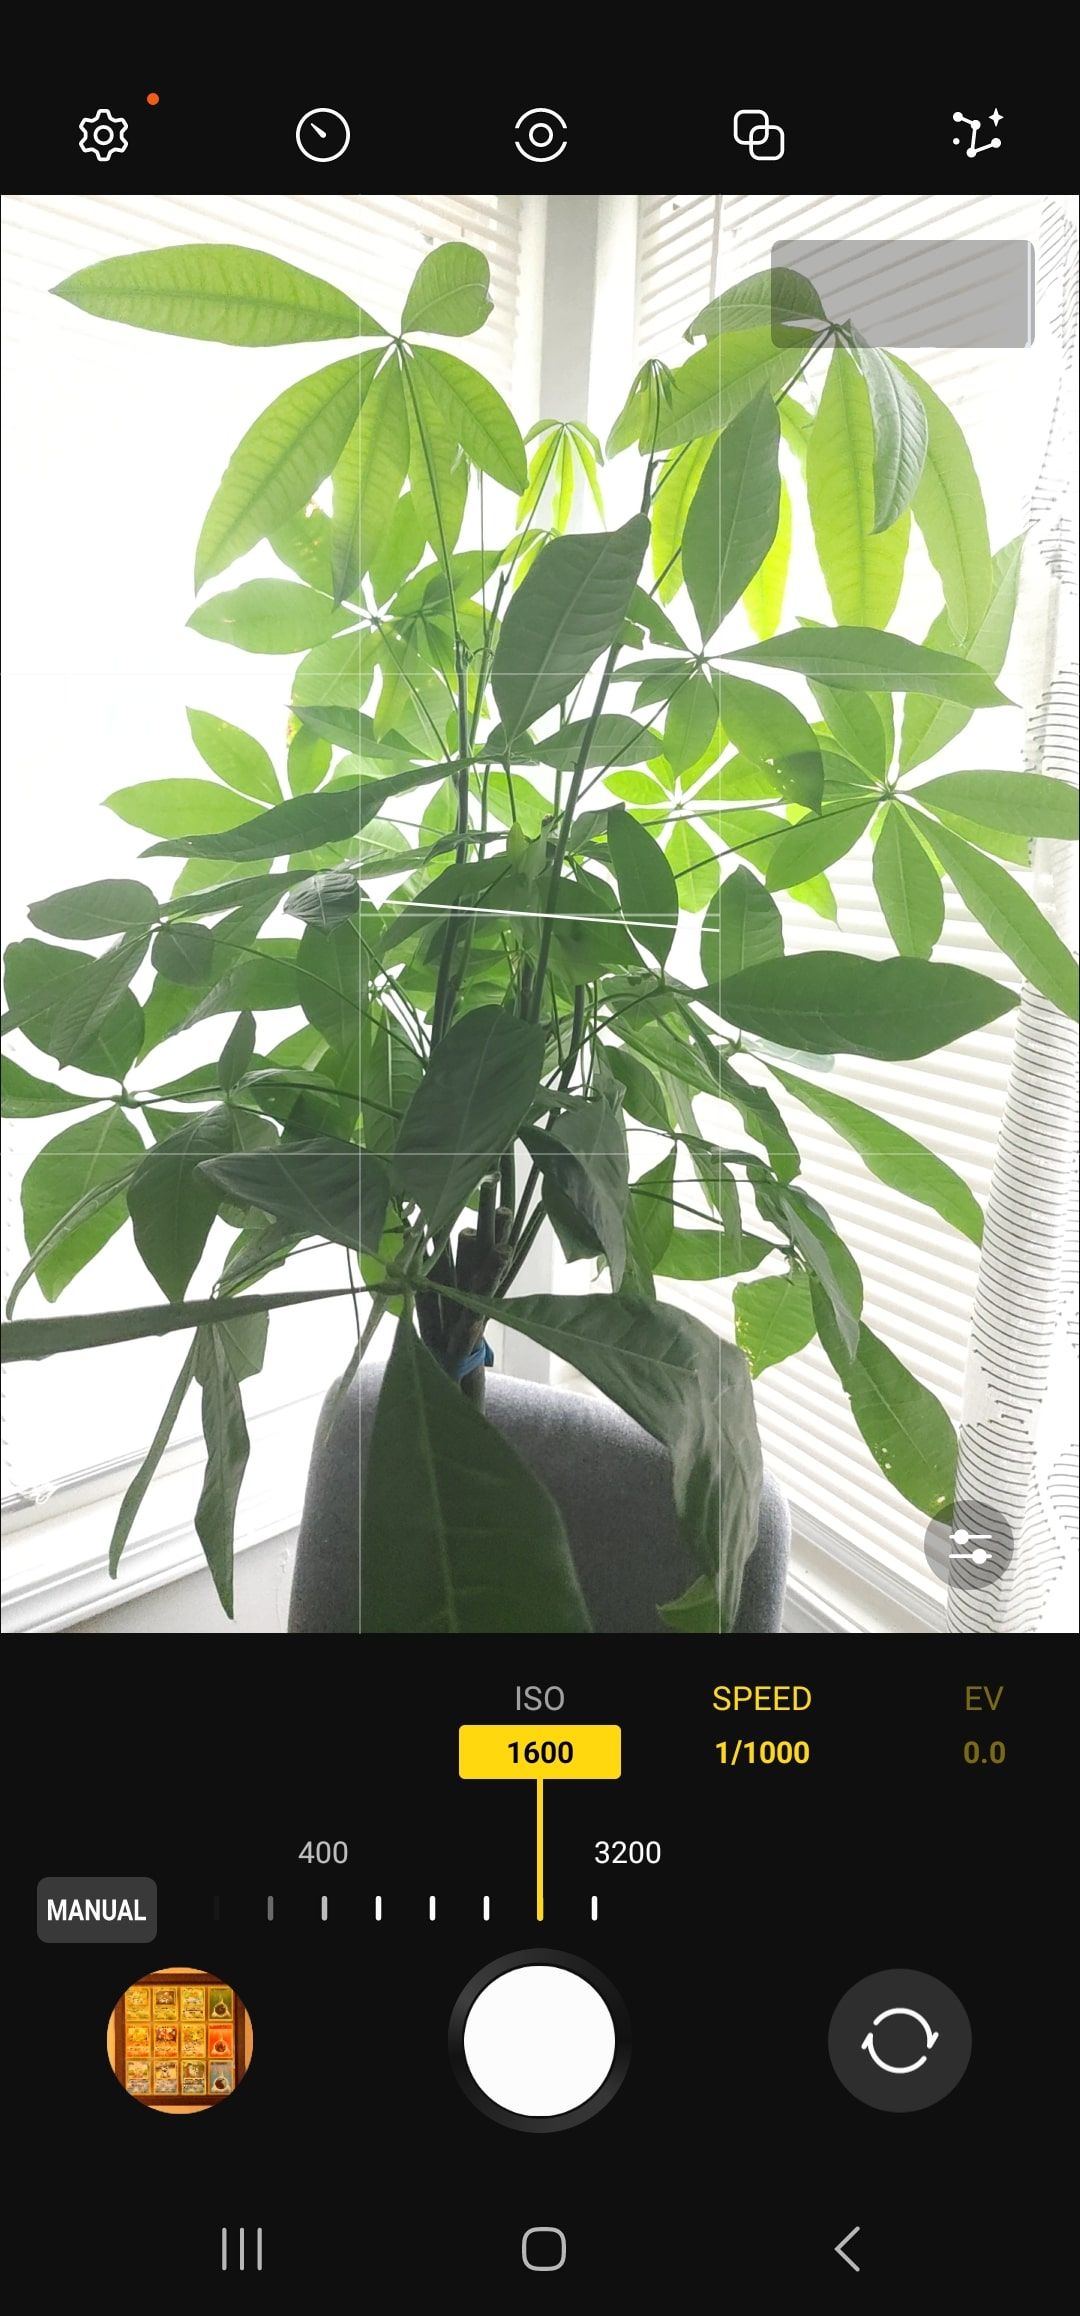
Lower versus higher ISO in Samsung Expert RAW.
Balancing ISO and shutter speed is important for getting good photos across lighting conditions. A higher-than-usual ISO can brighten photos taken in the dark, which means you can shoot at a faster shutter speed to reduce motion blur on moving subjects. You’ll need to be mindful of noise, though.
EV
EV stands for exposure value. On dedicated cameras, EV is calculated from shutter speed and aperture settings. Smartphone cameras don’t typically have moving apertures. The EV setting in mobile photography deals with shutter speed and ISO.
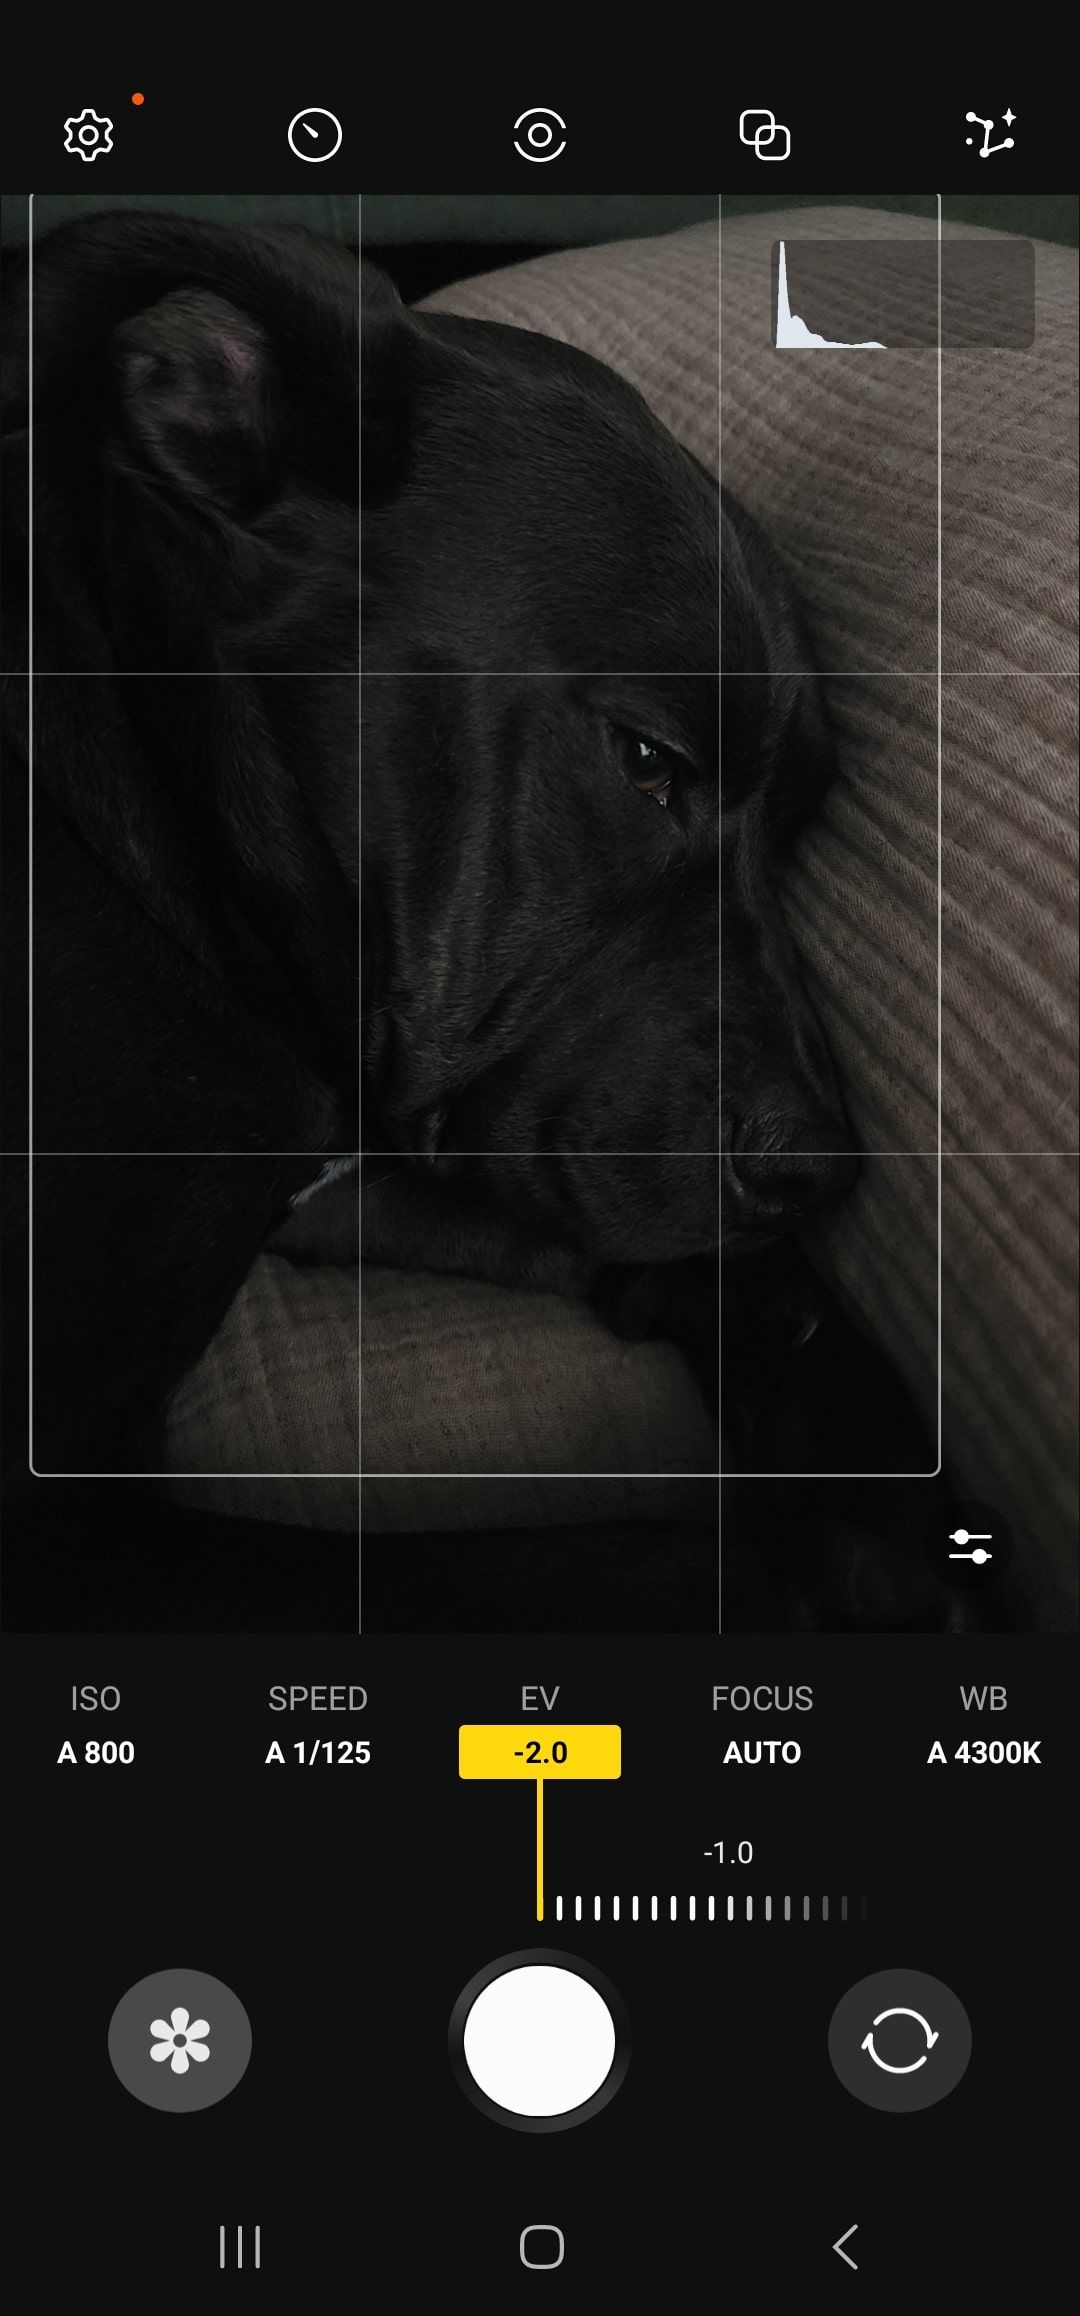
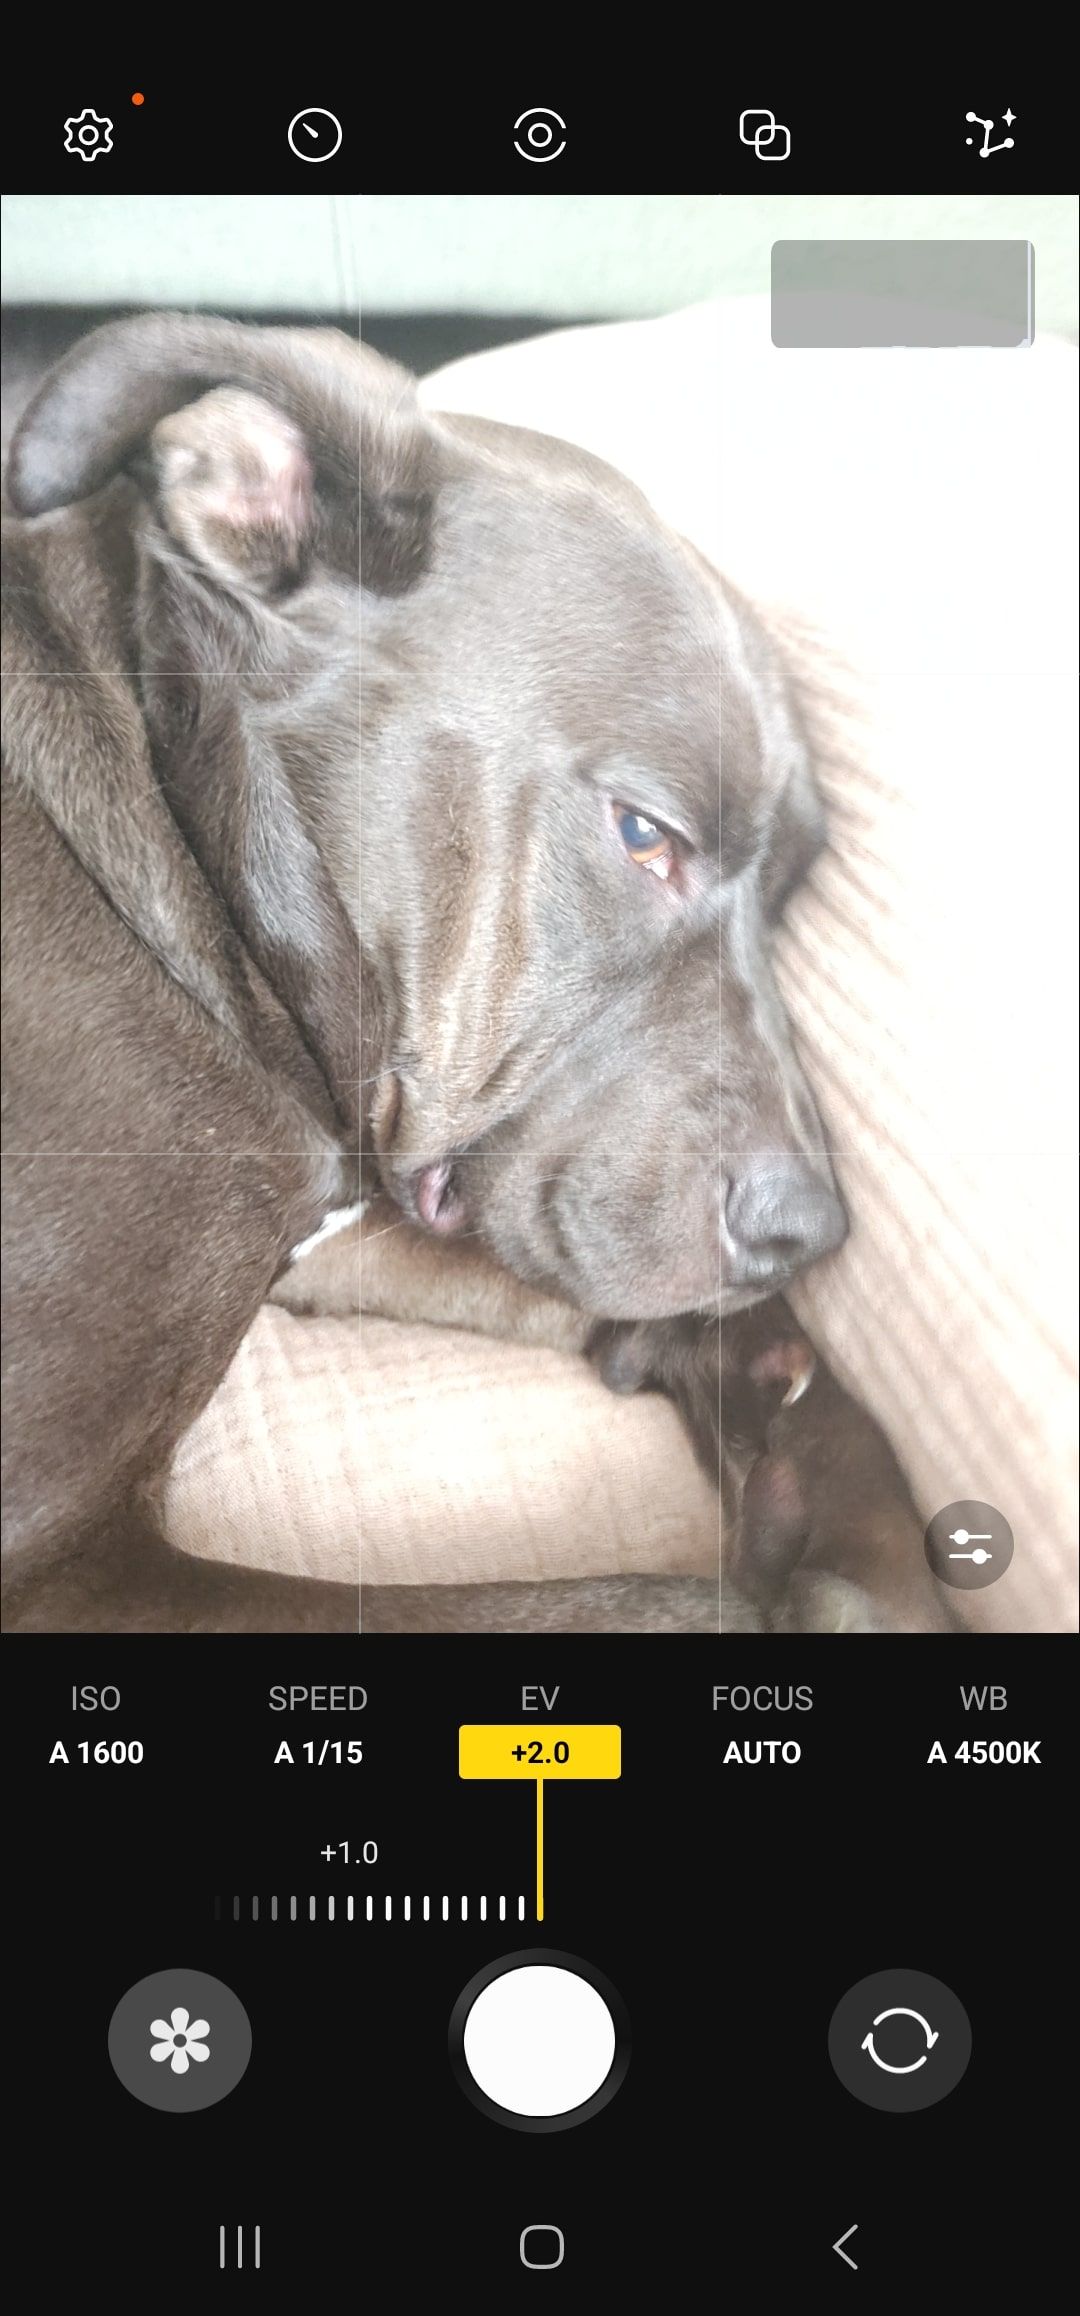
-2 and +2 EV in Samsung Expert RAW.
The EV slider adjusts the shutter speed and ISO to change the brightness of your photo. Lowering the EV in the phone’s manual camera settings makes the resulting photo darker. Raising the EV makes the photo brighter. Conversely, adjusting either the shutter speed or ISO changes the EV. This can be handy if you want a brighter or darker image but don’t know how to change the other two settings.
White balance
White balance (often abbreviated WB in manual settings) controls the color temperature in your photos. It’s measured in Kelvin (abbreviated as K). Setting the white balance to a lower number makes a picture visibly cooler (more blue). Setting the white balance higher makes the image warmer (more orange).
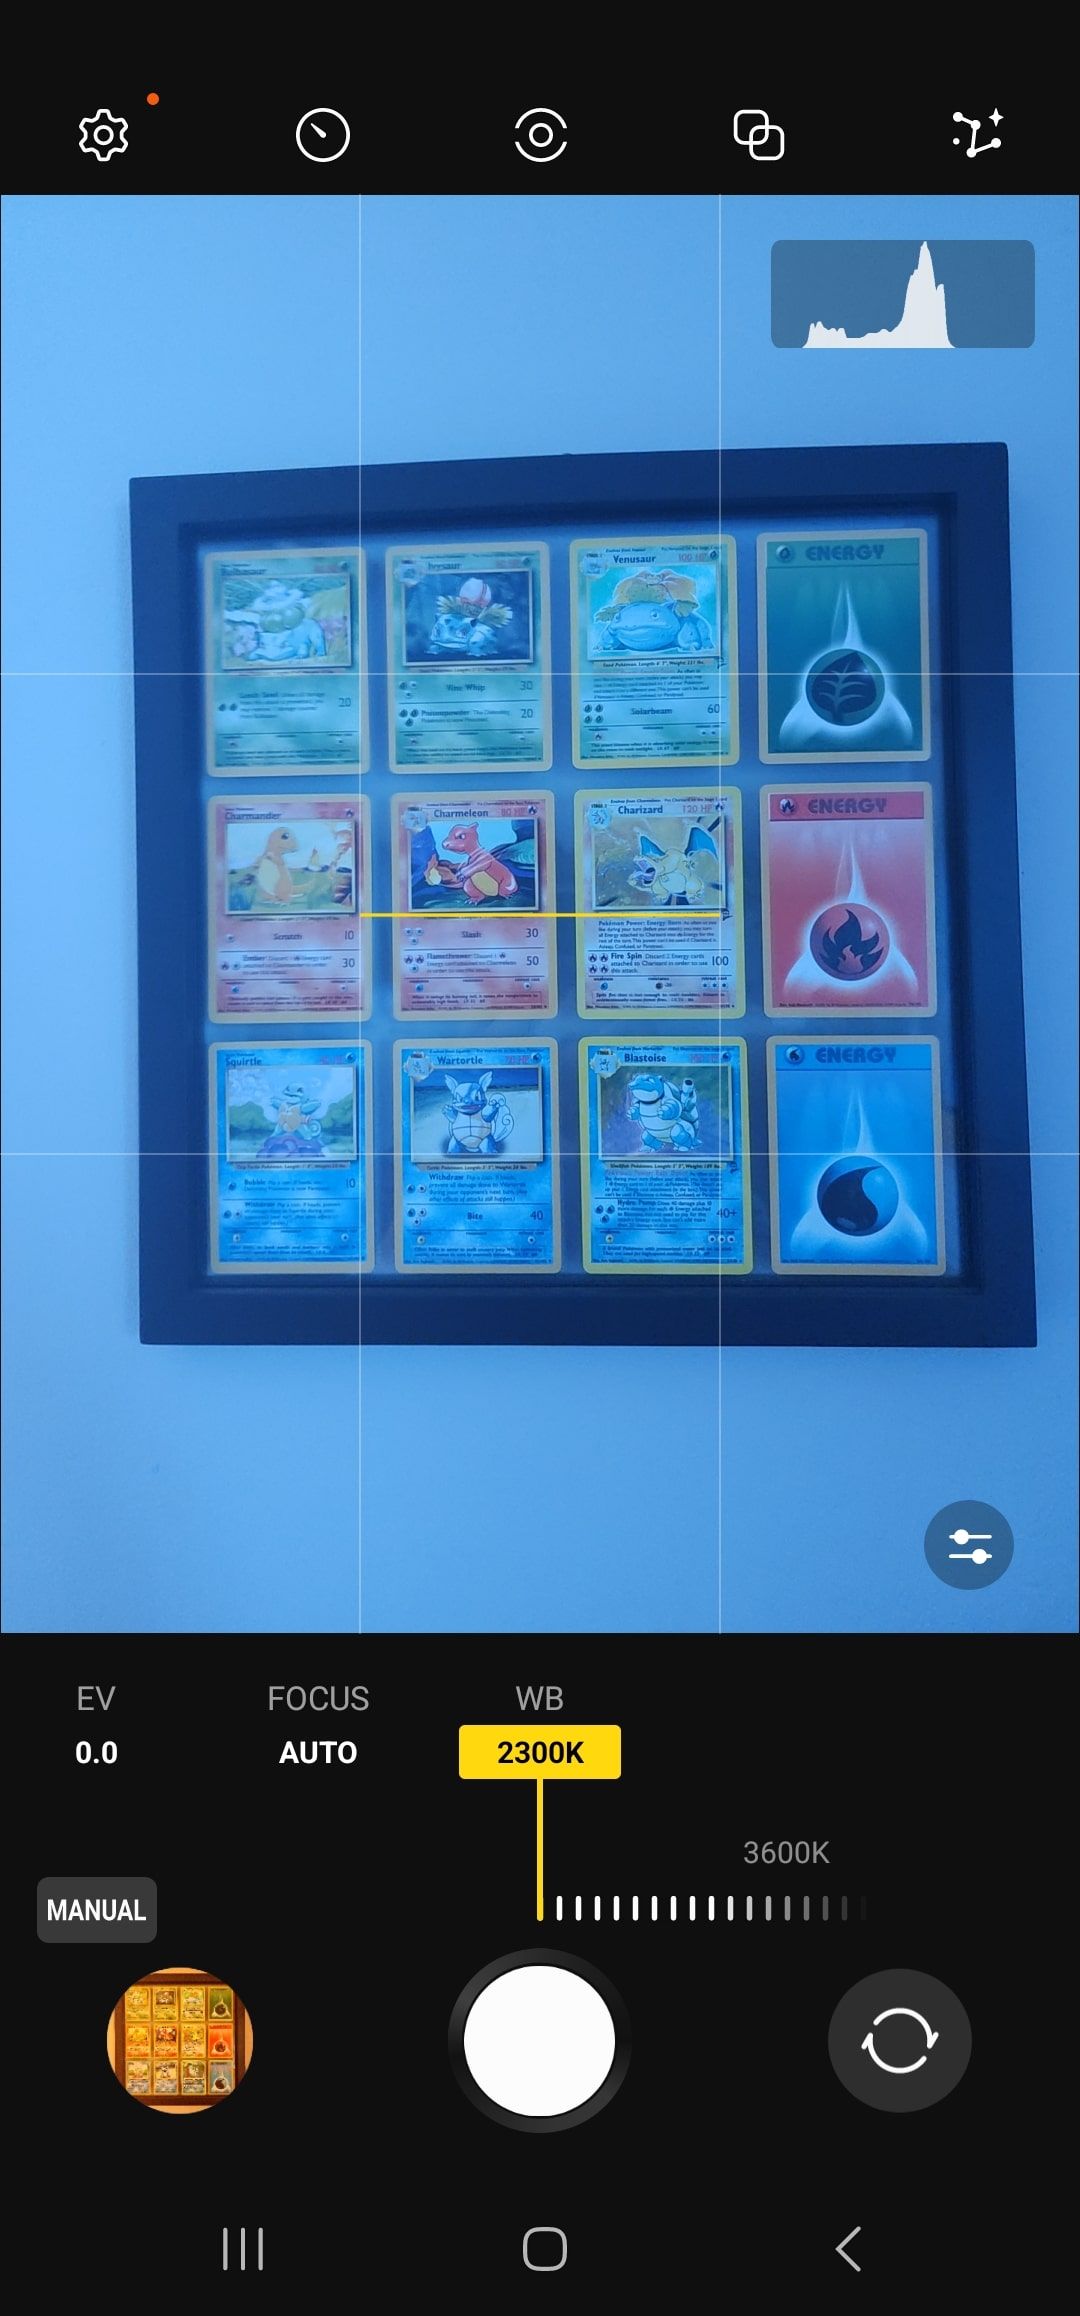
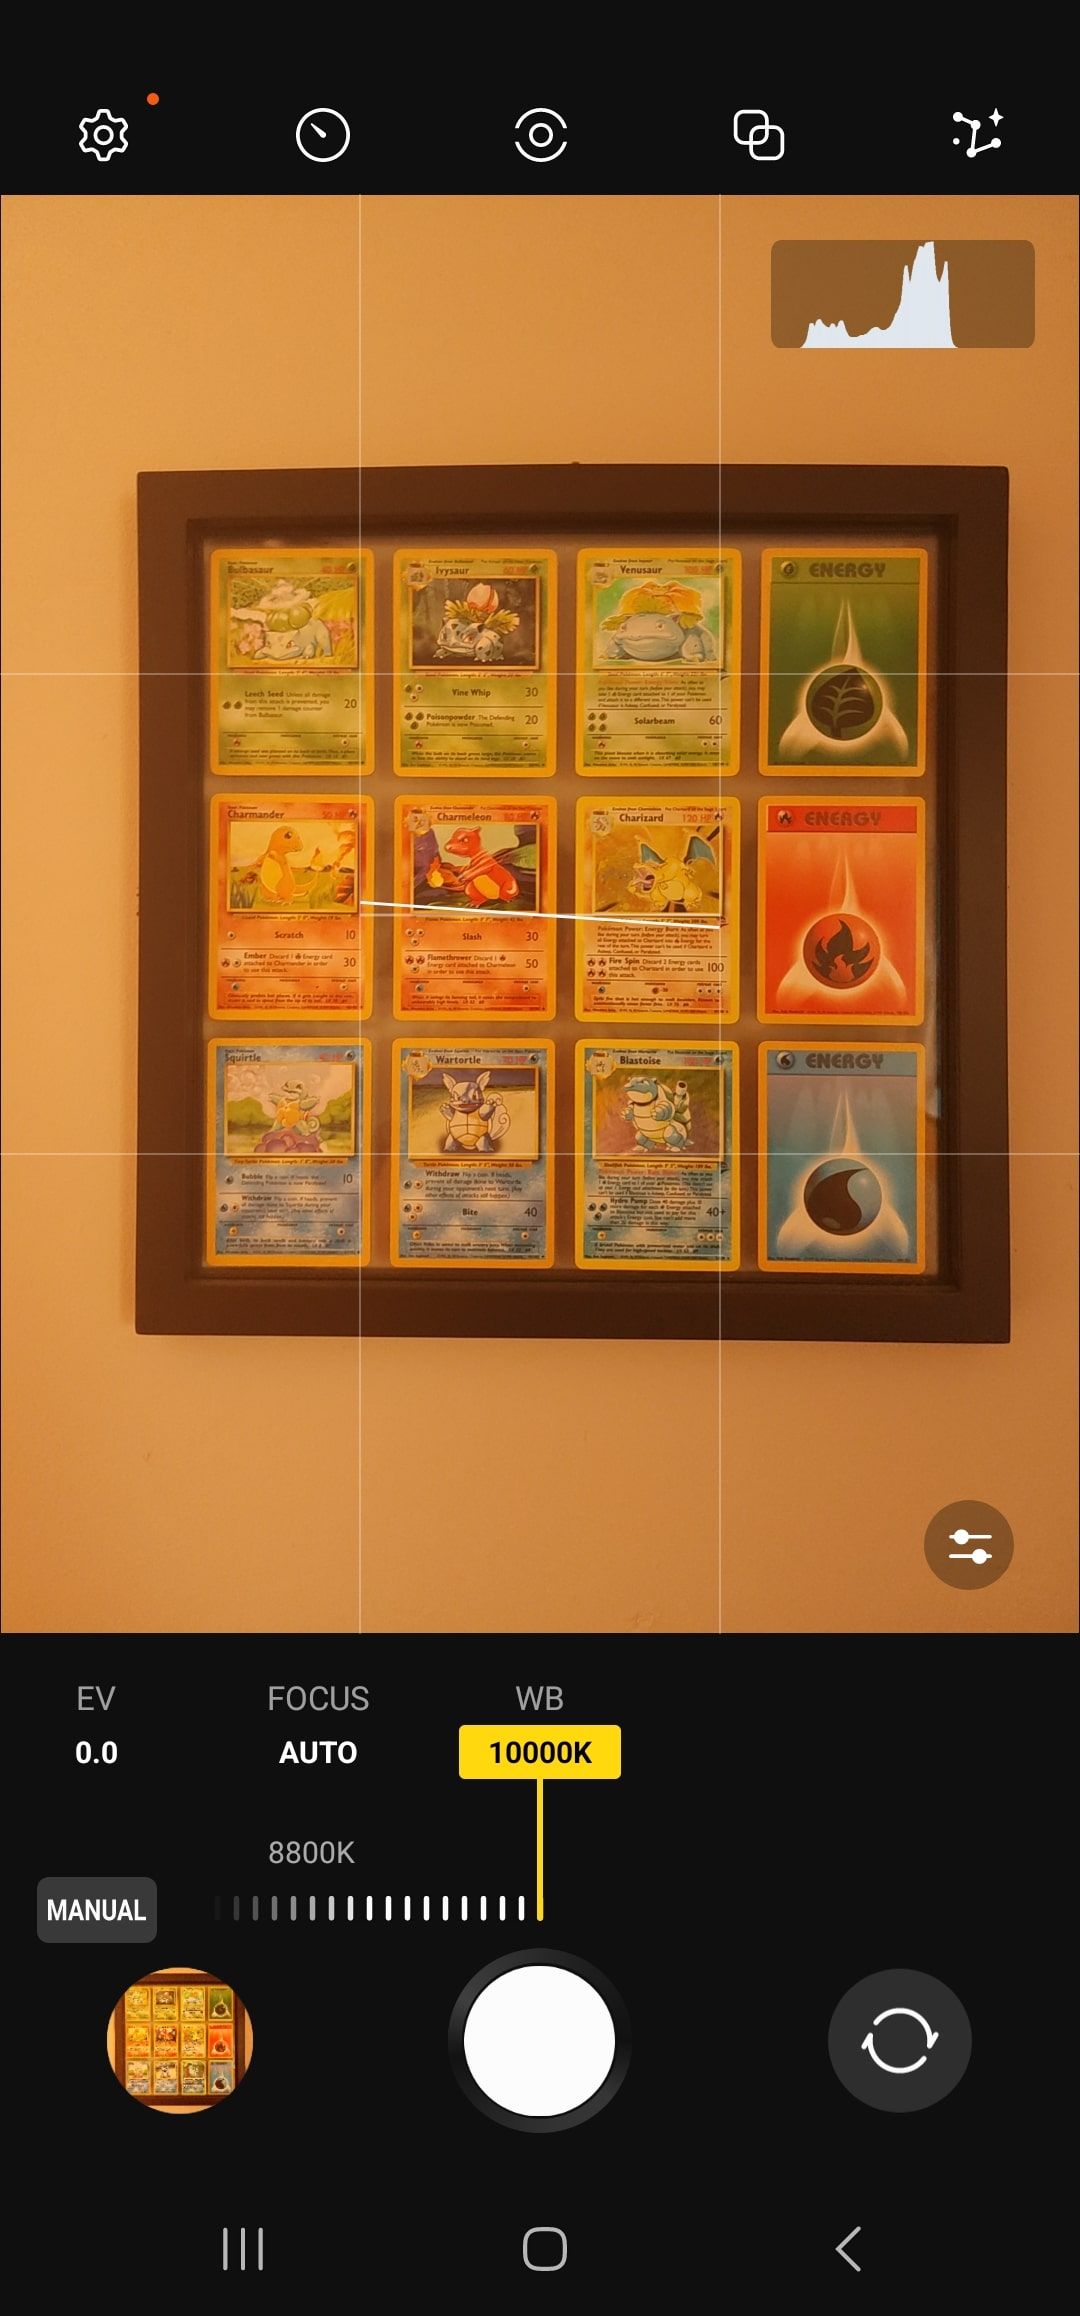
Cooler versus warmer white balance in Samsung Expert RAW.
Different light sources emit light in different colors. Outdoor light on a sunny day doesn’t look the same as indoor light from artificial sources, and different types of light bulbs produce differing colors of light. To get a natural-looking image, adjust the white balance to compensate for the lighting conditions you’re shooting in.
Pro photographers have tools and techniques for getting the perfect white balance. In recreational photography, it’s fine to eyeball it. When dialing in WB, compare colors in the image on your phone’s screen to what you see in real life and match the two. White objects are helpful to gauge white balance, as color temperature differences look most pronounced there.
Related
Google Collections: How to share places, photos, links and more
Google is serving bookmarks and blogs in a single feature
Focus
Smartphones generally rely on autofocus to pick which part of the frame should be in focus. You can tap other areas to change where the camera focuses, but manual settings let you dial in focus with more granularity.
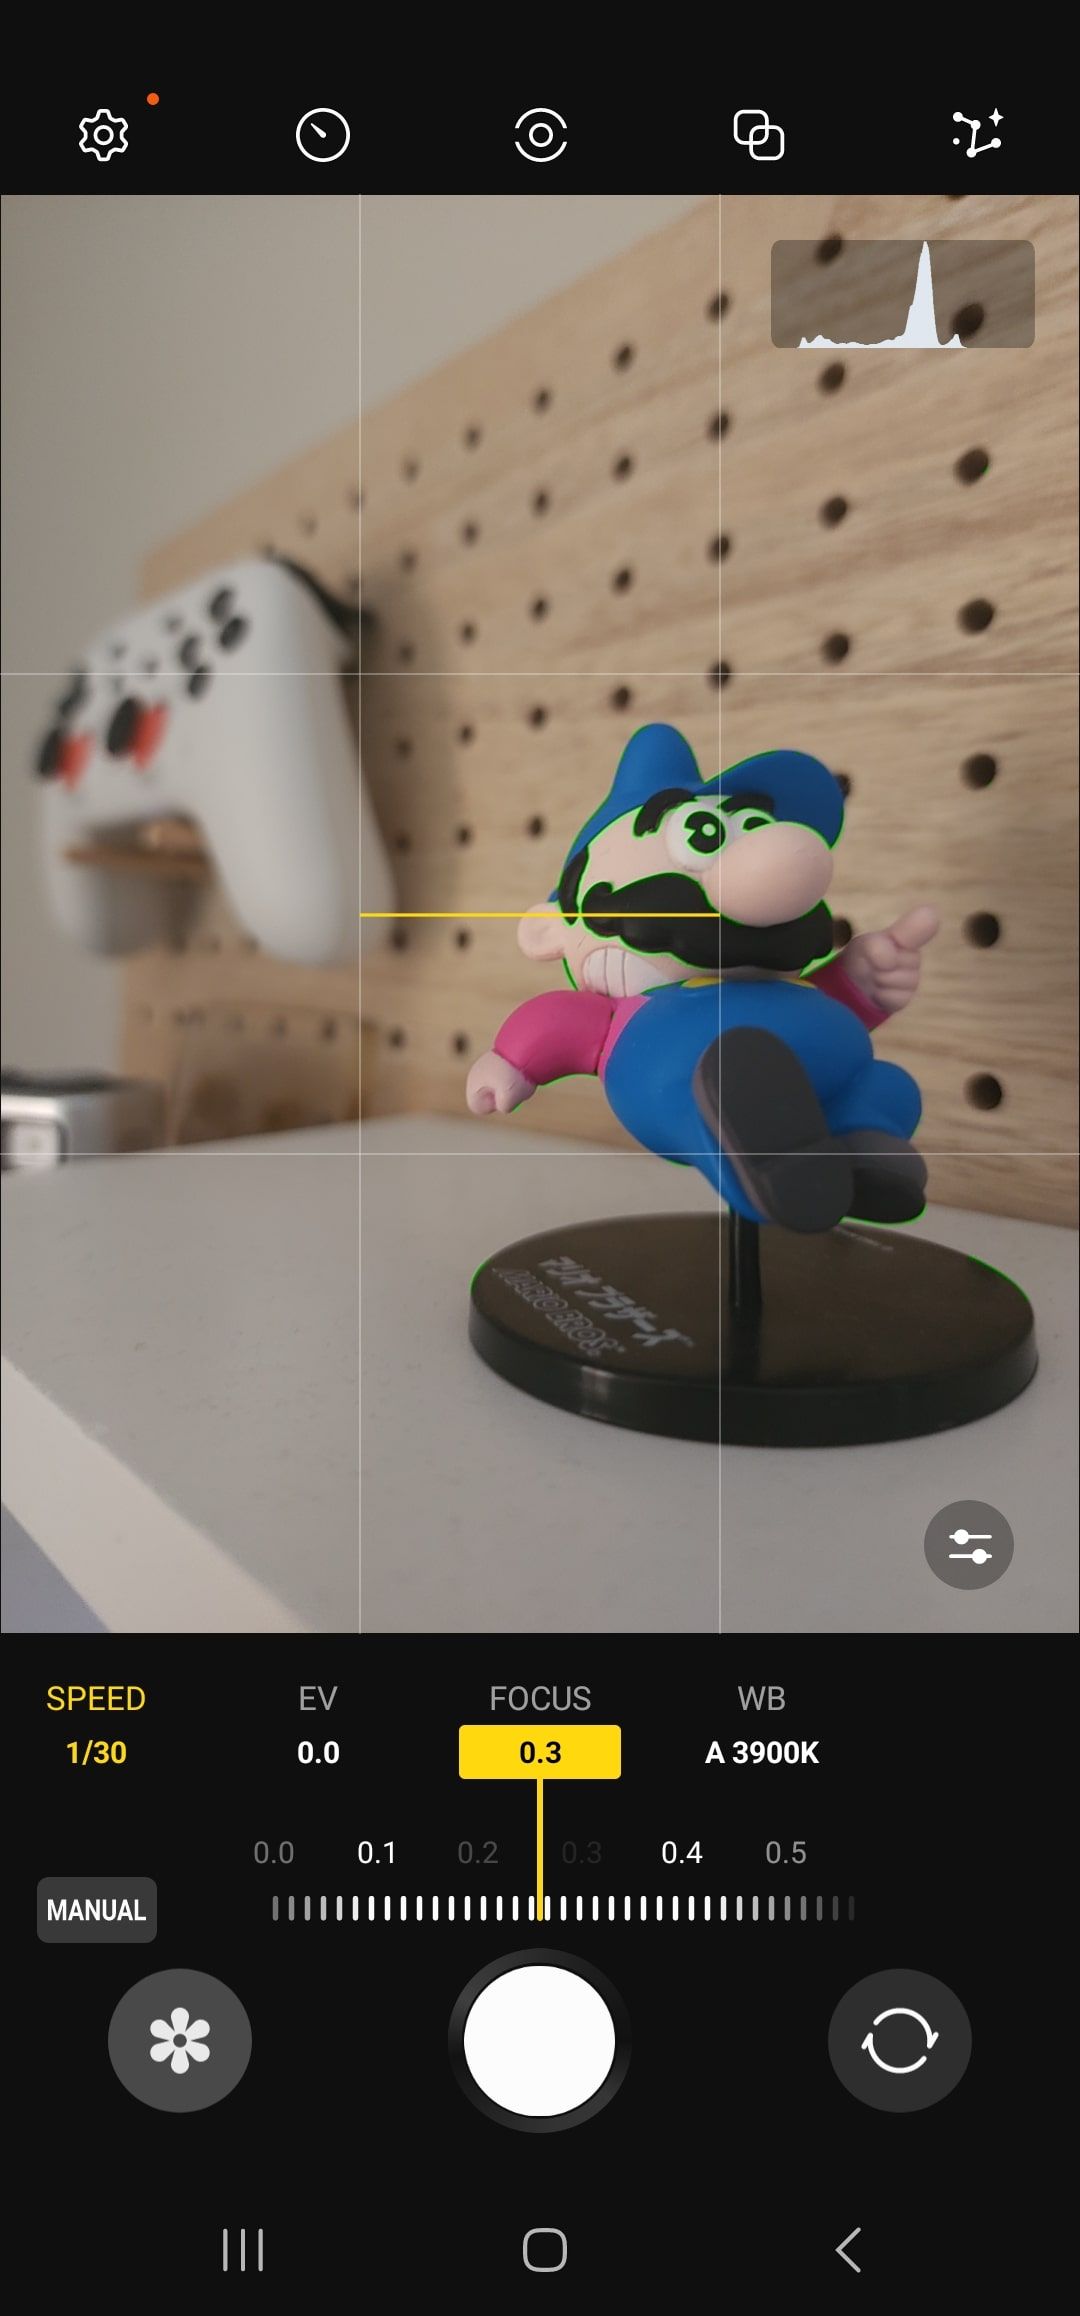
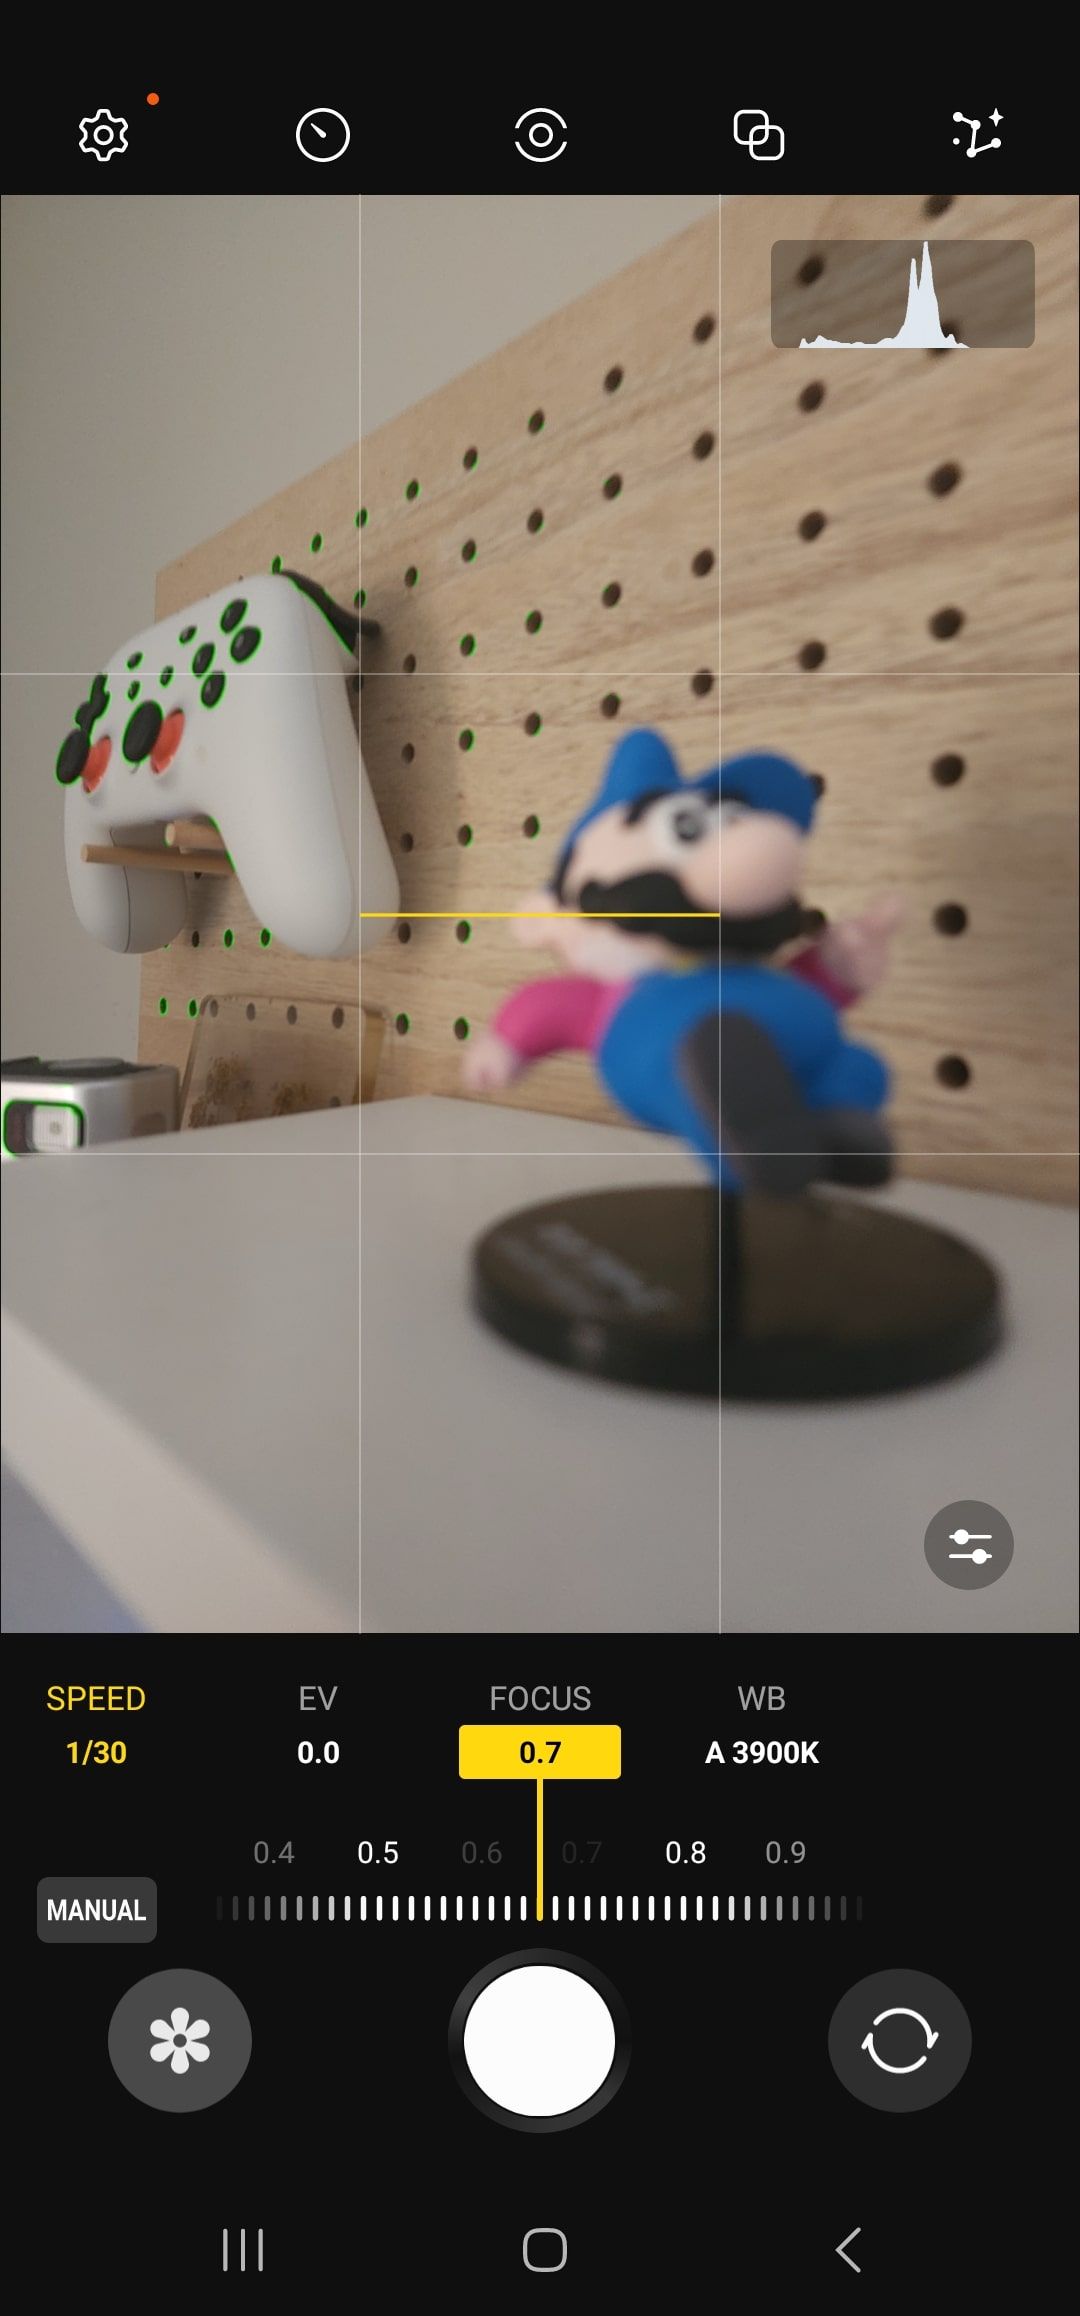
Two planes of focus in Samsung Expert RAW. Expert RAW highlights in-focus areas in green.
Manual focus on smartphones is controlled with a slider. The low end of the slider sets the plane of focus close to the camera. The high end focuses far away. Manual focus might be an appealing option when trying to get a sharp photo of something too small for autofocus to reliably zero in on.
More mobile photography tips
You can tweak your phone’s manual camera settings to nail the look you’re after. If you want to take your photography game to a new level, learn how to shoot and edit RAW photos on your phone and get the most out of the Samsung Expert RAW app.
Xem chi tiết và đăng kýXem chi tiết và đăng ký
Khám phá thêm từ Phụ Kiện Đỉnh
Đăng ký để nhận các bài đăng mới nhất được gửi đến email của bạn.


