

Review sản phẩm
Hủy Đăng Ký Dịch Vụ Chỉ Trong Vài Bước Đơn Giản!
Th5
## Hủy Đăng Ký Dịch Vụ Chỉ Trong Vài Bước Đơn Giản!
Bài viết này hướng dẫn bạn cách hủy đăng ký các dịch vụ trực tuyến một cách nhanh chóng và hiệu quả. Cho dù bạn đang muốn hủy đăng ký Netflix, Spotify, hay bất kỳ dịch vụ nào khác, những bước sau đây sẽ giúp bạn giải quyết vấn đề một cách dễ dàng, tránh khỏi những khoản phí không mong muốn.
Bước 1: Xác định Dịch Vụ Cần Hủy Đăng Ký
Trước tiên, bạn cần biết chính xác dịch vụ nào bạn muốn hủy. Ghi nhớ tên dịch vụ và tài khoản liên kết sẽ giúp quá trình này diễn ra suôn sẻ hơn.
Bước 2: Truy cập Trang Quản Lý Tài Khoản
Thông thường, bạn có thể truy cập trang quản lý tài khoản thông qua website chính thức của dịch vụ. Tìm kiếm mục “Tài khoản”, “Cài đặt”, hoặc “Quản lý đăng ký” trên trang chủ. Nếu không tìm thấy, hãy tham khảo phần Hỗ trợ hoặc FAQ (Câu hỏi thường gặp) của website.
Bước 3: Định Vị Mục “Hủy Đăng Ký” hoặc “Huỷ Thành Viên”
Sau khi đăng nhập vào tài khoản, hãy tìm kiếm mục “Hủy đăng ký”, “Huỷ thành viên”, “Cancel Subscription”, hoặc các từ tương tự. Mục này thường nằm trong phần cài đặt hoặc thông tin tài khoản.
Bước 4: Xác Nhận Việc Hủy Đăng Ký
Một số dịch vụ sẽ yêu cầu bạn xác nhận việc hủy đăng ký bằng cách nhập mật khẩu hoặc trả lời câu hỏi bảo mật. Hãy làm theo hướng dẫn của website để hoàn tất quá trình.
Bước 5: Lưu Giữ Thông Tin Xác Nhận
Sau khi hoàn tất việc hủy đăng ký, hãy lưu giữ email hoặc thông báo xác nhận từ phía nhà cung cấp dịch vụ. Điều này sẽ giúp bạn chứng minh bạn đã hủy đăng ký thành công nếu có bất kỳ vấn đề gì phát sinh về phí trong tương lai.
Bước 6: Liên Hệ Hỗ Trợ Khách Hàng (Nếu cần)
Nếu bạn gặp khó khăn trong việc hủy đăng ký, đừng ngần ngại liên hệ với bộ phận hỗ trợ khách hàng của dịch vụ. Họ sẽ hướng dẫn bạn từng bước một.
Lưu ý: Thời gian hủy đăng ký và hiệu lực của việc hủy có thể khác nhau tùy thuộc vào từng dịch vụ. Hãy đọc kỹ điều khoản và điều kiện của nhà cung cấp để hiểu rõ hơn về chính sách hủy đăng ký của họ.
#huydangkyservice #huydangky #huydangkyonline #cachhuydangky #tienich #thongtinthuvi #giupdo #tienichcuocsong #dichvutruc tuyến
Giới thiệu How to cancel your subscription
: How to cancel your subscription
Hãy viết lại bài viết dài kèm hashtag về việc đánh giá sản phẩm và mua ngay tại Queen Mobile bằng tiếng VIệt: How to cancel your subscription
Mua ngay sản phẩm tại Việt Nam:
QUEEN MOBILE chuyên cung cấp điện thoại Iphone, máy tính bảng Ipad, đồng hồ Smartwatch và các phụ kiện APPLE và các giải pháp điện tử và nhà thông minh. Queen Mobile rất hân hạnh được phục vụ quý khách….
_____________________________________________________
Mua #Điện_thoại #iphone #ipad #macbook #samsung #xiaomi #poco #oppo #snapdragon giá tốt, hãy ghé [𝑸𝑼𝑬𝑬𝑵 𝑴𝑶𝑩𝑰𝑳𝑬]
✿ 149 Hòa Bình, phường Hiệp Tân, quận Tân Phú, TP HCM
✿ 402B, Hai Bà Trưng, P Tân Định, Q 1, HCM
✿ 287 đường 3/2 P 10, Q 10, HCM
Hotline (miễn phí) 19003190
Thu cũ đổi mới
Rẻ hơn hoàn tiền
Góp 0%
Thời gian làm việc: 9h – 21h.
KẾT LUẬN
Hãy viết đoạn tóm tắt về nội dung bằng tiếng việt kích thích người mua: How to cancel your subscription
Skype is still one of the best options to make international calls, especially if you want to connect to someone who isn’t internet savvy. Skype is one of the few services that allows you to call a mobile or landline number.
While the online Skype services are free, connecting to a mobile or landline number requires you to buy Skype credits or a subscription. If you no longer need a Skype subscription and are looking for steps to cancel it, you’ve come to the right place.
Here’s how to cancel your Skype subscription on Windows, Mac, Android, iPhone, and the top Chromebooks.
Cancel your Skype subscription in easy steps
If you want to cancel your Skype subscription, cancel it three to four days before your renewal date to prevent automatic charges for the next month. Also, if you’ve been charged for the next month, you don’t have to wait for the month to end to cancel your service. You can cancel the service now, and the subscription automatically lapses at the end of the paid month.
The steps to cancel your Skype subscription depend on the device you use and the payment services you used to buy the subscription. We mention the steps to cancel your Skype subscription on desktop and mobile devices. Use the steps suited for your device to get the job done.
How to cancel your Skype subscription on Windows or Mac desktop
You can cancel your Skype subscription using Skype’s desktop apps for Windows and macOS systems. You can also cancel your Skype subscription using its web app. Since the steps for desktop and web apps are the same, we use the web app for demonstration.
- Open a browser on your desktop device, visit Skype’s website, and log in with your account information.
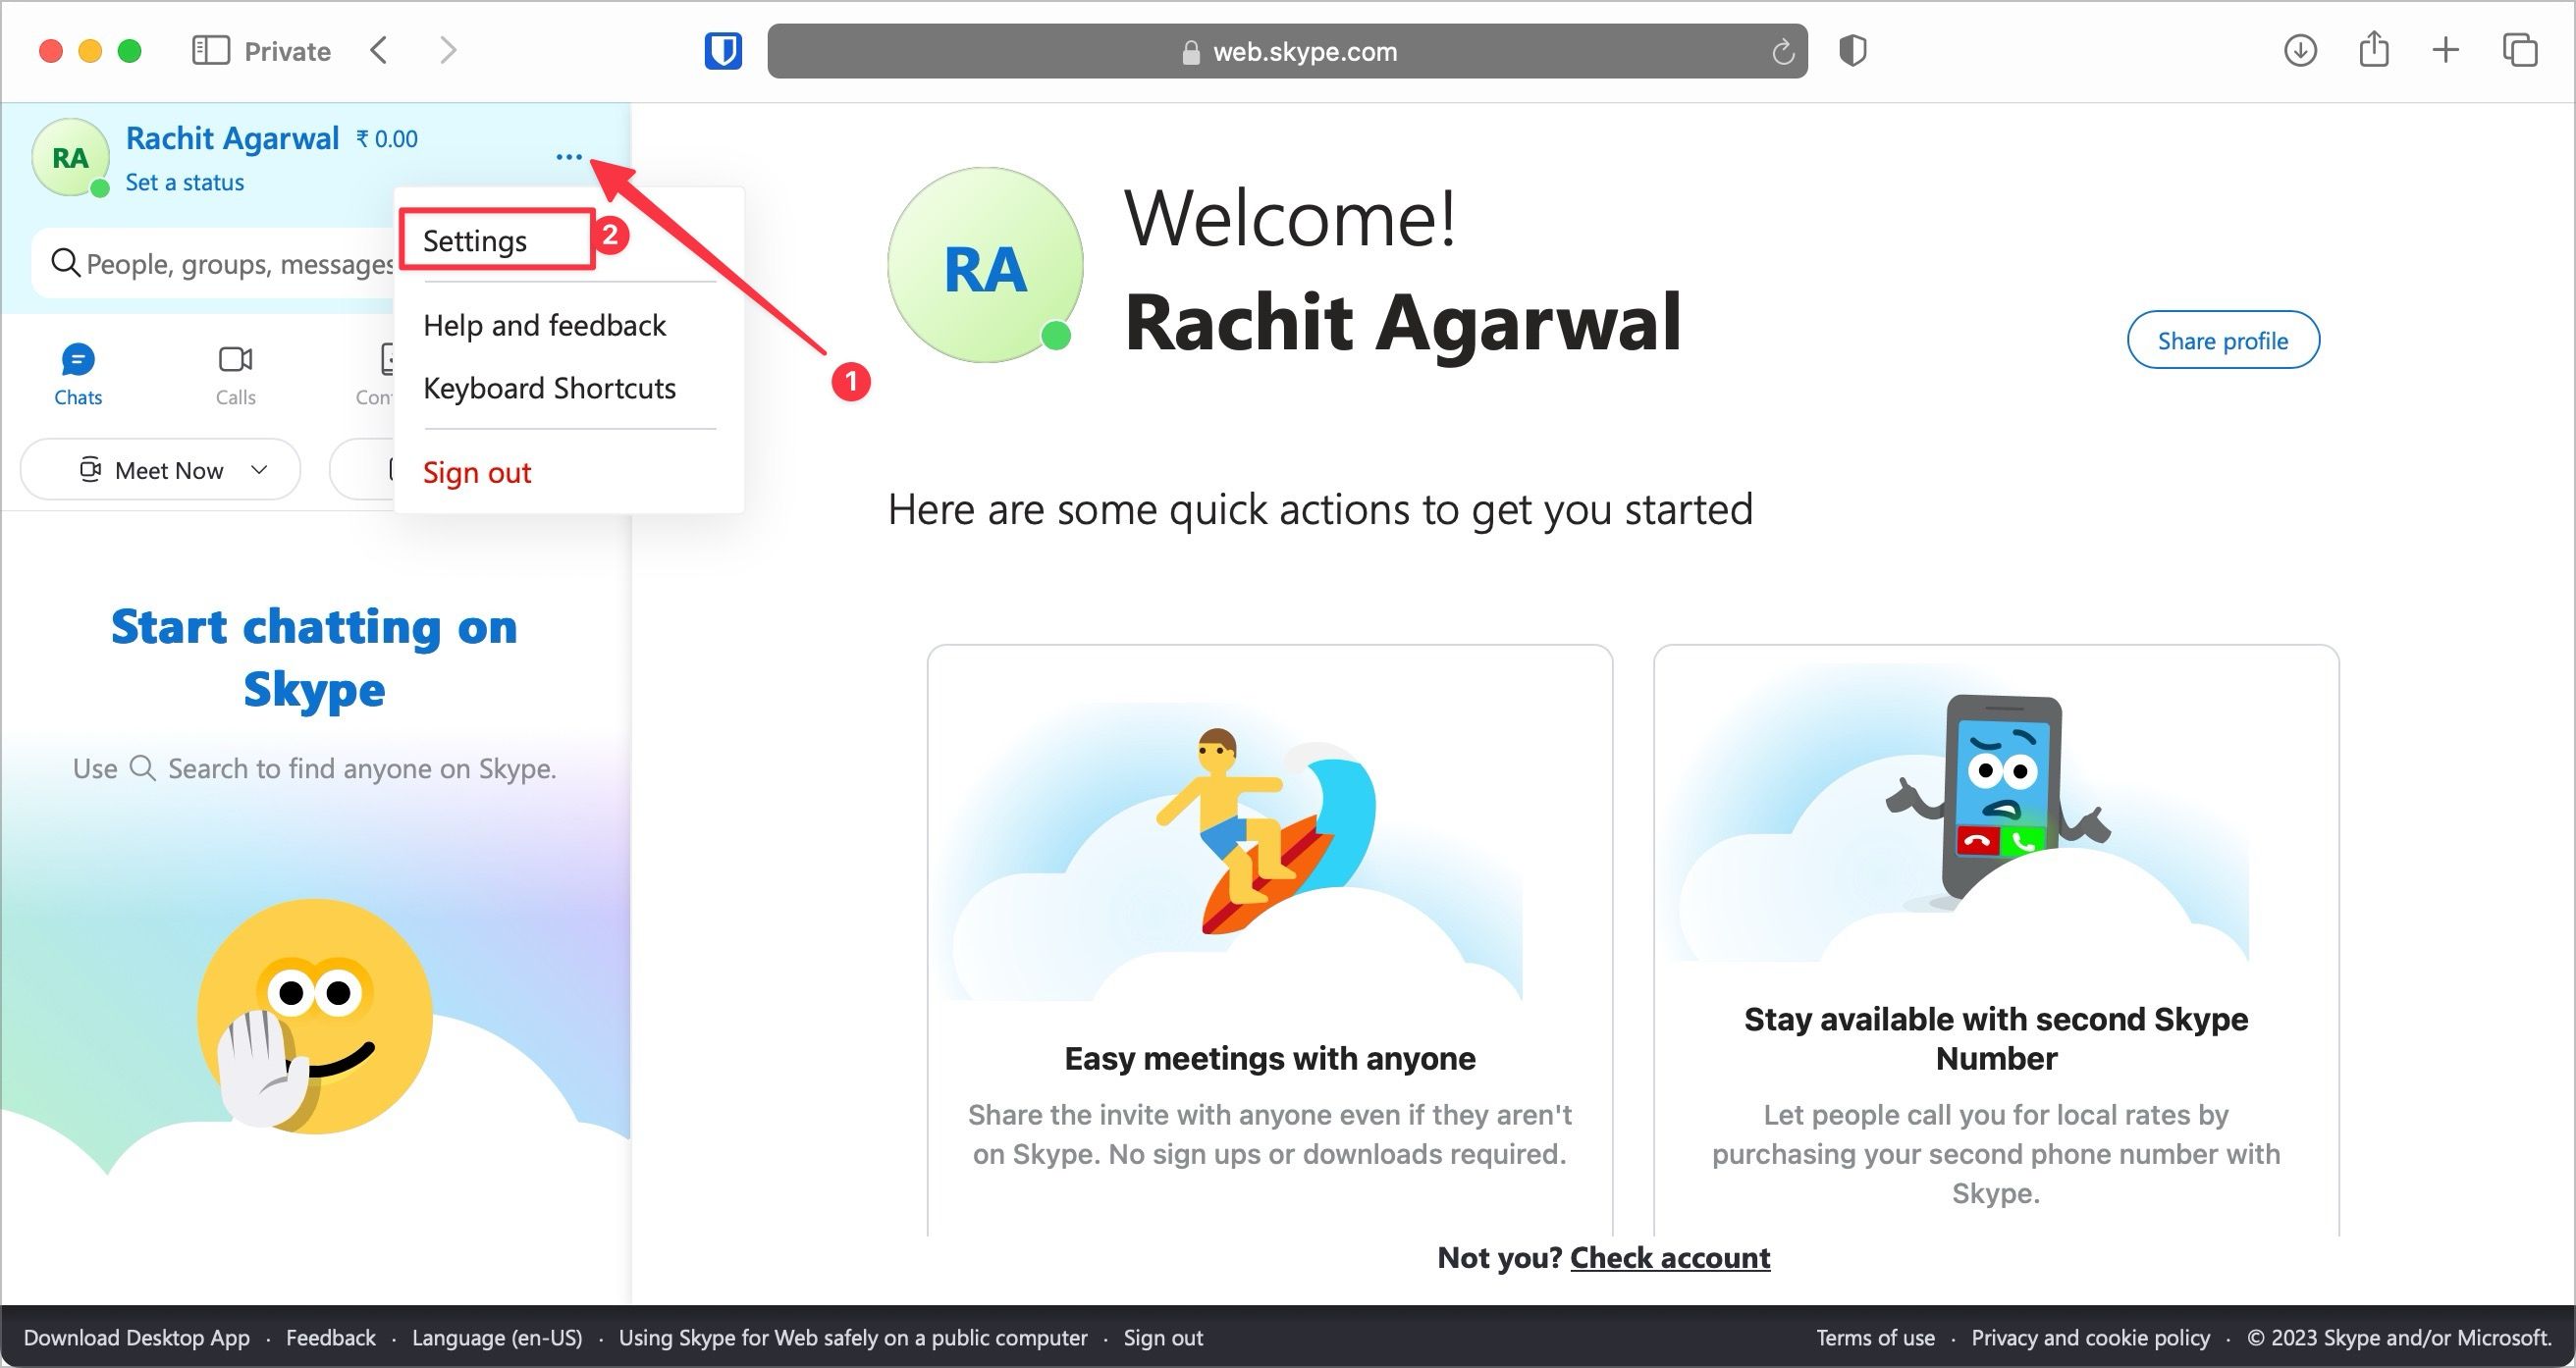
- Click the three-dot button next to your name and choose the Settings option.
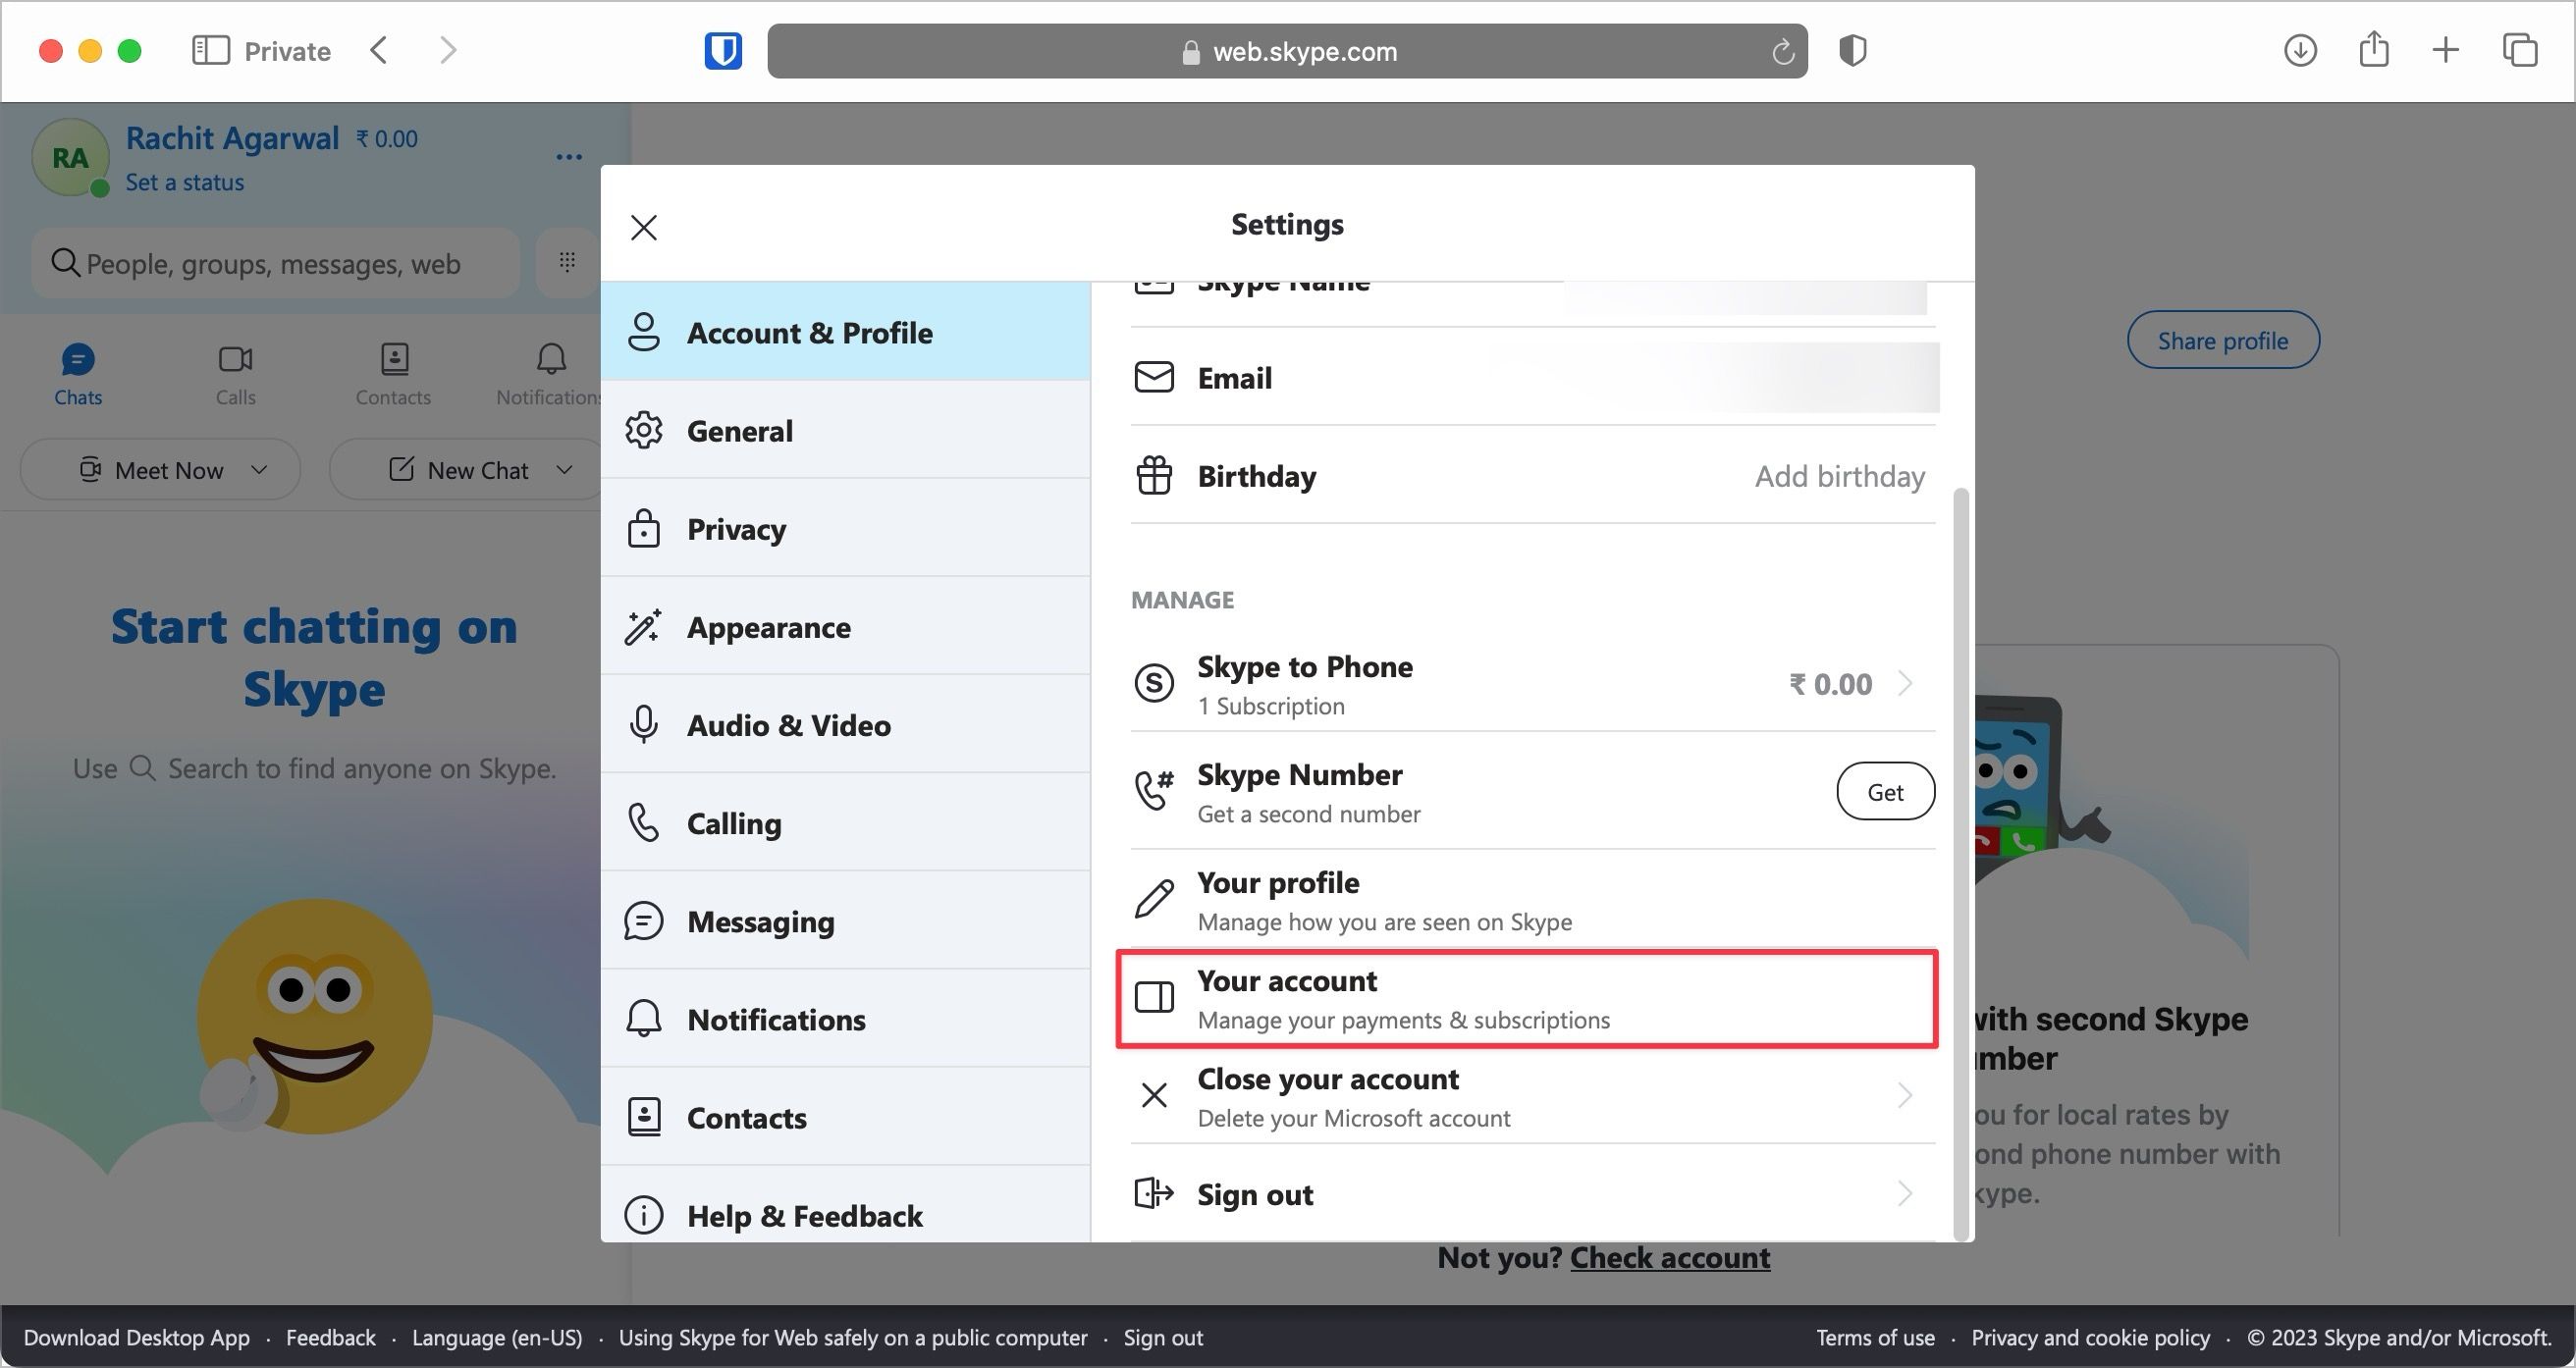
- With the Account & Profile option selected, scroll down the right panel and click the Your account option.
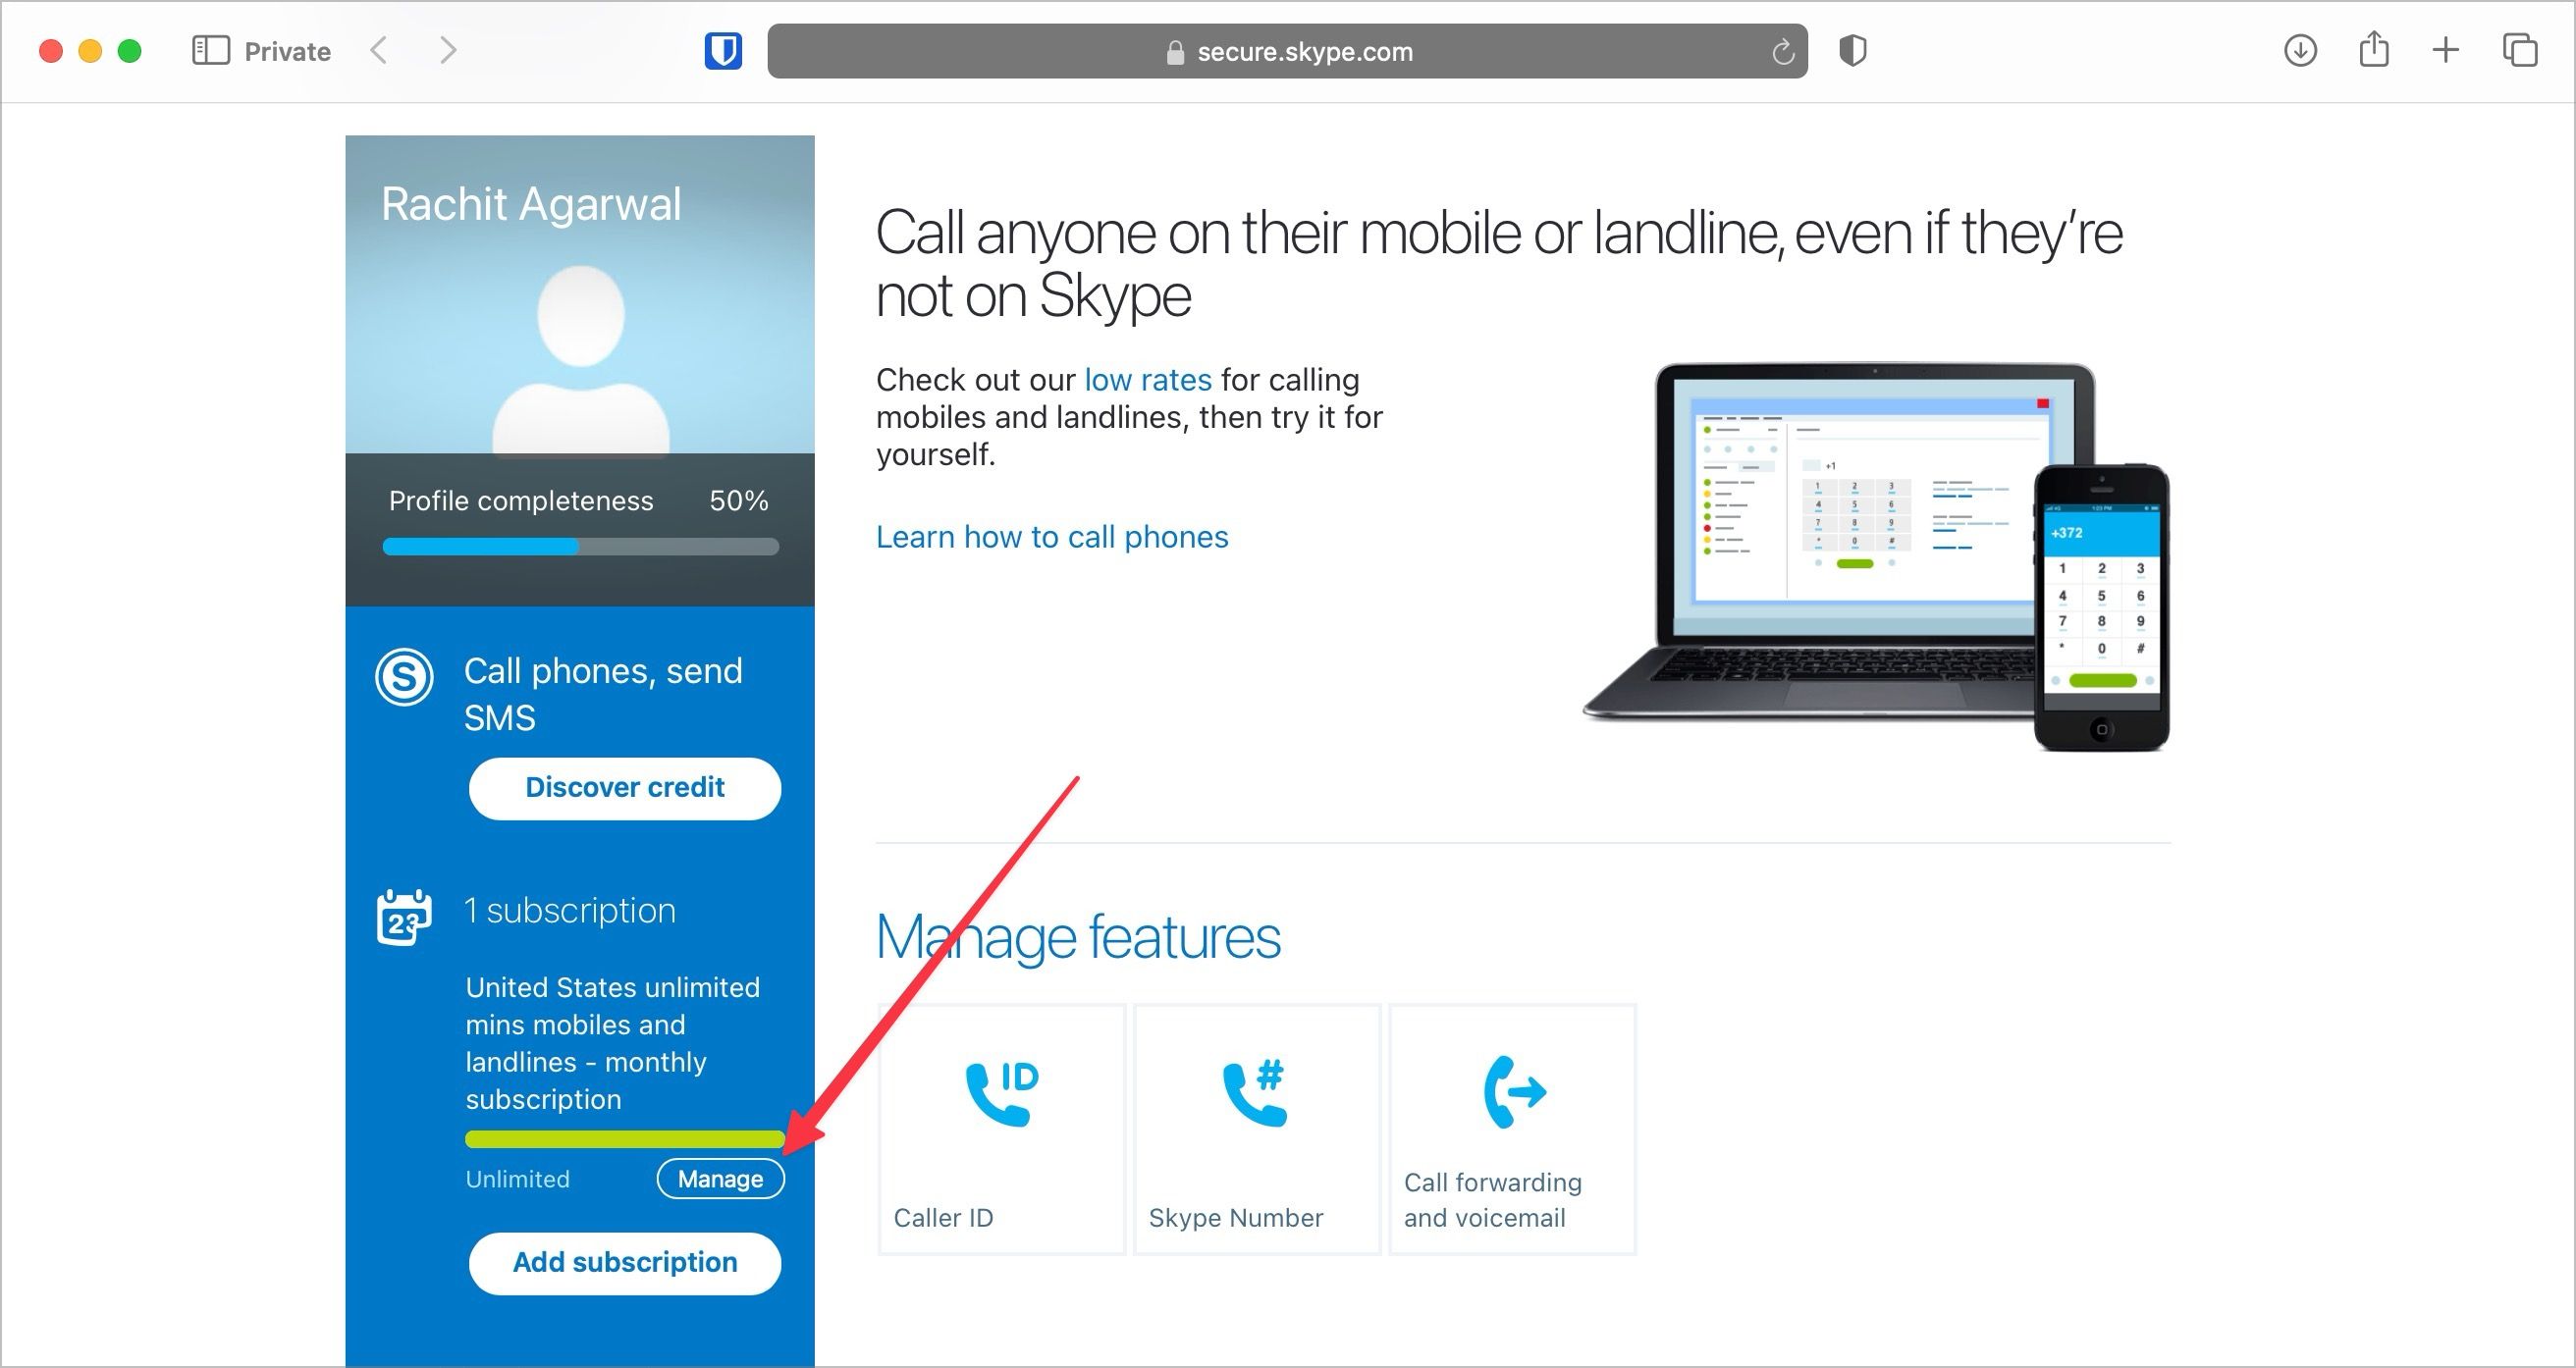
- A new tab with your Skype account page opens. Click the Manage button to proceed.
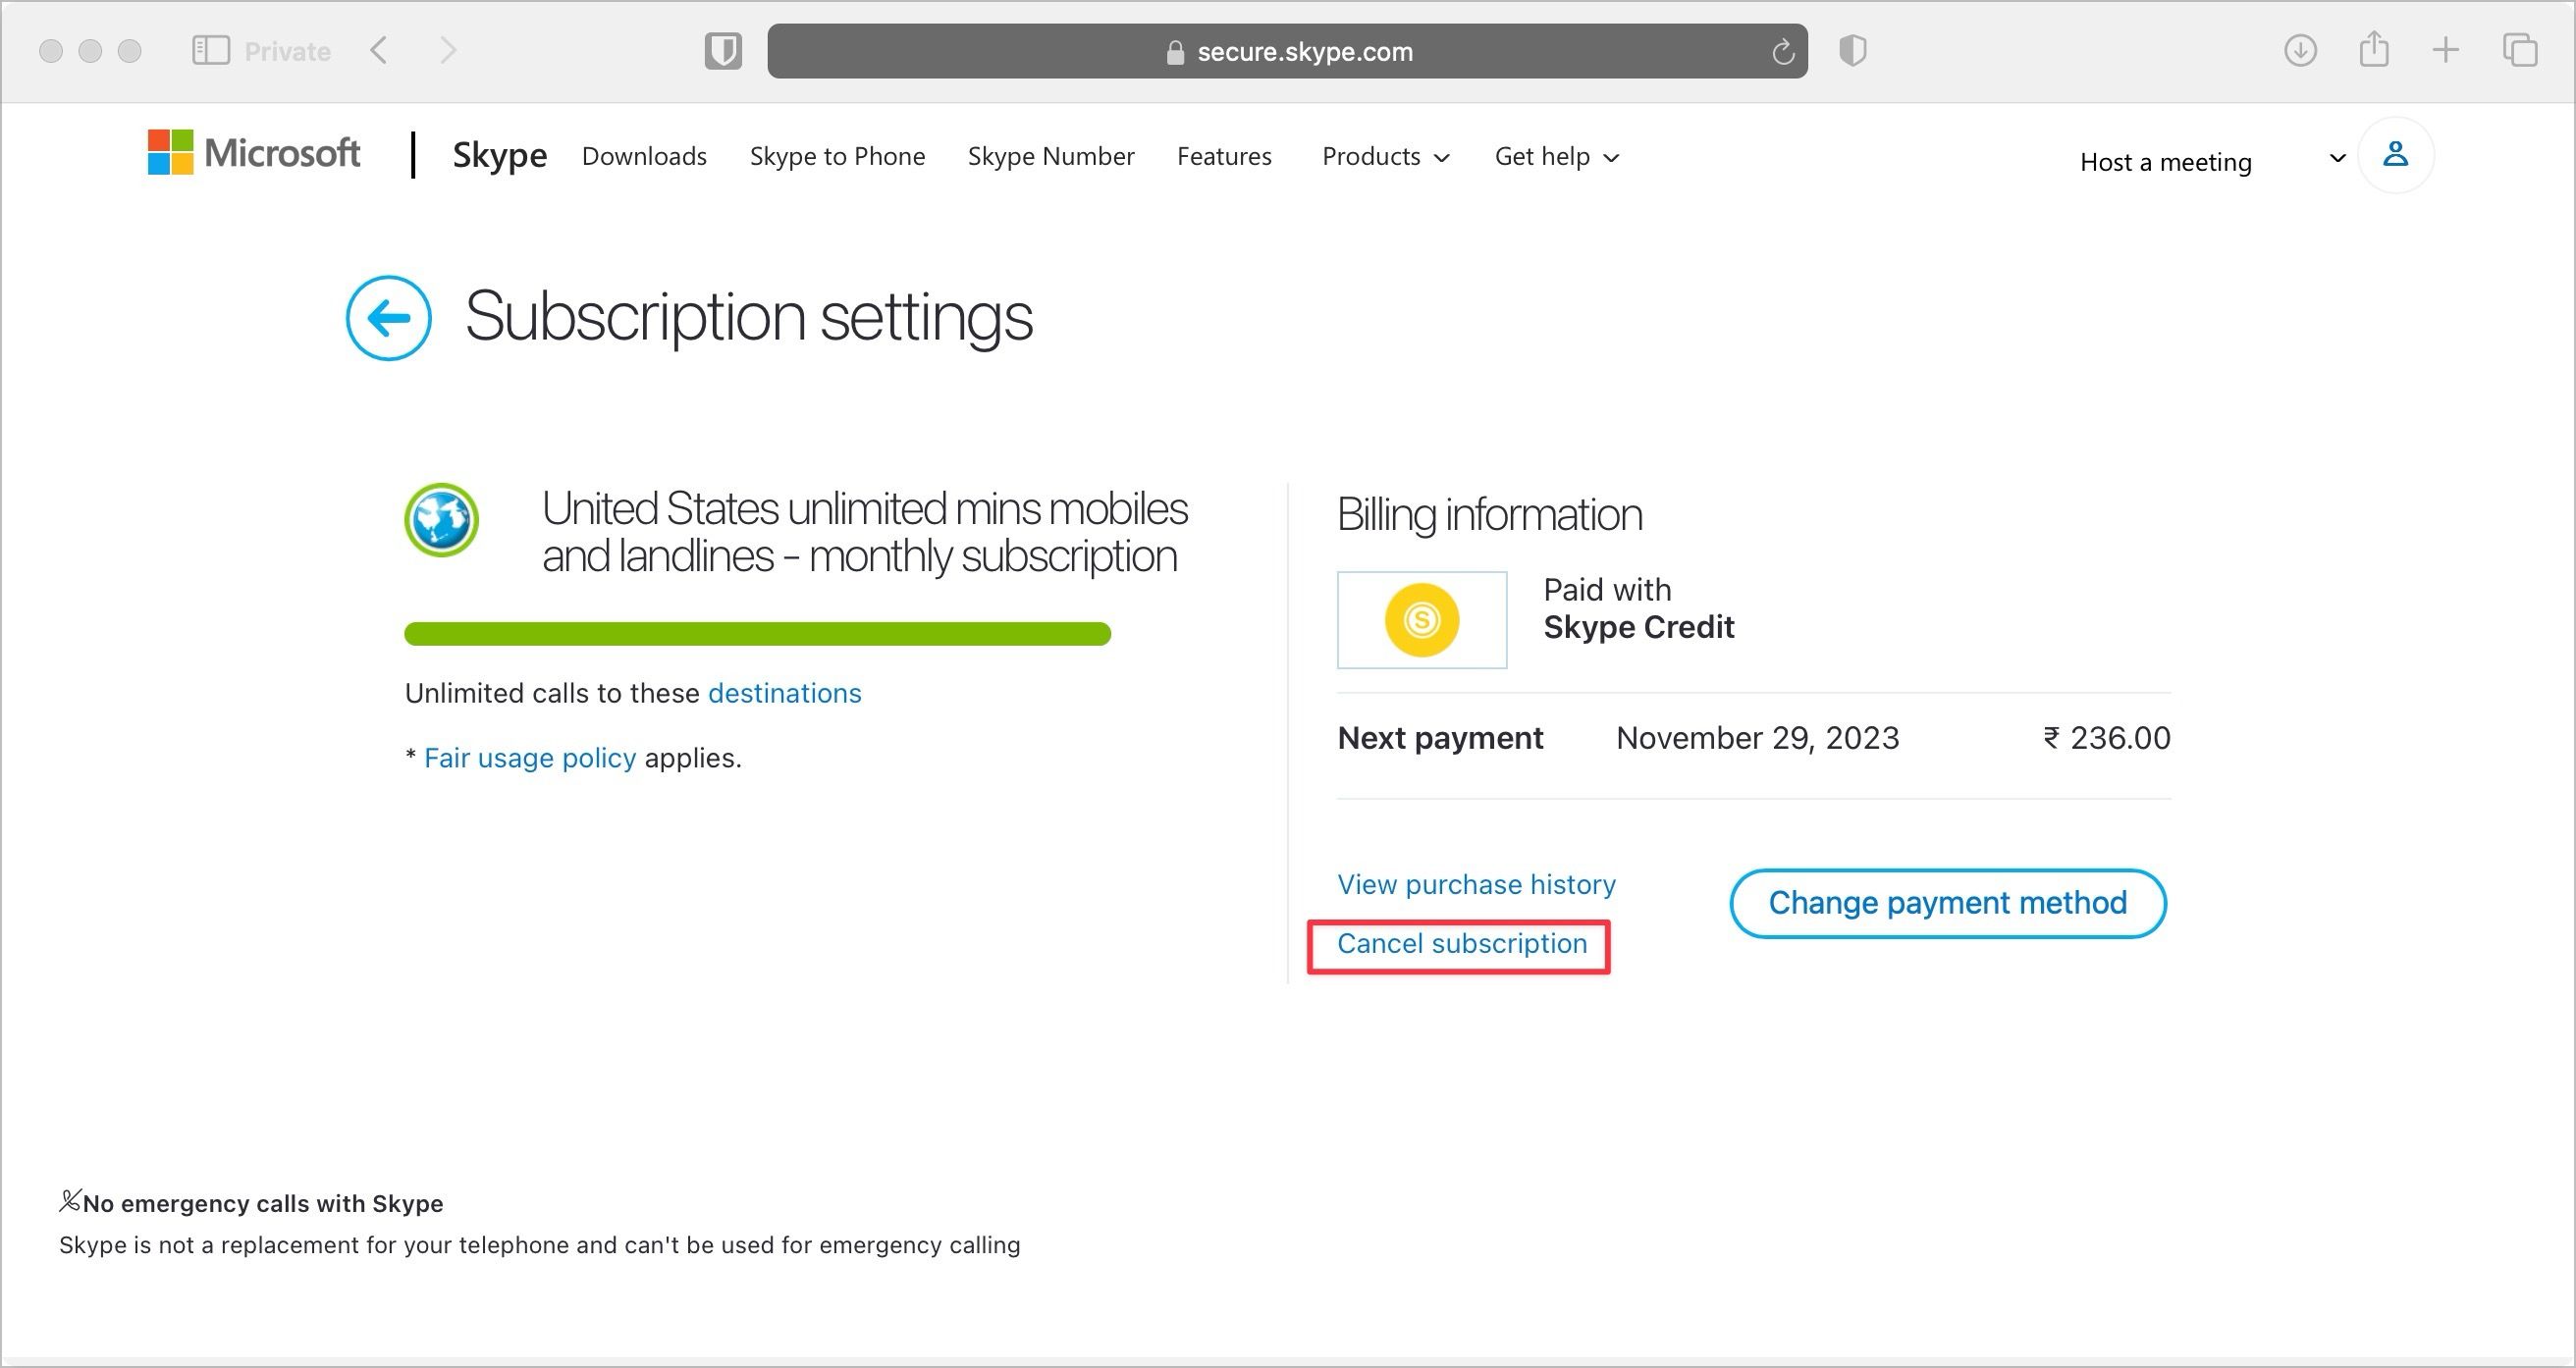
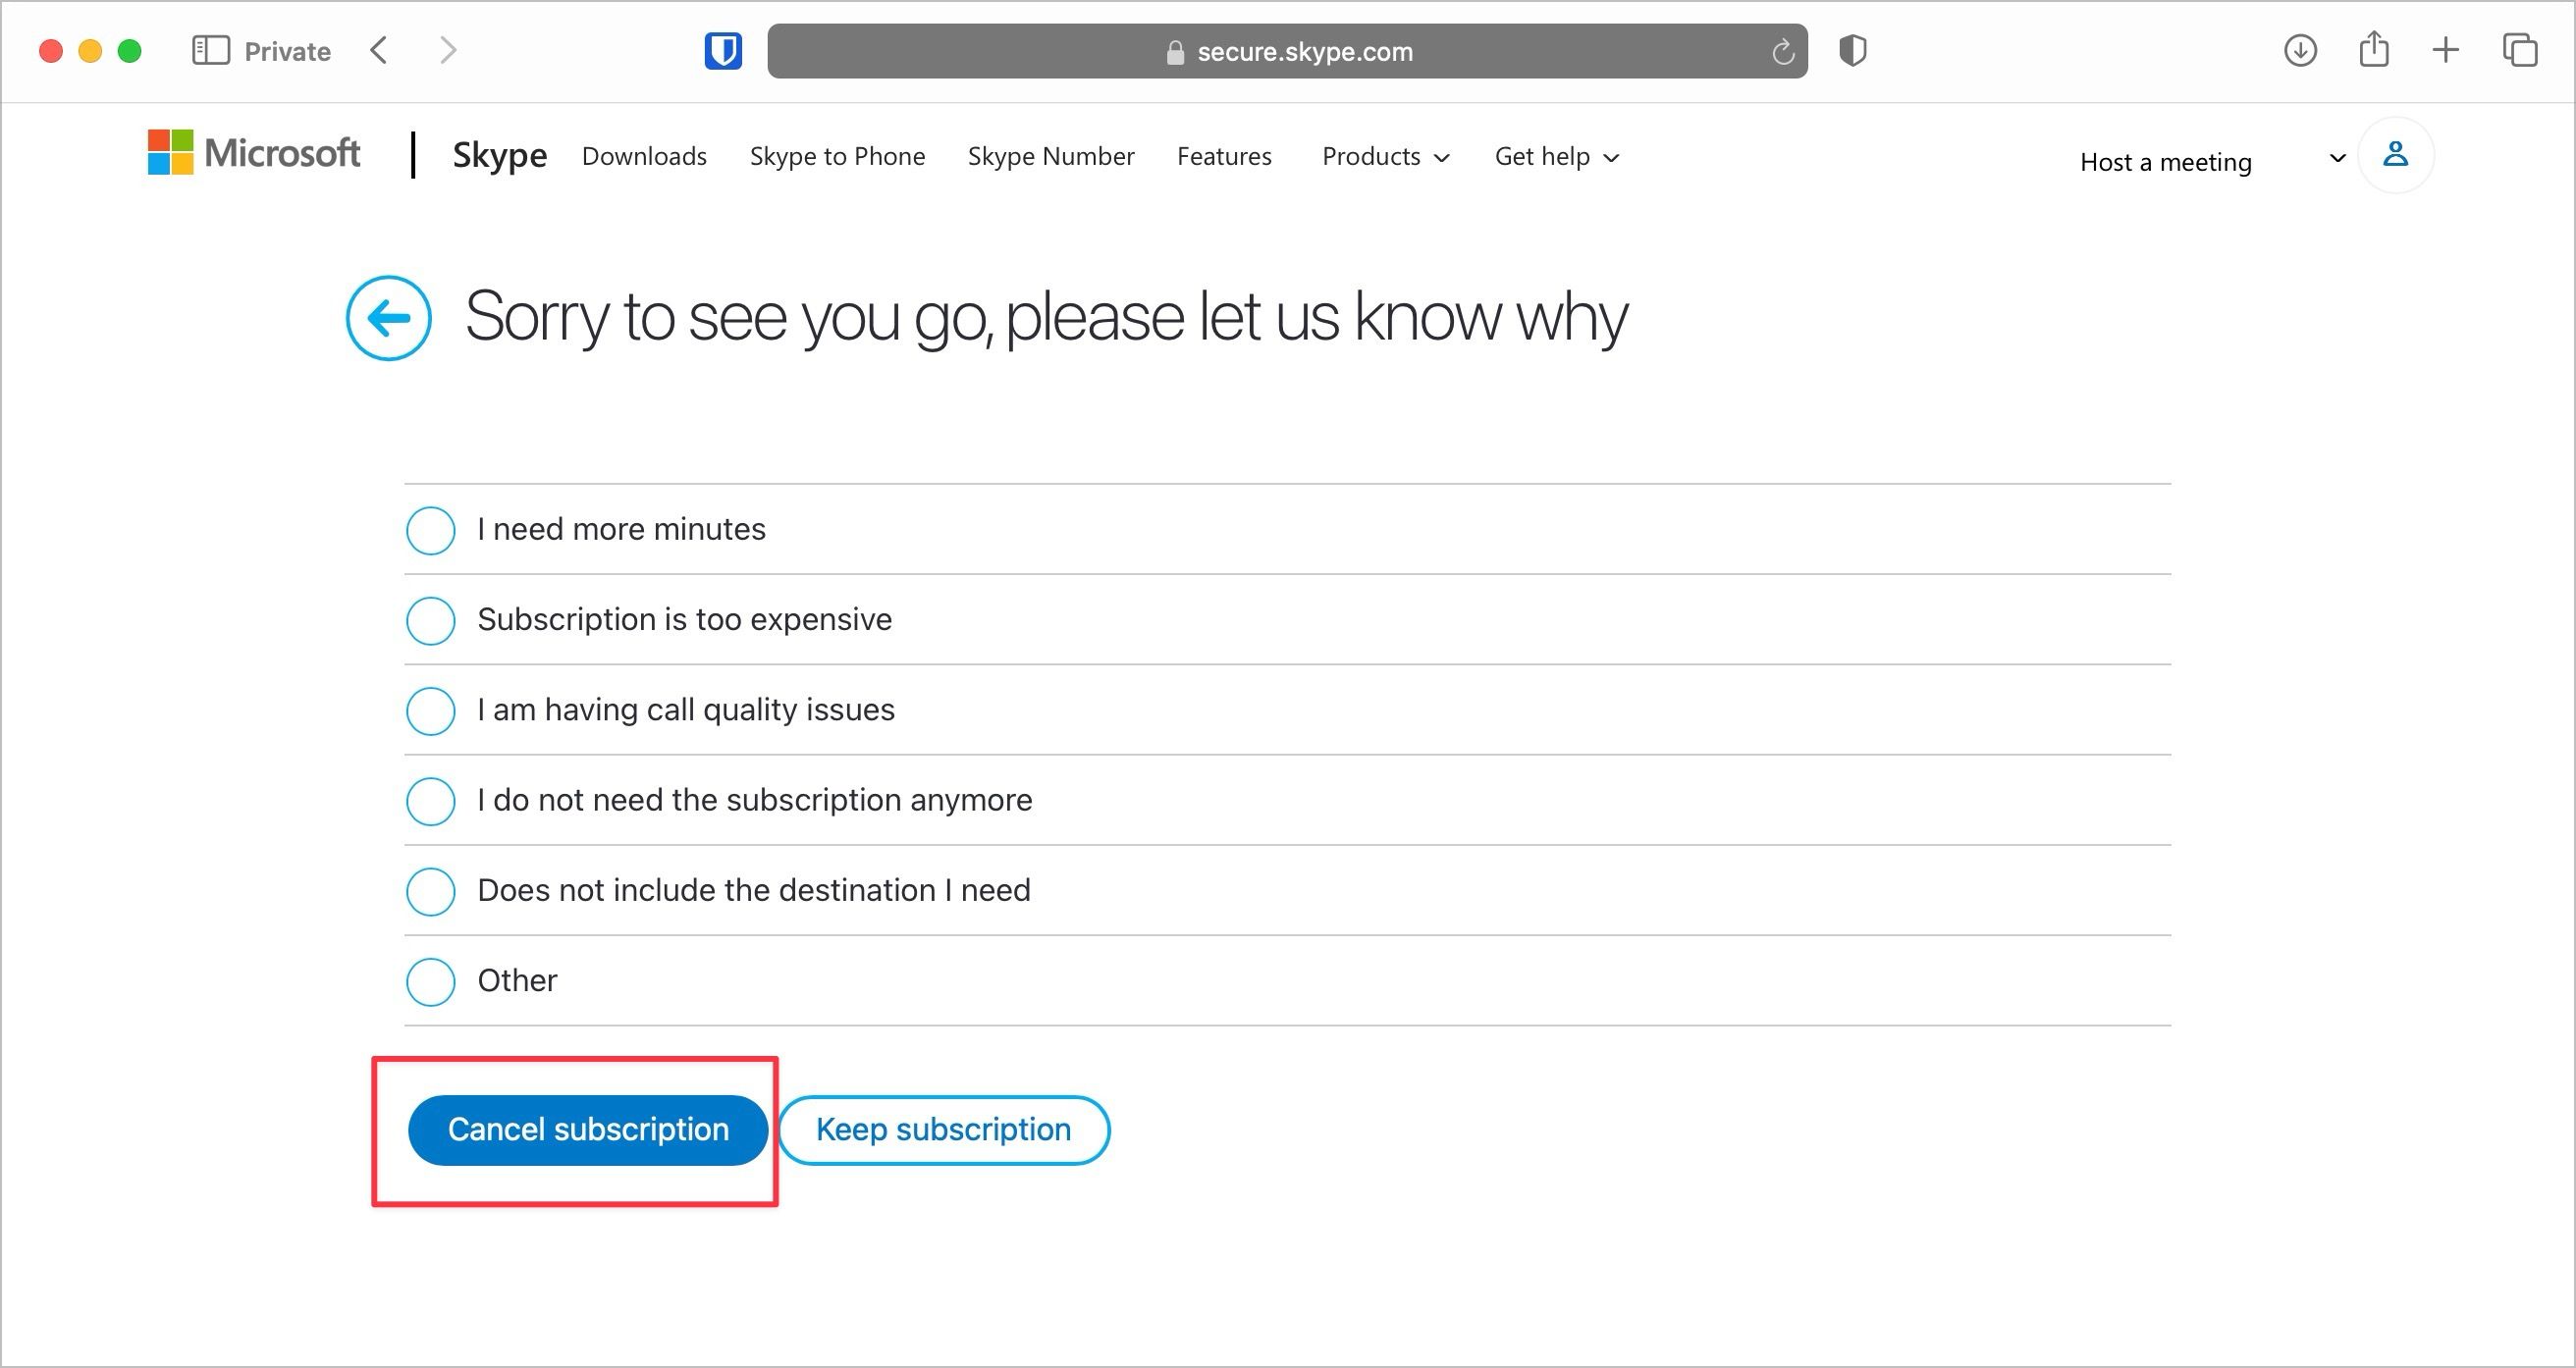
- Click the Cancel subscription button.
- Select the cancelation reason and click the Cancel subscription button to cancel your subscription.
How to cancel your Skype subscription on Android and iPhone
There are two ways to cancel your Skype subscription on Android. The method you use depends on how you purchased the subscription. If you purchased the subscription via Skype’s online platform, the process is the same as on the desktop. If you purchased the subscription via Play Store or App Store, cancel it as you cancel other app subscriptions on your Android or iOS device.
Cancel Skype web subscription on Android and iPhone
The steps to cancel the Skype subscription on Android and iPhone are the same if you purchased the subscription using Skype’s web platform. We use a Google Pixel to demonstrate the steps. You can use the same steps on any Android or iOS device.
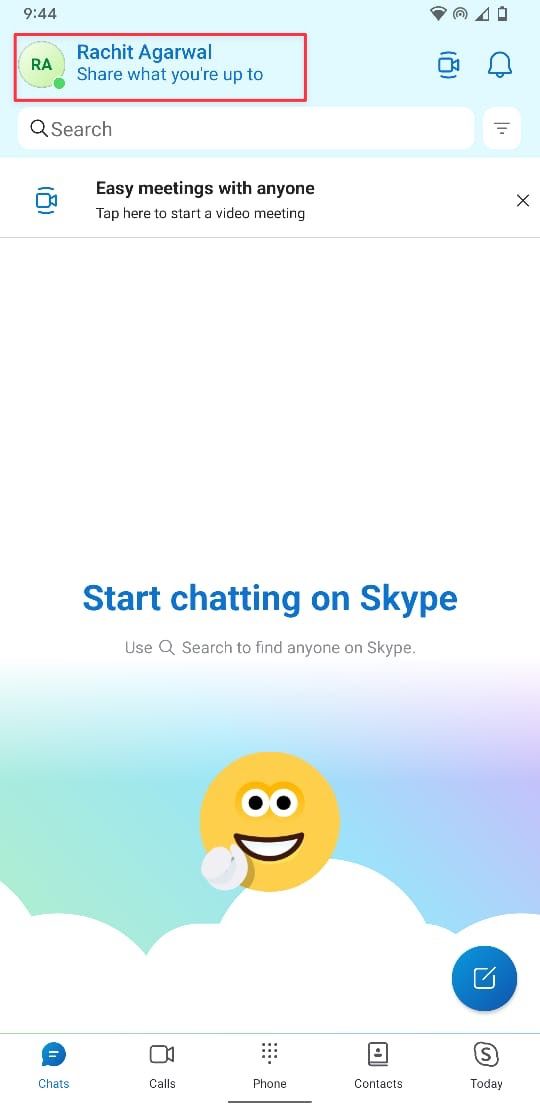
- Launch the Skype app on your Android smartphone and tap your name.
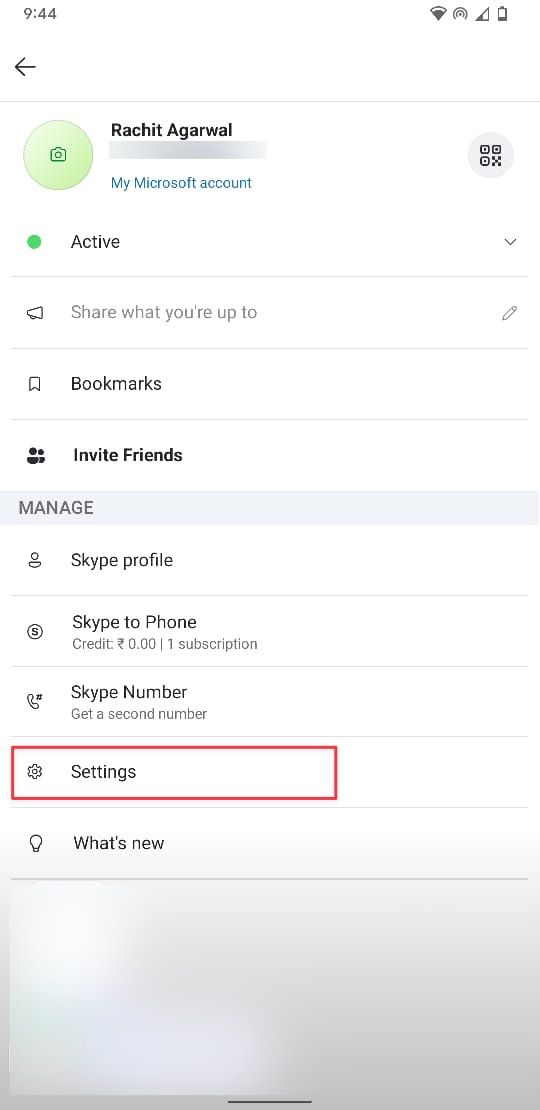
- Scroll down to find Settings and tap to open it.
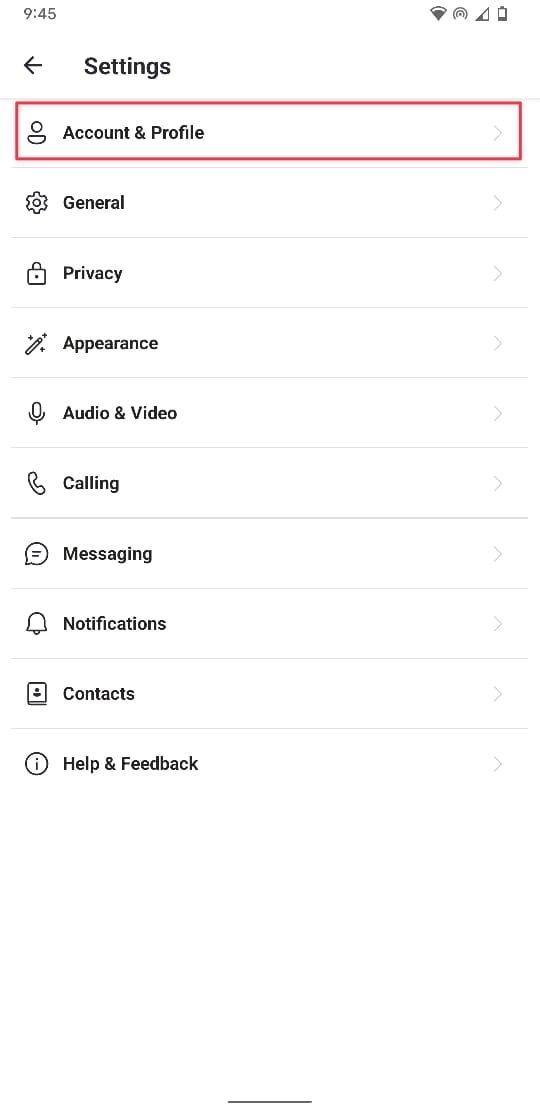
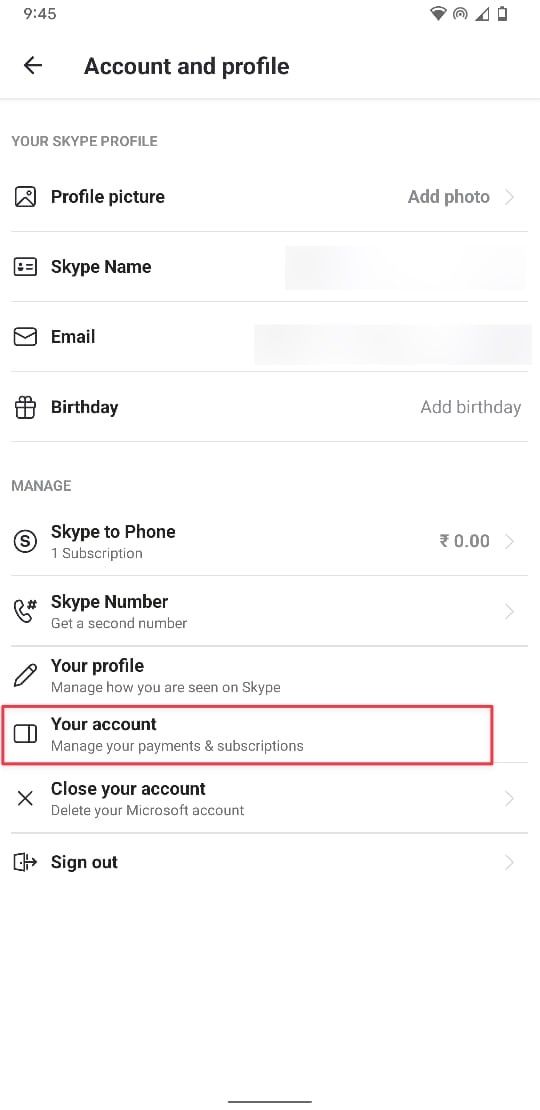
- Tap the Accounts & Profile option and tap the Your account option.
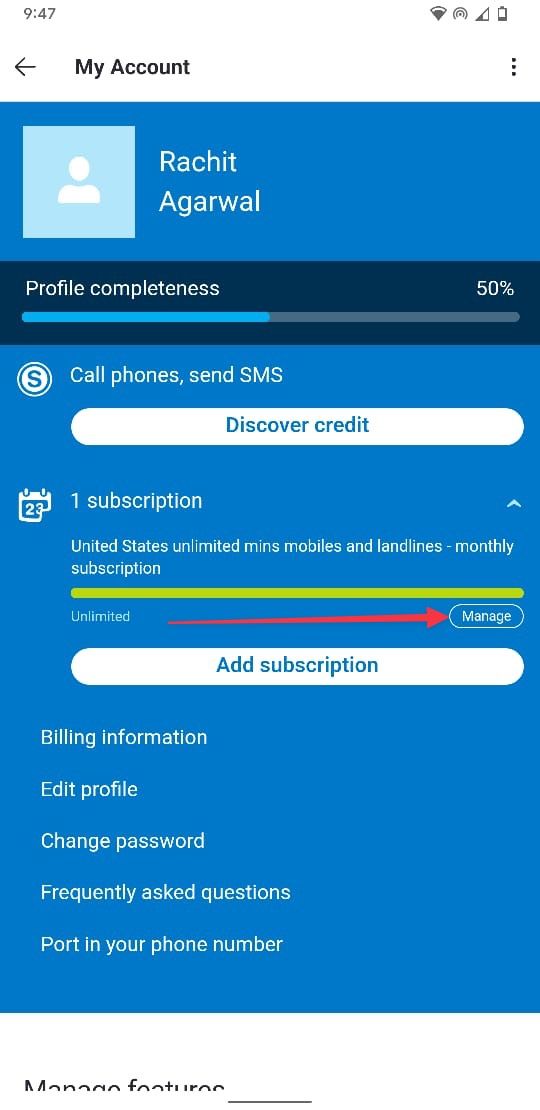
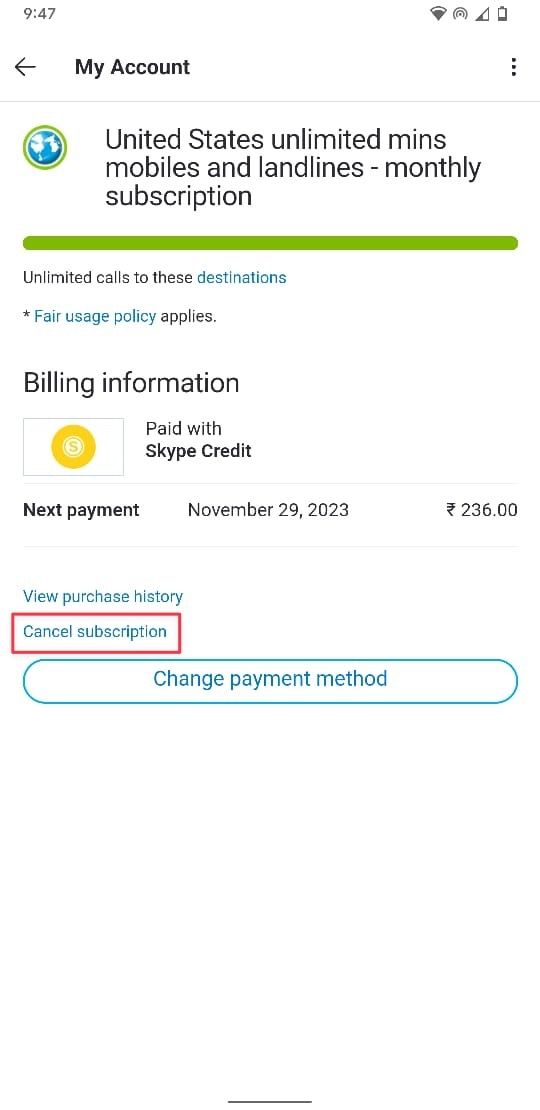
- Tap Manage and use the Cancel subscription button.
- Enter the cancelation reason if you want, and tap the Cancel subscription button to cancel your subscription.
Cancel the Skype subscription purchased through the Google Play Store
If you purchased the Skype subscription via the Google Play Store, follow the steps below to cancel it.
- Open the Play Store on your Android device and click your profile picture.
- Select the Payments & subscriptions option.
- Tap Subscriptions to see a list of your app subscriptions.
- Select Skype and follow the onscreen instructions to cancel your subscription.
Cancel Skype subscription on iPhone purchased via the App Store
If you want to cancel your Skype subscription purchased via the App Store on your iPhone or iPad, follow the steps below.
- Launch the App Store on your iPhone and tap your profile picture in the upper-right corner.
- Tap Subscriptions to see a list of your subscriptions.
- Tap Skype and use the Cancel subscription button to cancel your subscription.
Scrap your Skype subscription in easy steps
You can easily cancel your Skype subscription no matter which device you use. We mentioned the steps to cancel the Skype subscription on desktop and mobile devices, so you can cancel it no matter which device you use. Even after you cancel your Skype subscription, you can still enjoy its online audio and video calling services for free. If you want to eliminate Skype, use one of the best video-calling apps to meet your connectivity needs.

Khám phá thêm từ Phụ Kiện Đỉnh
Đăng ký để nhận các bài đăng mới nhất được gửi đến email của bạn.

