

Review sản phẩm
Cài đặt và Kết nối Chuông Ring Chime Pro: Hướng dẫn chi tiết

Th5
## Cài đặt và Kết nối Chuông Ring Chime Pro: Hướng dẫn chi tiết
Bài viết này sẽ hướng dẫn bạn từng bước cách thiết lập và liên kết Ring Chime Pro với hệ thống Ring của bạn một cách nhanh chóng và dễ dàng. Chúng tôi sẽ giải thích rõ ràng các bước cần thiết, từ việc chuẩn bị đến việc kiểm tra kết nối thành công. Cho dù bạn là người dùng Ring lần đầu hay đã quen thuộc với các sản phẩm của Ring, bài viết này vẫn sẽ cung cấp cho bạn thông tin hữu ích và giúp bạn tận dụng tối đa tính năng của Ring Chime Pro.
Phần 1: Chuẩn bị trước khi cài đặt
Trước khi bắt đầu, hãy đảm bảo bạn đã có sẵn những thứ sau:
* Ring Chime Pro: Thiết bị mà bạn muốn cài đặt.
* Ứng dụng Ring: Đã được tải xuống và đăng nhập trên điện thoại thông minh hoặc máy tính bảng của bạn.
* Mạng Wi-Fi hoạt động: Đảm bảo mạng Wi-Fi của bạn ổn định và có tín hiệu mạnh tại vị trí đặt Ring Chime Pro. Ghi nhớ mật khẩu Wi-Fi của bạn.
* Tuốc nơ vít (nếu cần): Tùy thuộc vào vị trí lắp đặt, bạn có thể cần đến tuốc nơ vít để gắn Ring Chime Pro lên tường.
Phần 2: Cài đặt Ring Chime Pro
1. Cắm Ring Chime Pro vào nguồn điện: Cắm thiết bị vào ổ điện gần vị trí bạn muốn đặt nó. Đèn LED trên Ring Chime Pro sẽ sáng lên, cho biết thiết bị đang được cấp nguồn.
2. Mở ứng dụng Ring: Mở ứng dụng Ring trên điện thoại hoặc máy tính bảng của bạn.
3. Thêm thiết bị mới: Trong ứng dụng, tìm kiếm và chọn tùy chọn “Thêm thiết bị” hoặc tương tự. Ứng dụng sẽ hướng dẫn bạn qua các bước tiếp theo.
4. Kết nối với Wi-Fi: Ứng dụng sẽ yêu cầu bạn chọn mạng Wi-Fi nhà bạn và nhập mật khẩu. Đảm bảo bạn nhập đúng mật khẩu để tránh lỗi kết nối.
5. Kết nối với hệ thống Ring: Sau khi kết nối với Wi-Fi, ứng dụng sẽ hướng dẫn bạn kết nối Ring Chime Pro với hệ thống Ring của bạn. Điều này bao gồm việc liên kết với các thiết bị Ring khác như chuông cửa thông minh hoặc camera an ninh.
6. Kiểm tra kết nối: Sau khi hoàn tất quá trình cài đặt, hãy kiểm tra xem Ring Chime Pro có hoạt động bình thường không. Bạn có thể thử kích hoạt chuông cửa Ring của mình để kiểm tra âm thanh và thông báo.
Phần 3: Khắc phục sự cố
Nếu gặp phải bất kỳ sự cố nào trong quá trình cài đặt, hãy tham khảo phần Hỏi đáp thường gặp trên trang web hỗ trợ của Ring hoặc liên hệ với bộ phận hỗ trợ khách hàng của Ring để được trợ giúp.
Kết luận:
Việc cài đặt và liên kết Ring Chime Pro với hệ thống Ring của bạn là một quá trình đơn giản. Bằng cách làm theo các bước hướng dẫn trên, bạn có thể dễ dàng thiết lập và tận hưởng những tiện ích mà Ring Chime Pro mang lại, bao gồm thông báo âm thanh rõ ràng và tiện lợi hơn khi có người đến nhà.
#RingChimePro #CàiĐặtRing #KếtNốiRing #HướngDẫnRing #AnNinhNhàCửa #SmartHome #Ring #ThiếtBịThôngMinh #AnToànGiaĐình
Giới thiệu How to set up and link your Ring Chime Pro
: How to set up and link your Ring Chime Pro
Hãy viết lại bài viết dài kèm hashtag về việc đánh giá sản phẩm và mua ngay tại Queen Mobile bằng tiếng VIệt: How to set up and link your Ring Chime Pro
Mua ngay sản phẩm tại Việt Nam:
QUEEN MOBILE chuyên cung cấp điện thoại Iphone, máy tính bảng Ipad, đồng hồ Smartwatch và các phụ kiện APPLE và các giải pháp điện tử và nhà thông minh. Queen Mobile rất hân hạnh được phục vụ quý khách….
_____________________________________________________
Mua #Điện_thoại #iphone #ipad #macbook #samsung #xiaomi #poco #oppo #snapdragon giá tốt, hãy ghé [𝑸𝑼𝑬𝑬𝑵 𝑴𝑶𝑩𝑰𝑳𝑬]
✿ 149 Hòa Bình, phường Hiệp Tân, quận Tân Phú, TP HCM
✿ 402B, Hai Bà Trưng, P Tân Định, Q 1, HCM
✿ 287 đường 3/2 P 10, Q 10, HCM
Hotline (miễn phí) 19003190
Thu cũ đổi mới
Rẻ hơn hoàn tiền
Góp 0%
Thời gian làm việc: 9h – 21h.
KẾT LUẬN
Hãy viết đoạn tóm tắt về nội dung bằng tiếng việt kích thích người mua: How to set up and link your Ring Chime Pro
The Ring Chime Pro is one of the best accessories for Ring Doorbells, combining several devices into one. It serves as a chime for your doorbell, allowing you to hear an audio prompt when someone is at your door or when motion is sensed. It also doubles as a Wi-Fi range extender and a nightlight.
Setting it up might be frightening because it’s such a complete product, and you may worry about configuring all the features. Ring products are straightforward to set up. We guide you through the process with step-by-step directions to make things as smooth as possible.
How to connect your Ring Chime Pro to your Wi-Fi network
Before you set up your new Chime Pro, make sure your existing Ring Video Doorbell is set up in the Ring app and that you’re logged in to the Ring app on your phone. After checking that everything is up and running, start the process to install your Chime Pro.
- Unbox your new Ring Chime Pro.
- Slide the power adapter into the Ring Chime Pro. Don’t plug it in yet.
- Open the Ring app on your phone.
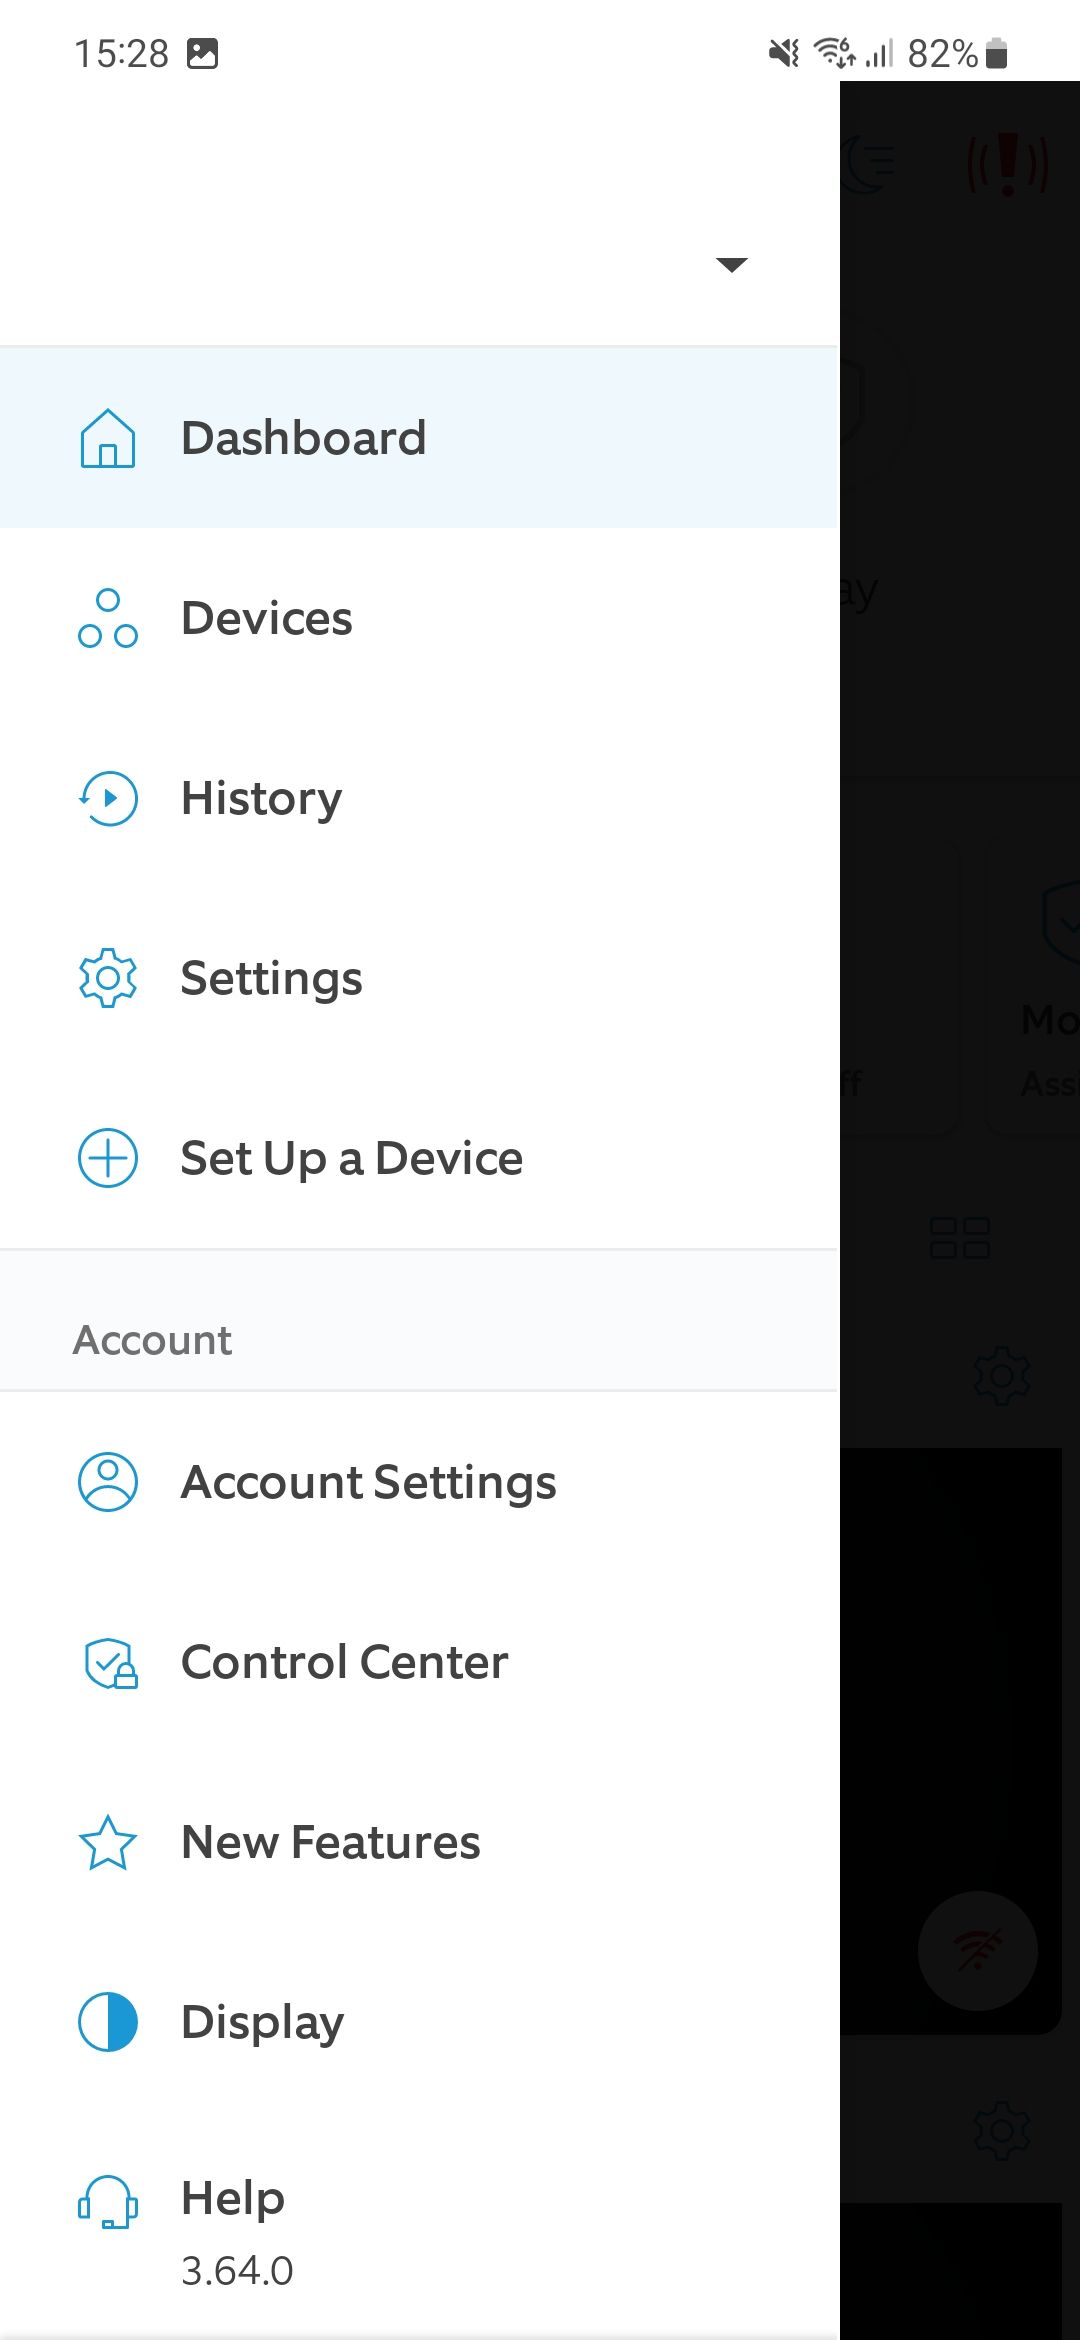
- Open the menu by tapping its icon in the upper-right corner.
- Tap Set Up a Device.
- Tap Chimes.
- Tap the blue I’m ready to scan button.
- Scan the QR code located on the back of the Ring Chime Pro with your phone.
- Give your Chime Pro a name.
- Plug the Chime Pro into a power outlet and wait a few minutes for it to play a tone and the green light to start blinking.
- On your phone’s screen, tap Chime Pro is on.
- Tap the blue I have my password button, then tap I am near the device, and then tap The light is flashing green.
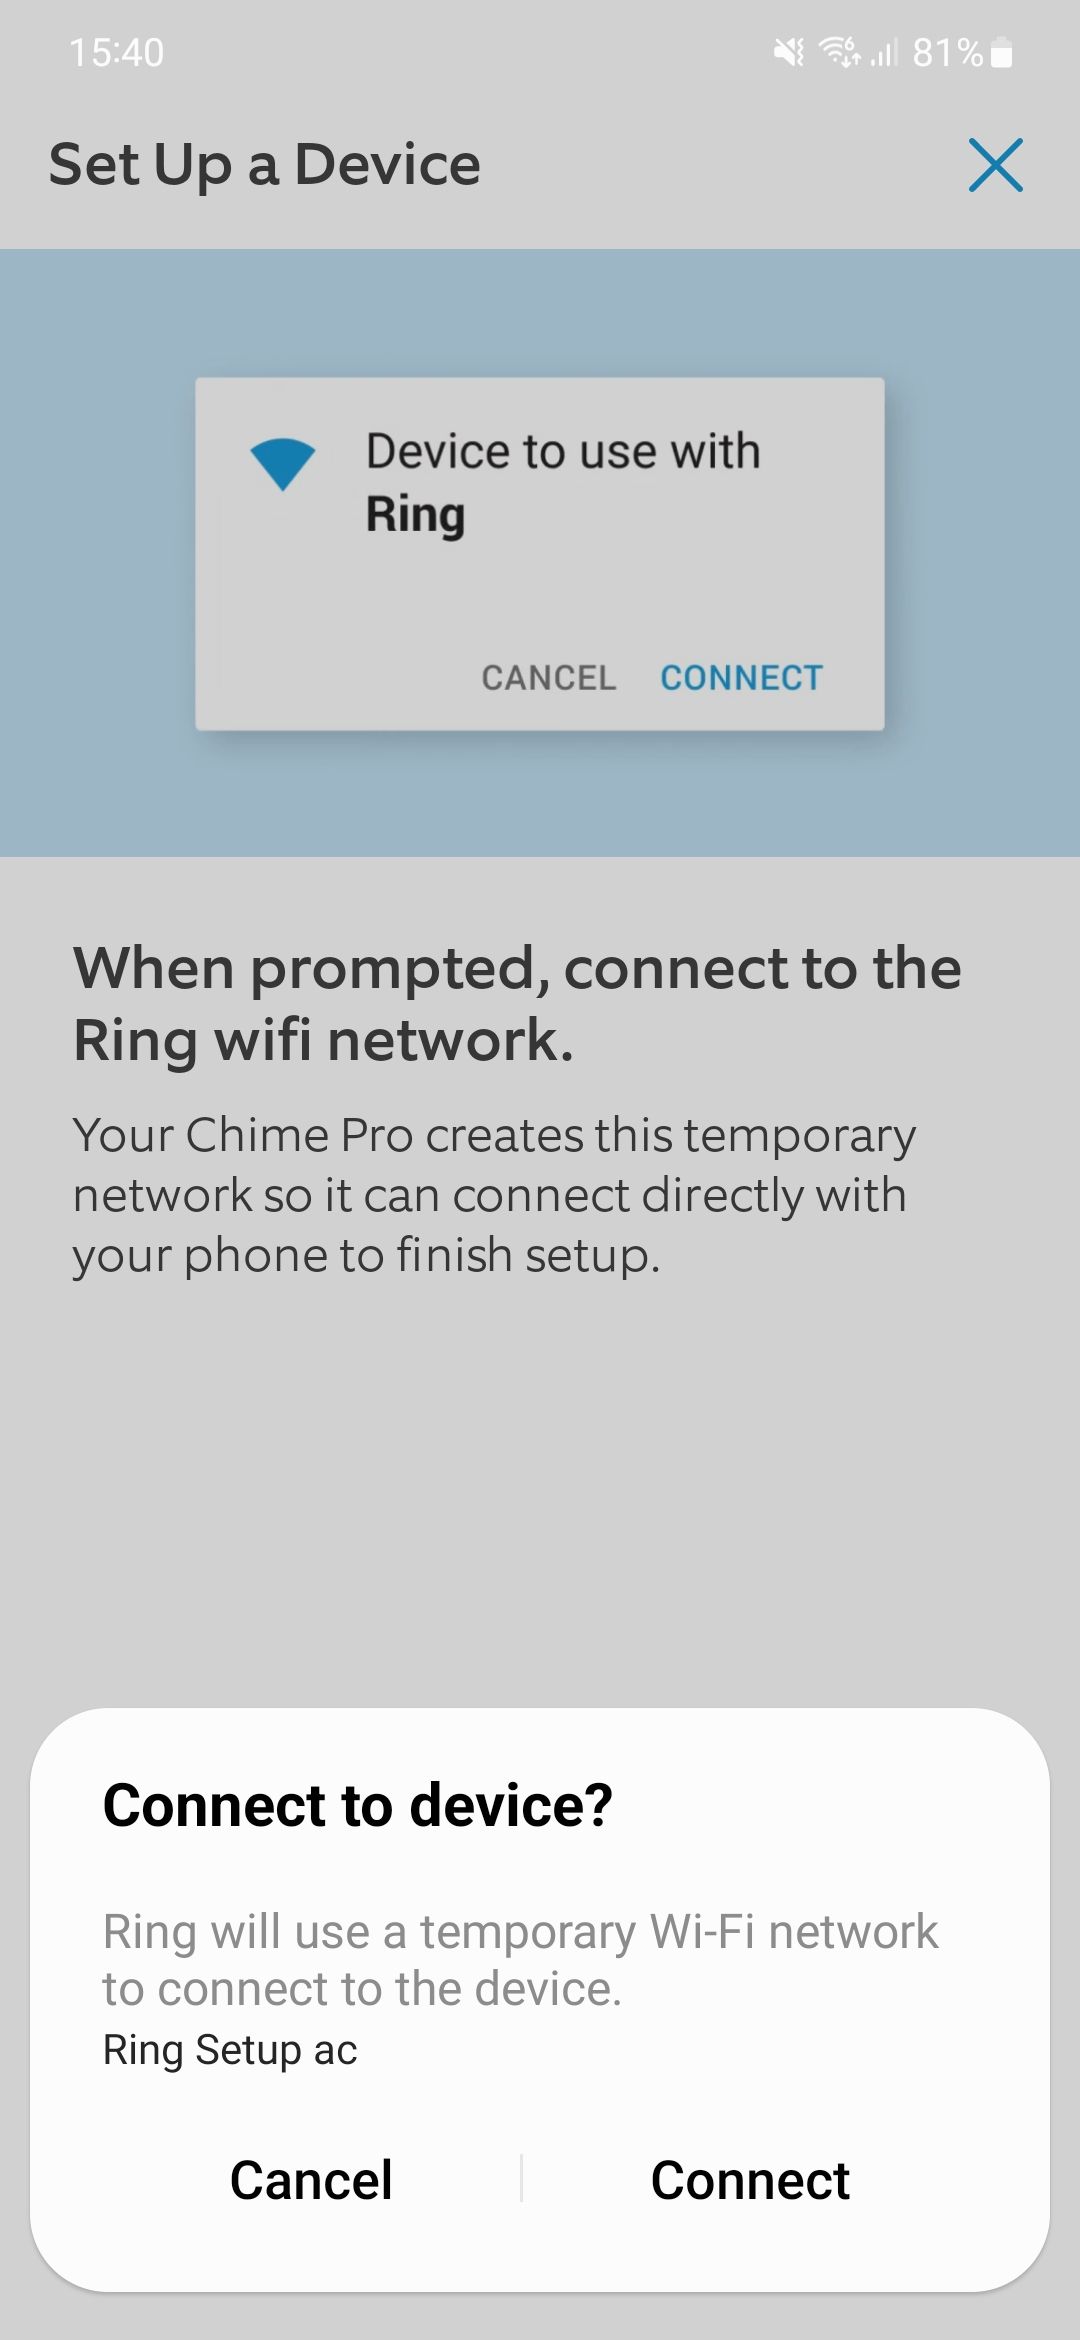
- Tap Got it and wait a few seconds until a prompt appears on your screen. When it does, tap Connect.
- Wait a few seconds for the Chime Pro to connect to your phone and for the list of nearby Wi-Fi networks to appear on your phone’s screen.
- Tap your Wi-Fi network’s name and enter your Wi-Fi password. Then, tap Continue.
- When the Success screen appears and the Chime Pro confirms it’s connected, tap Continue.
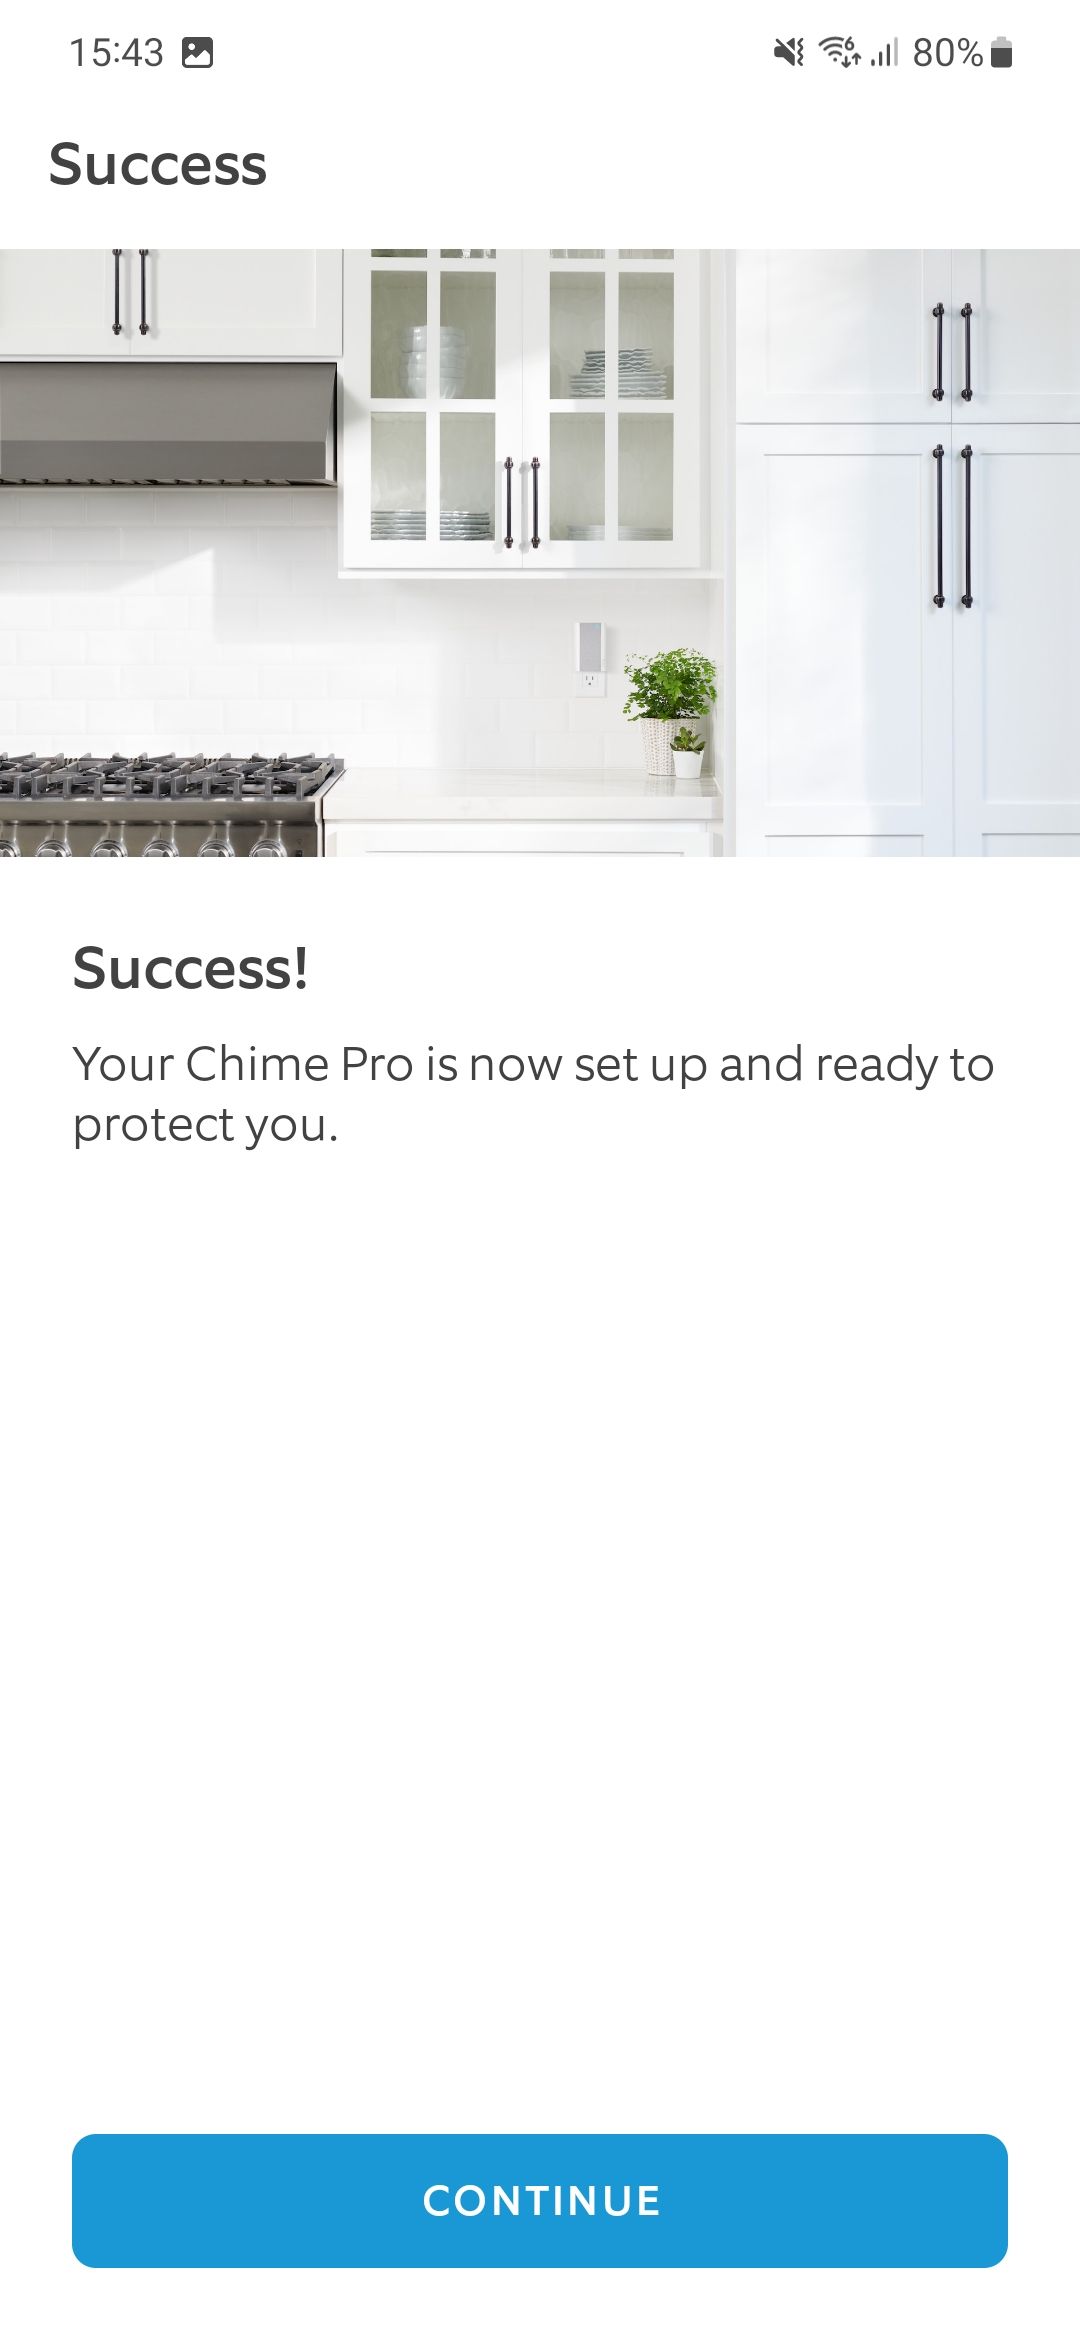
You’re done connecting your Chime Pro to your Wi-Fi network. Read on to find out how to customize it and select the type of alerts you want to receive.
How to customize and configure your Ring Chime Pro
Now that you’ve successfully connected your new Chime Pro to your Wi-Fi network, let’s see how to customize it according to your needs. If you connect it to Wi-Fi, you are guided through the process. Otherwise, we explain how to access and change your settings after you’ve set them up or skipped the wizard process.
After you’ve tapped Continue at the end of the connection process, you are prompted to customize your new Ring Chime Pro. Tap Continue.
Customize alerts
Your Chime Pro can notify you when someone is at your door or when motion is detected and lets you personalize when these alerts are received.
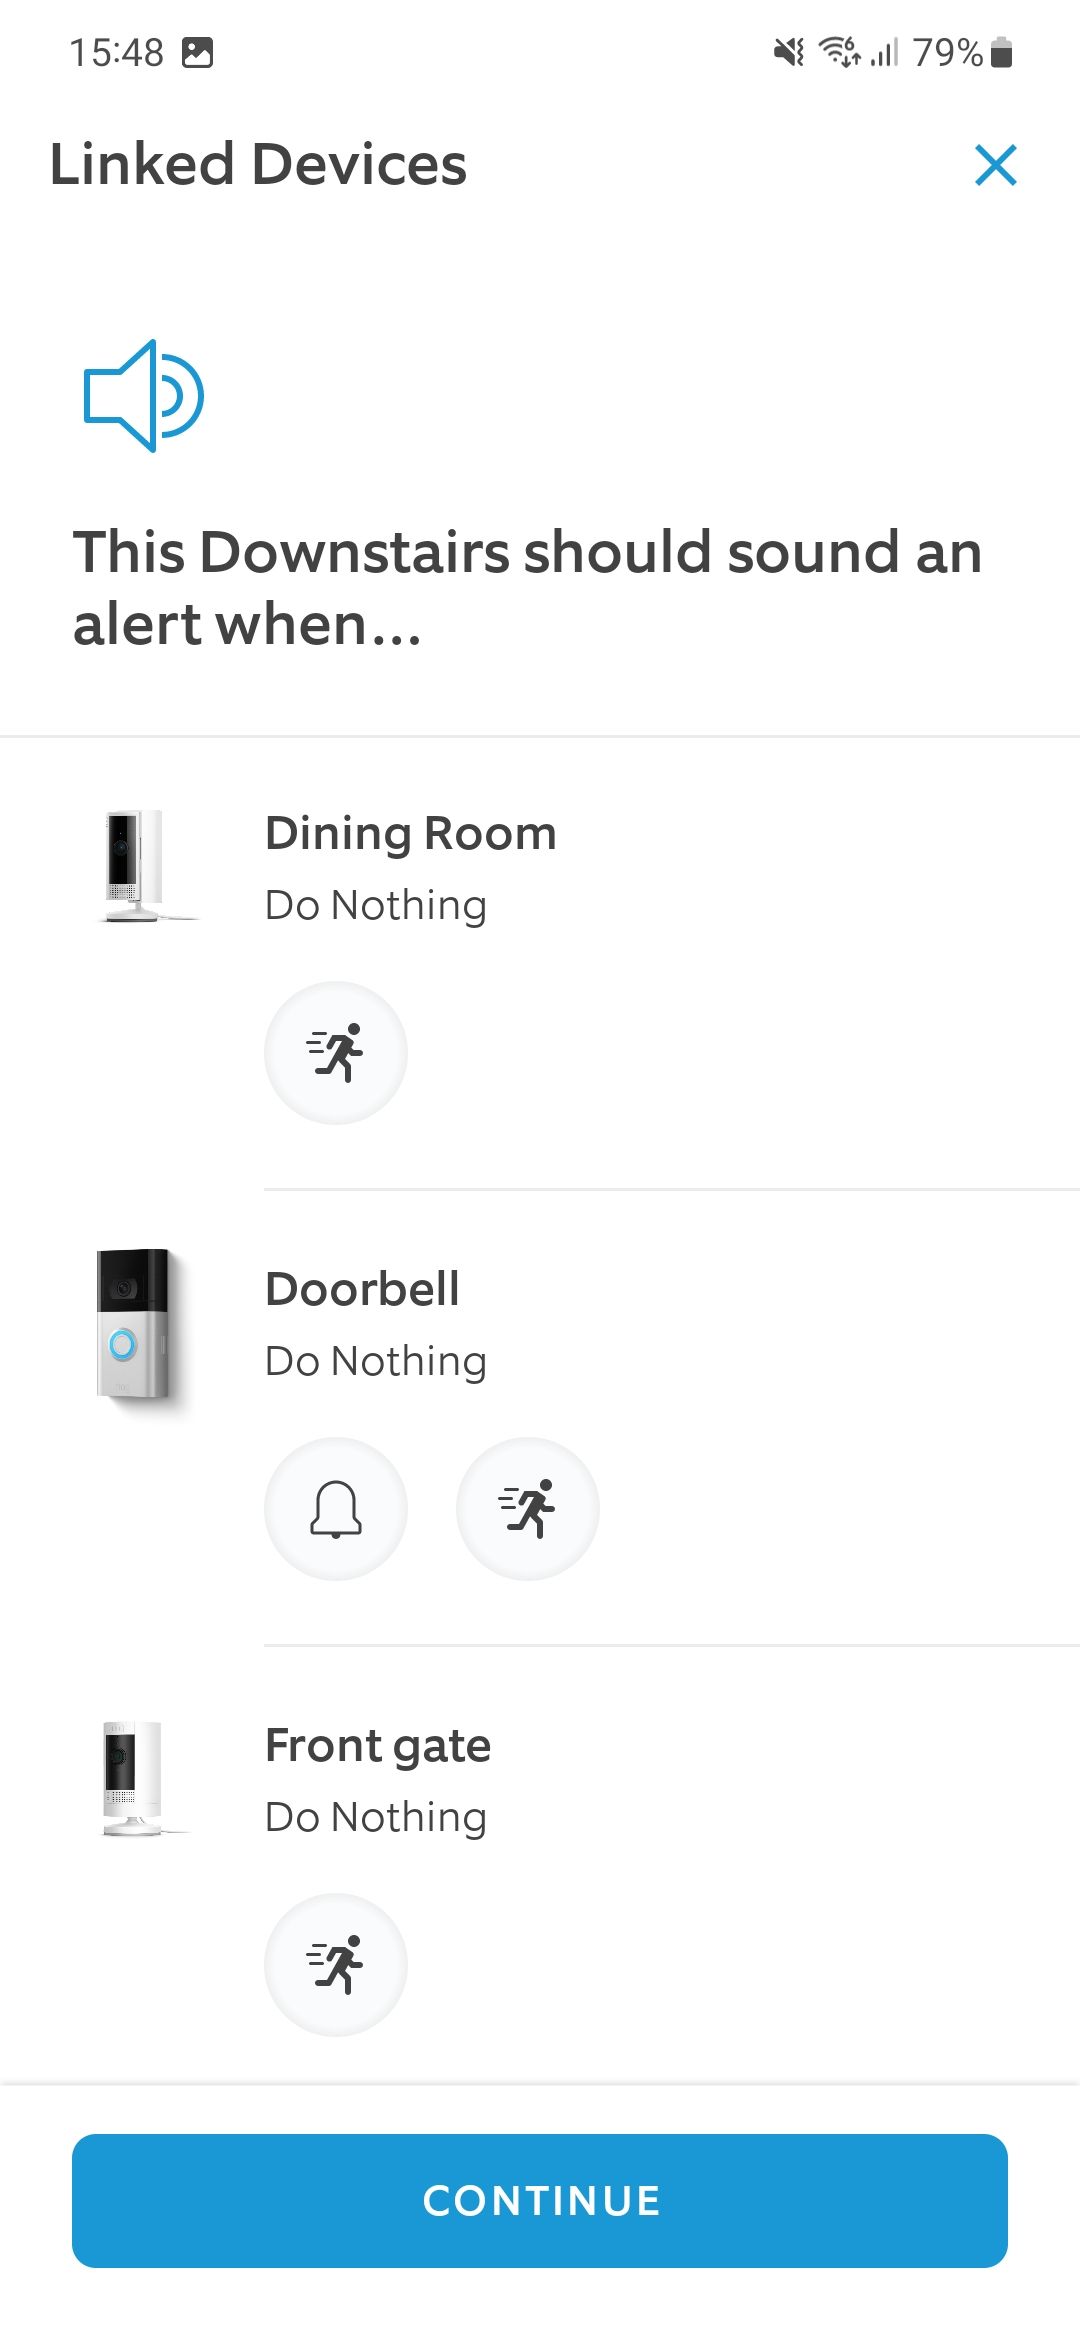
- Tap the blue Select alerts button. For each Ring device you own, you can tap different icons.
- For your Chime Pro to sound an alert when a Ring device senses motion, tap the icon that symbolizes a person moving. For the Chime Pro to notify you when someone rings your doorbell, tap the bell icon.
- When you’re happy with your settings, tap Continue.
Set up the Chime Pro as a Wi-Fi range extender
Your Ring Chime Pro can also act as a Wi-Fi range extender for your Ring cameras and doorbells. To set up this feature, tap the blue Connect icon.
- Select the devices you’d like to connect to the Ring Chime Pro. These need to be closer to where you plug in the Chime Pro compared to your Wi-Fi router.
- Tap Switch to Chime Pro network, then confirm by tapping Connect to Chime Pro.
- You may be prompted to activate nearby devices. If so, accept to continue.
- Move closer to the device you’re trying to connect to the Chime Pro and press I am near the device on your phone.
- Confirm your device’s light is flashing blue, and wait a few seconds for it to connect to your Chime Pro.
- You’ll see a success screen on your phone when they’re connected and hear confirmation. Tap Continue.
- Repeat the process for other devices, or tap I’m done.

Customize the tone to play for alerts
- Tap Select tones.
- Select the tone and volume for when someone rings your doorbell and when motion is detected.
- Tap Save and continue.
- Tap Continue to finish setting up your Chime Pro.
Change the customization settings
If you need to change these settings, for example, if you want to use another chime, deactivate motion alerts, or connect a different device to your Chime Pro’s network, you can quickly access them by following the below steps:
- Open the Ring app on your phone.
- Open the menu by tapping its icon in the upper-right corner.
- Tap Devices.
- Tap your Chime Pro.
- Tap Audio Settings to change the chime tones and what triggers an alert.
- Tap Chime Pro Network to connect or disconnect a Ring device from your Chime Pro’s network.
- Tap the Nightlight button to turn it on or off.

Make the most out of your Ring products
Now that you’ve set up your Ring Chime Pro, you can benefit from great new features when using your Ring Doorbell. In addition to these, did you know that a Ring Protect subscription gives you access to extra features? Check out whether you should get one and learn more about what you could be missing.
Xem chi tiết và đăng kýXem chi tiết và đăng ký

Khám phá thêm từ Phụ Kiện Đỉnh
Đăng ký để nhận các bài đăng mới nhất được gửi đến email của bạn.

