

Review sản phẩm
Cài đặt và Kết nối Chuông Cửa Ring: Hướng dẫn chi tiết, dễ hiểu!

Th4
## Cài đặt và Kết nối Chuông Cửa Ring: Hướng dẫn chi tiết, dễ hiểu!
Bài viết này sẽ hướng dẫn bạn từng bước cách cài đặt và kết nối chuông cửa thông minh Ring của bạn một cách nhanh chóng và dễ dàng. Cho dù bạn là người dùng công nghệ lần đầu tiên hay đã quen thuộc với các thiết bị thông minh, hướng dẫn này sẽ giúp bạn hoàn tất quá trình setup mà không gặp khó khăn.
Bước 1: Chuẩn bị trước khi cài đặt
Trước khi bắt đầu, hãy đảm bảo bạn đã có những thứ sau đây:
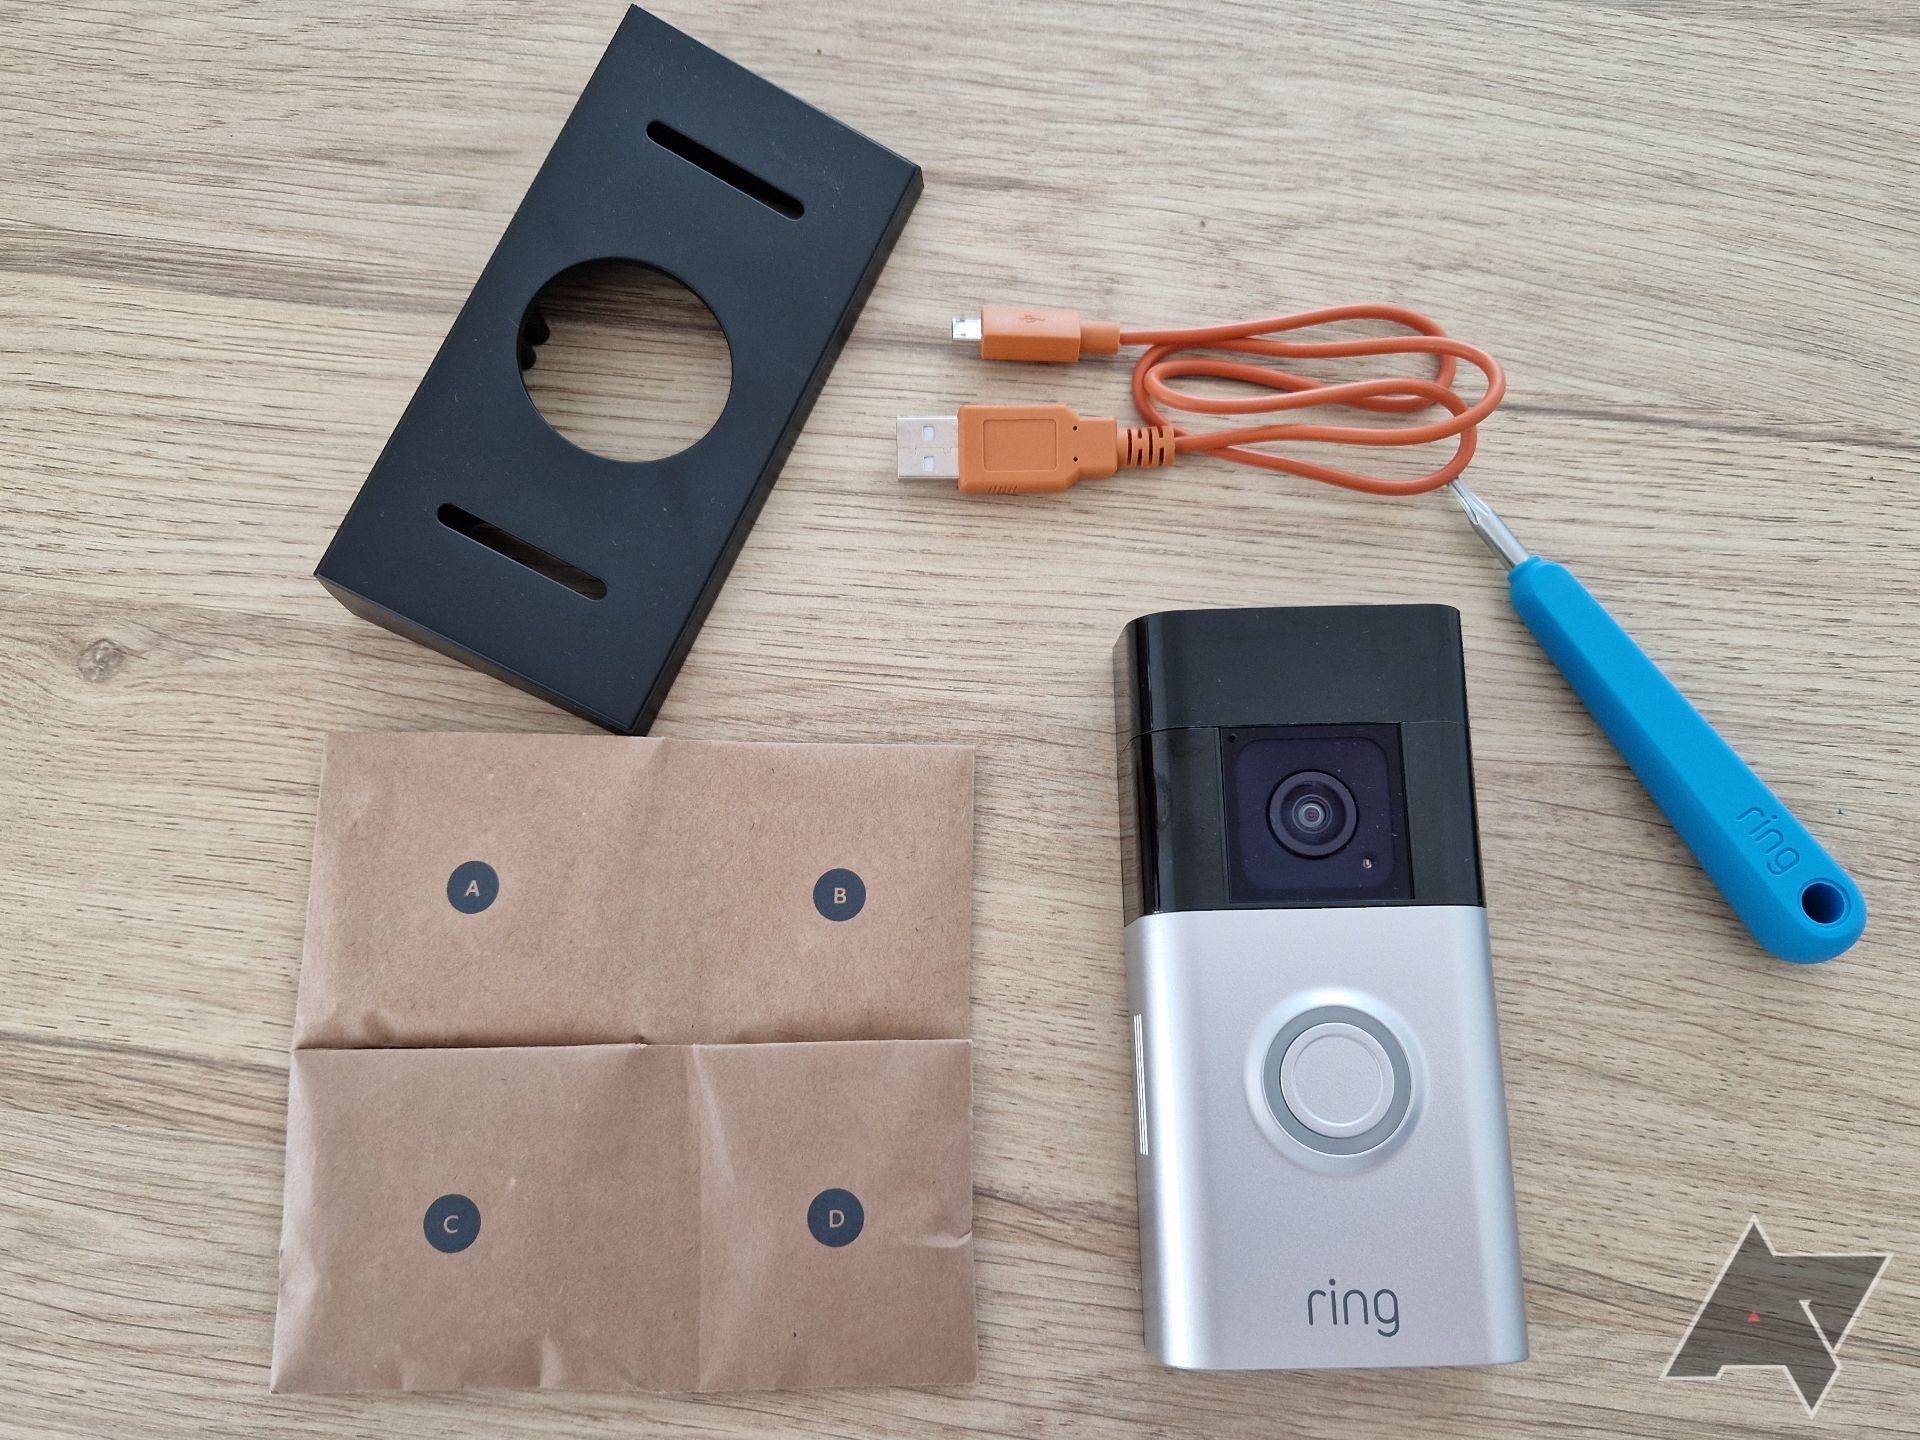
* Chuông cửa Ring: Kiểm tra xem bạn đã có đầy đủ các bộ phận trong hộp, bao gồm chuông cửa, bộ nguồn, vít, và hướng dẫn sử dụng.
* Ứng dụng Ring: Tải xuống và cài đặt ứng dụng Ring trên điện thoại thông minh hoặc máy tính bảng của bạn (có sẵn trên App Store và Google Play). Tạo tài khoản Ring nếu bạn chưa có.
* Kết nối Wi-Fi: Đảm bảo mạng Wi-Fi gia đình của bạn hoạt động ổn định và bạn biết mật khẩu Wi-Fi. Lưu ý rằng chuông cửa Ring cần kết nối với mạng 2.4 GHz.
* Tuốc nơ vít: Bạn sẽ cần tuốc nơ vít phù hợp để gắn chuông cửa vào tường.
* Điện thoại đã được sạc đầy: Quá trình cài đặt có thể mất một chút thời gian, vì vậy hãy chắc chắn rằng điện thoại của bạn có đủ pin.
Bước 2: Gắn chuông cửa Ring lên tường
* Chọn vị trí: Chọn vị trí lý tưởng để lắp đặt chuông cửa, đảm bảo có tầm nhìn rõ ràng và tín hiệu Wi-Fi tốt.
* Lắp đặt đế: Gắn đế chuông cửa lên tường theo hướng dẫn kèm theo. Hãy đảm bảo đế được gắn chắc chắn.
* Gắn chuông cửa: Đặt chuông cửa lên đế và đảm bảo nó được cố định chắc chắn.
Bước 3: Kết nối chuông cửa Ring với ứng dụng
* Mở ứng dụng Ring: Mở ứng dụng Ring trên điện thoại của bạn và làm theo các hướng dẫn trên màn hình.
* Thêm thiết bị mới: Chọn tùy chọn “Thêm thiết bị” hoặc tương tự trong ứng dụng.
* Quét mã QR: Ứng dụng sẽ hướng dẫn bạn quét mã QR trên chuông cửa Ring.
* Kết nối với Wi-Fi: Nhập mật khẩu Wi-Fi của bạn để kết nối chuông cửa với mạng gia đình.
* Cài đặt tùy chỉnh: Bạn có thể tùy chỉnh các cài đặt khác nhau, chẳng hạn như thông báo, khu vực hoạt động, và âm thanh chuông.
Bước 4: Kiểm tra và hoàn tất
Sau khi hoàn tất quá trình cài đặt, hãy kiểm tra chức năng của chuông cửa Ring bằng cách thực hiện một cuộc gọi thử nghiệm từ ứng dụng. Nếu mọi thứ hoạt động bình thường, bạn đã hoàn tất quá trình cài đặt.
Mẹo nhỏ:
* Nếu gặp sự cố trong quá trình cài đặt, hãy tham khảo hướng dẫn sử dụng chi tiết đi kèm với sản phẩm hoặc truy cập trang hỗ trợ của Ring.
* Đảm bảo vị trí lắp đặt có tín hiệu Wi-Fi mạnh để tránh tình trạng kết nối không ổn định.
Chúc bạn cài đặt và sử dụng chuông cửa Ring thành công!
#ChuôngCửaRing #HướngDẫnCàiĐặt #SmartHome #AnNinhGiaĐình #RingDoorbell #CôngNghệThôngMinh #CàiĐặtThiếtBị #KếtNốiWi-Fi #DIY #HướngDẫnSửDụng
Giới thiệu How to install and pair your Ring doorbell
: How to install and pair your Ring doorbell
Hãy viết lại bài viết dài kèm hashtag về việc đánh giá sản phẩm và mua ngay tại Queen Mobile bằng tiếng VIệt: How to install and pair your Ring doorbell
Mua ngay sản phẩm tại Việt Nam:
QUEEN MOBILE chuyên cung cấp điện thoại Iphone, máy tính bảng Ipad, đồng hồ Smartwatch và các phụ kiện APPLE và các giải pháp điện tử và nhà thông minh. Queen Mobile rất hân hạnh được phục vụ quý khách….
_____________________________________________________
Mua #Điện_thoại #iphone #ipad #macbook #samsung #xiaomi #poco #oppo #snapdragon giá tốt, hãy ghé [𝑸𝑼𝑬𝑬𝑵 𝑴𝑶𝑩𝑰𝑳𝑬]
✿ 149 Hòa Bình, phường Hiệp Tân, quận Tân Phú, TP HCM
✿ 402B, Hai Bà Trưng, P Tân Định, Q 1, HCM
✿ 287 đường 3/2 P 10, Q 10, HCM
Hotline (miễn phí) 19003190
Thu cũ đổi mới
Rẻ hơn hoàn tiền
Góp 0%
Thời gian làm việc: 9h – 21h.
KẾT LUẬN
Hãy viết đoạn tóm tắt về nội dung bằng tiếng việt kích thích người mua: How to install and pair your Ring doorbell
Ring doorbells stand out as a top-tier choice in smart video doorbells, offering cutting-edge features and user-friendly operation. Their reputation for quality and innovation makes them a great option for a smart video doorbell or to enhance your home’s security.
A standout aspect of Ring doorbells is their seamless setup process. Installing new technology can be intimidating, especially when doing it for the first time. Ring makes the experience straightforward and hassle-free. We make this even easier by walking you through each step, ensuring that even beginners can complete the installation in a few minutes without needing a professional installer.
Getting started
Before beginning the installation of your doorbell, be well-prepared and understand the necessary steps. Although the app provides step-by-step guidance, identifying the requirements for mounting your doorbell is essential.
Start by determining the type of surface where you plan to mount the doorbell, as the approach varies for different materials. For mounting on wood, wood screws are needed. Concrete surfaces require a different set of screws and anchors. A drill is not typically necessary for wooden surfaces, but it’s indispensable for concrete ones.
In addition to having the appropriate tools and screws, consider the power source for your doorbell. For hardwired doorbells, ensure you have the correct wires and voltage. If the voltage is inadequate, install a power transformer to achieve the appropriate power supply.
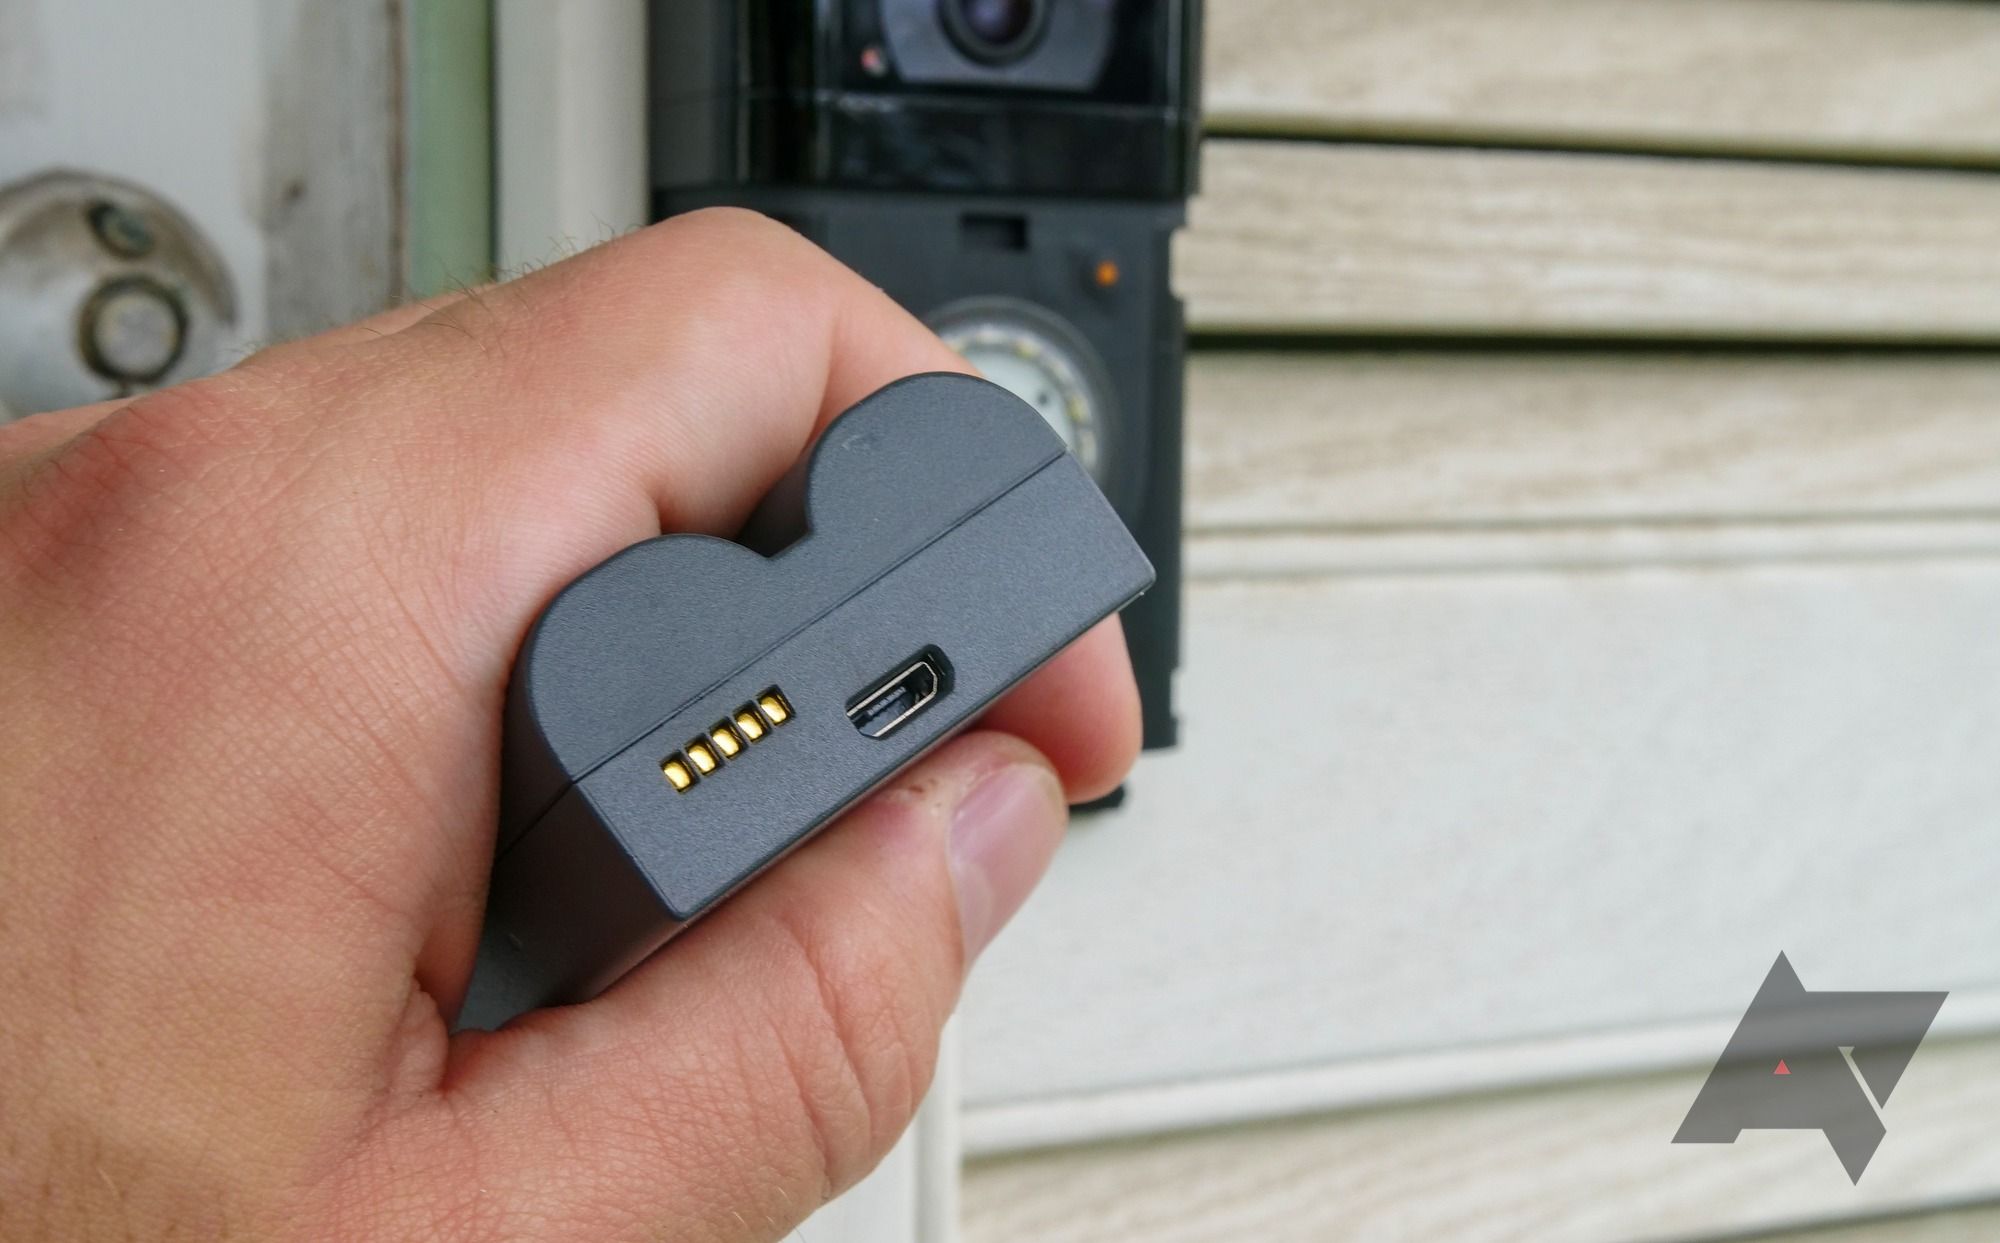
Plug-in doorbell models are relatively simpler, provided a power outlet is nearby. If the outlet is outdoors, ensure it is weather-protected to prevent electrocution risks. Also, conceal the wiring to protect it from vandalism. If your doorbell is battery-operated, fully charge the battery before beginning the installation process.
Pair your doorbell with the Ring app before mounting it. This allows you to verify the camera’s view and avoid incorrectly positioning the doorbell too high or too low. Adjusting the position after drilling can be challenging and may lead to unnecessary complications, especially since you already drilled the holes, and you’ll need to conceal them.
How to pair your Ring doorbell
Now that you’ve identified where and how to mount your doorbell, pair it with your Ring account. Do this before mounting it and drilling holes, as it helps you assess its final position by checking the live feed on the app after it’s connected.
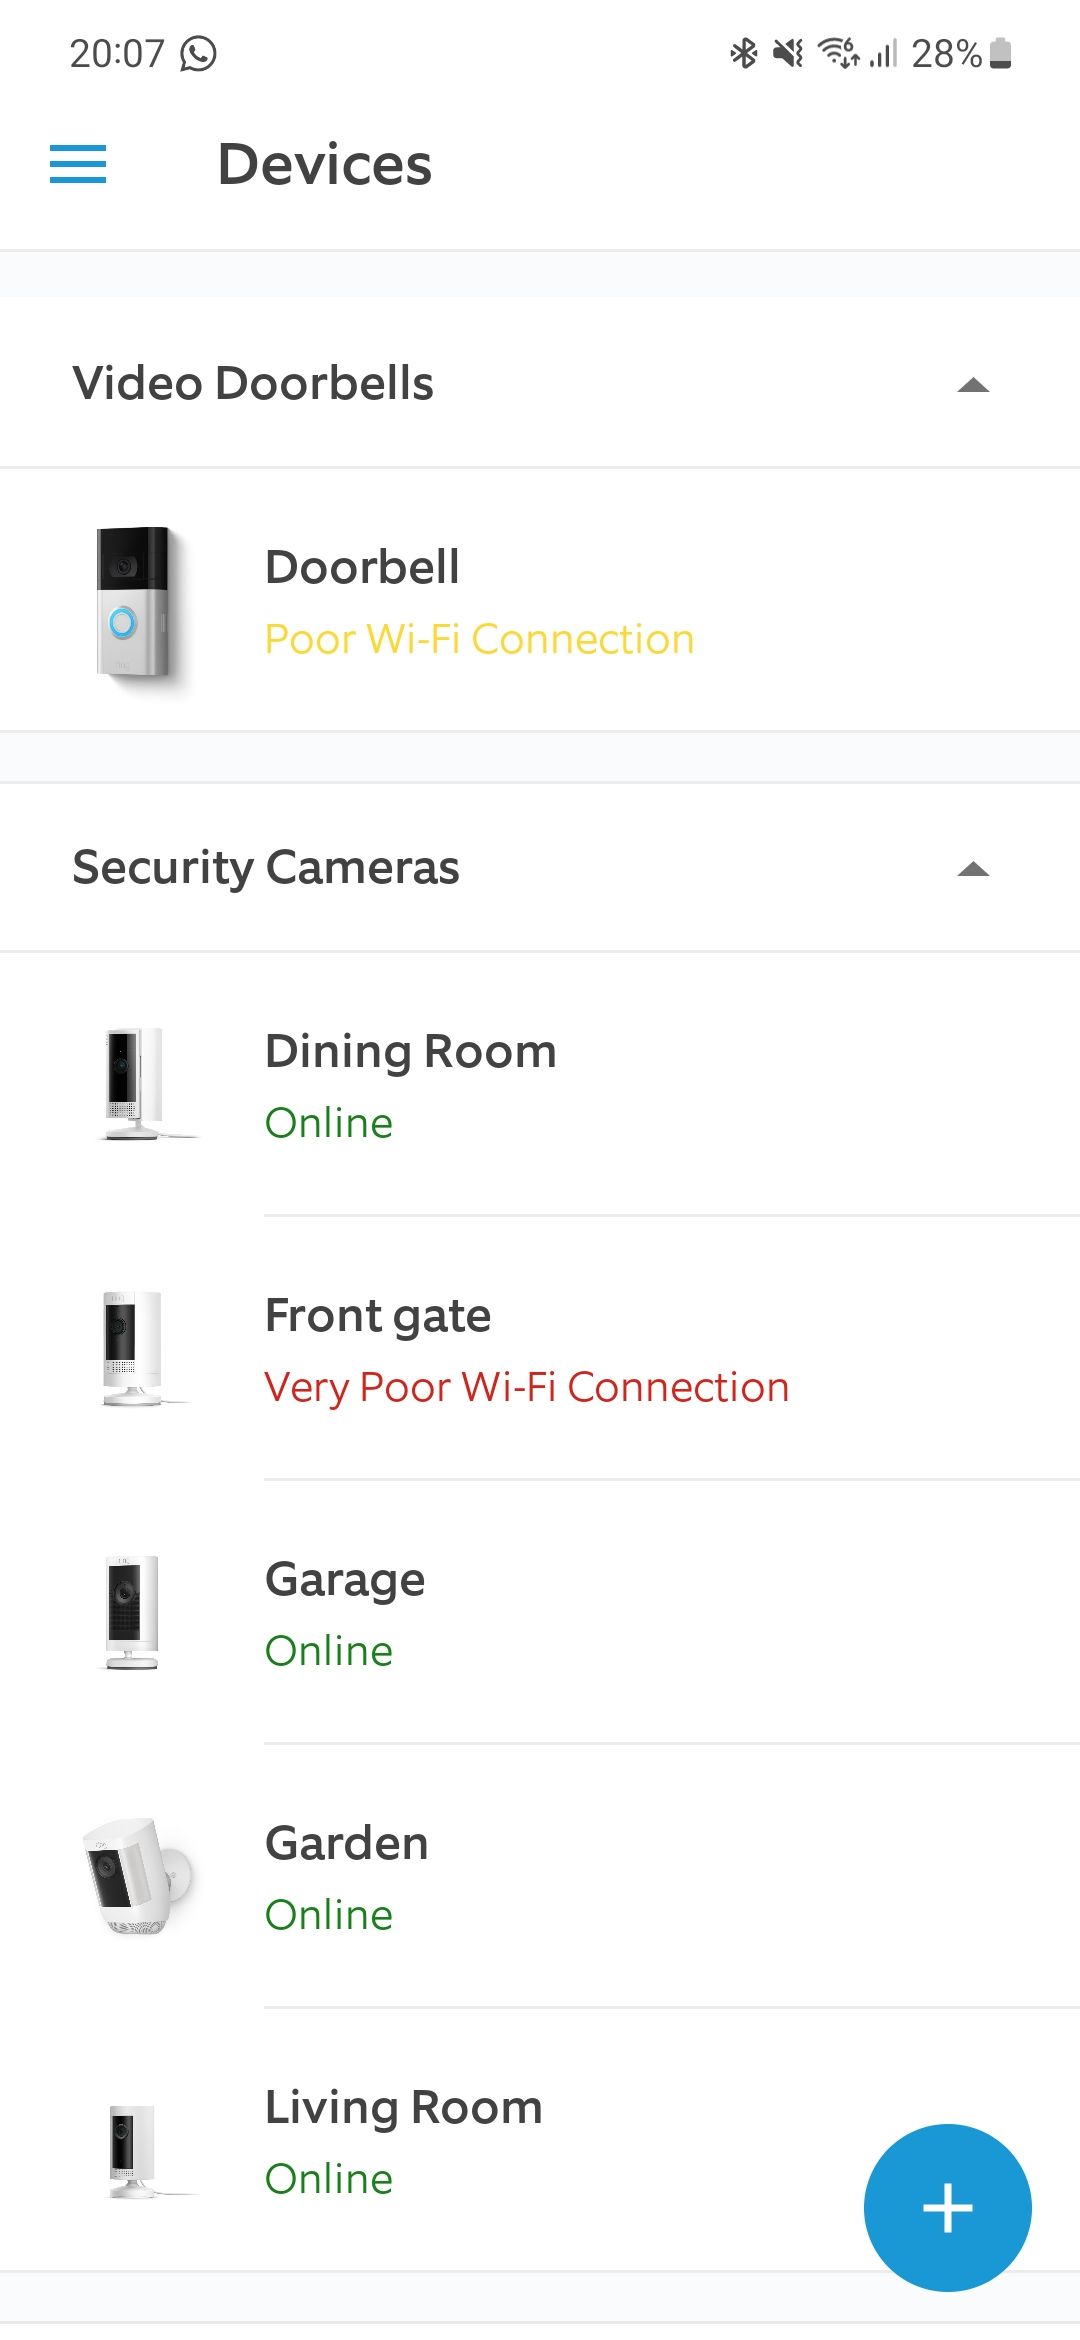
- On your smartphone, open the Ring app.
- Tap the menu icon in the upper-right corner.
- Tap Devices.
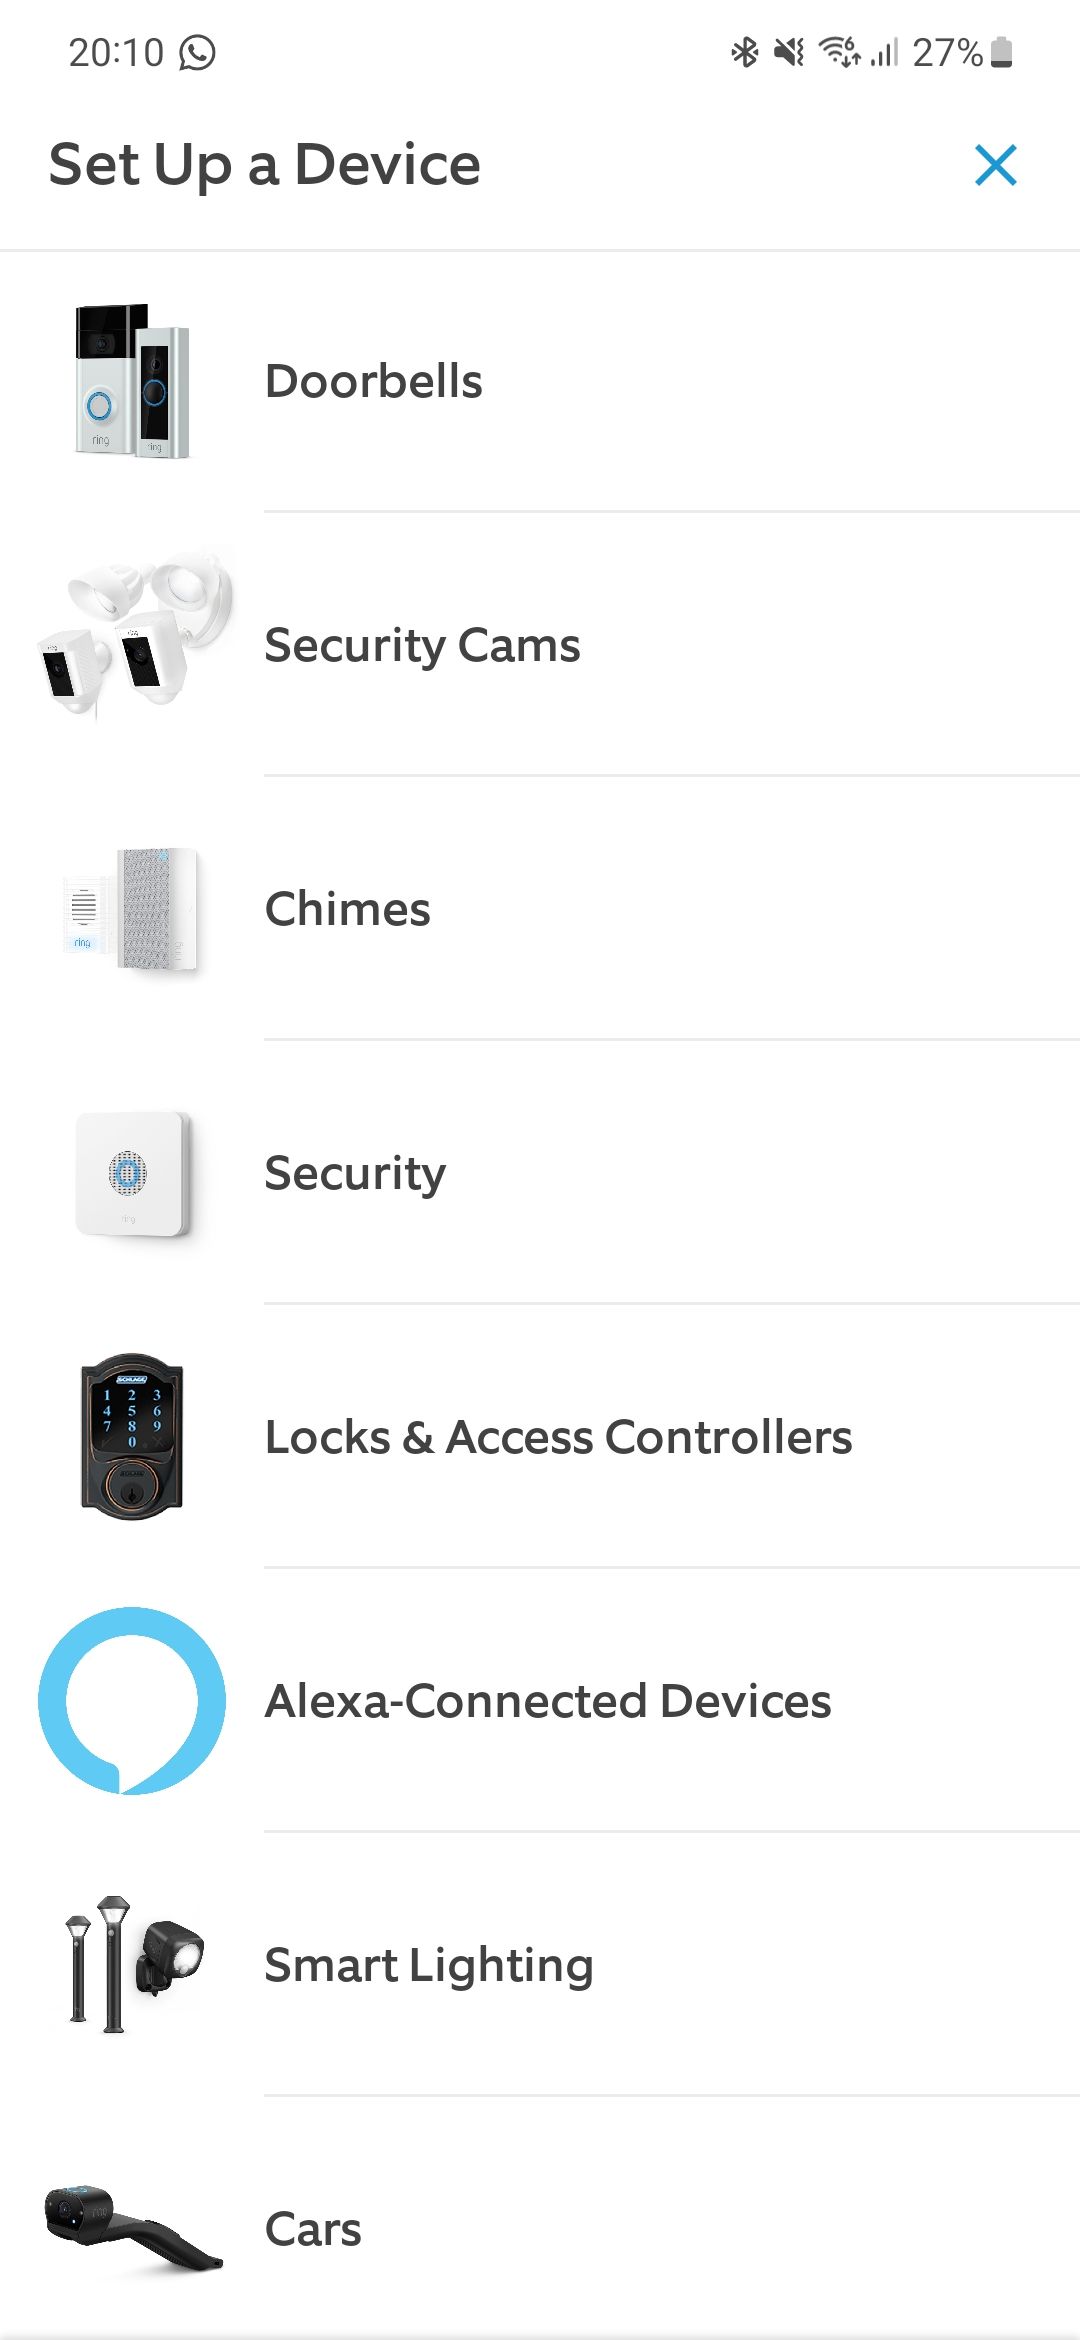
- Tap the + icon in the lower-right corner.
- Tap Doorbells.
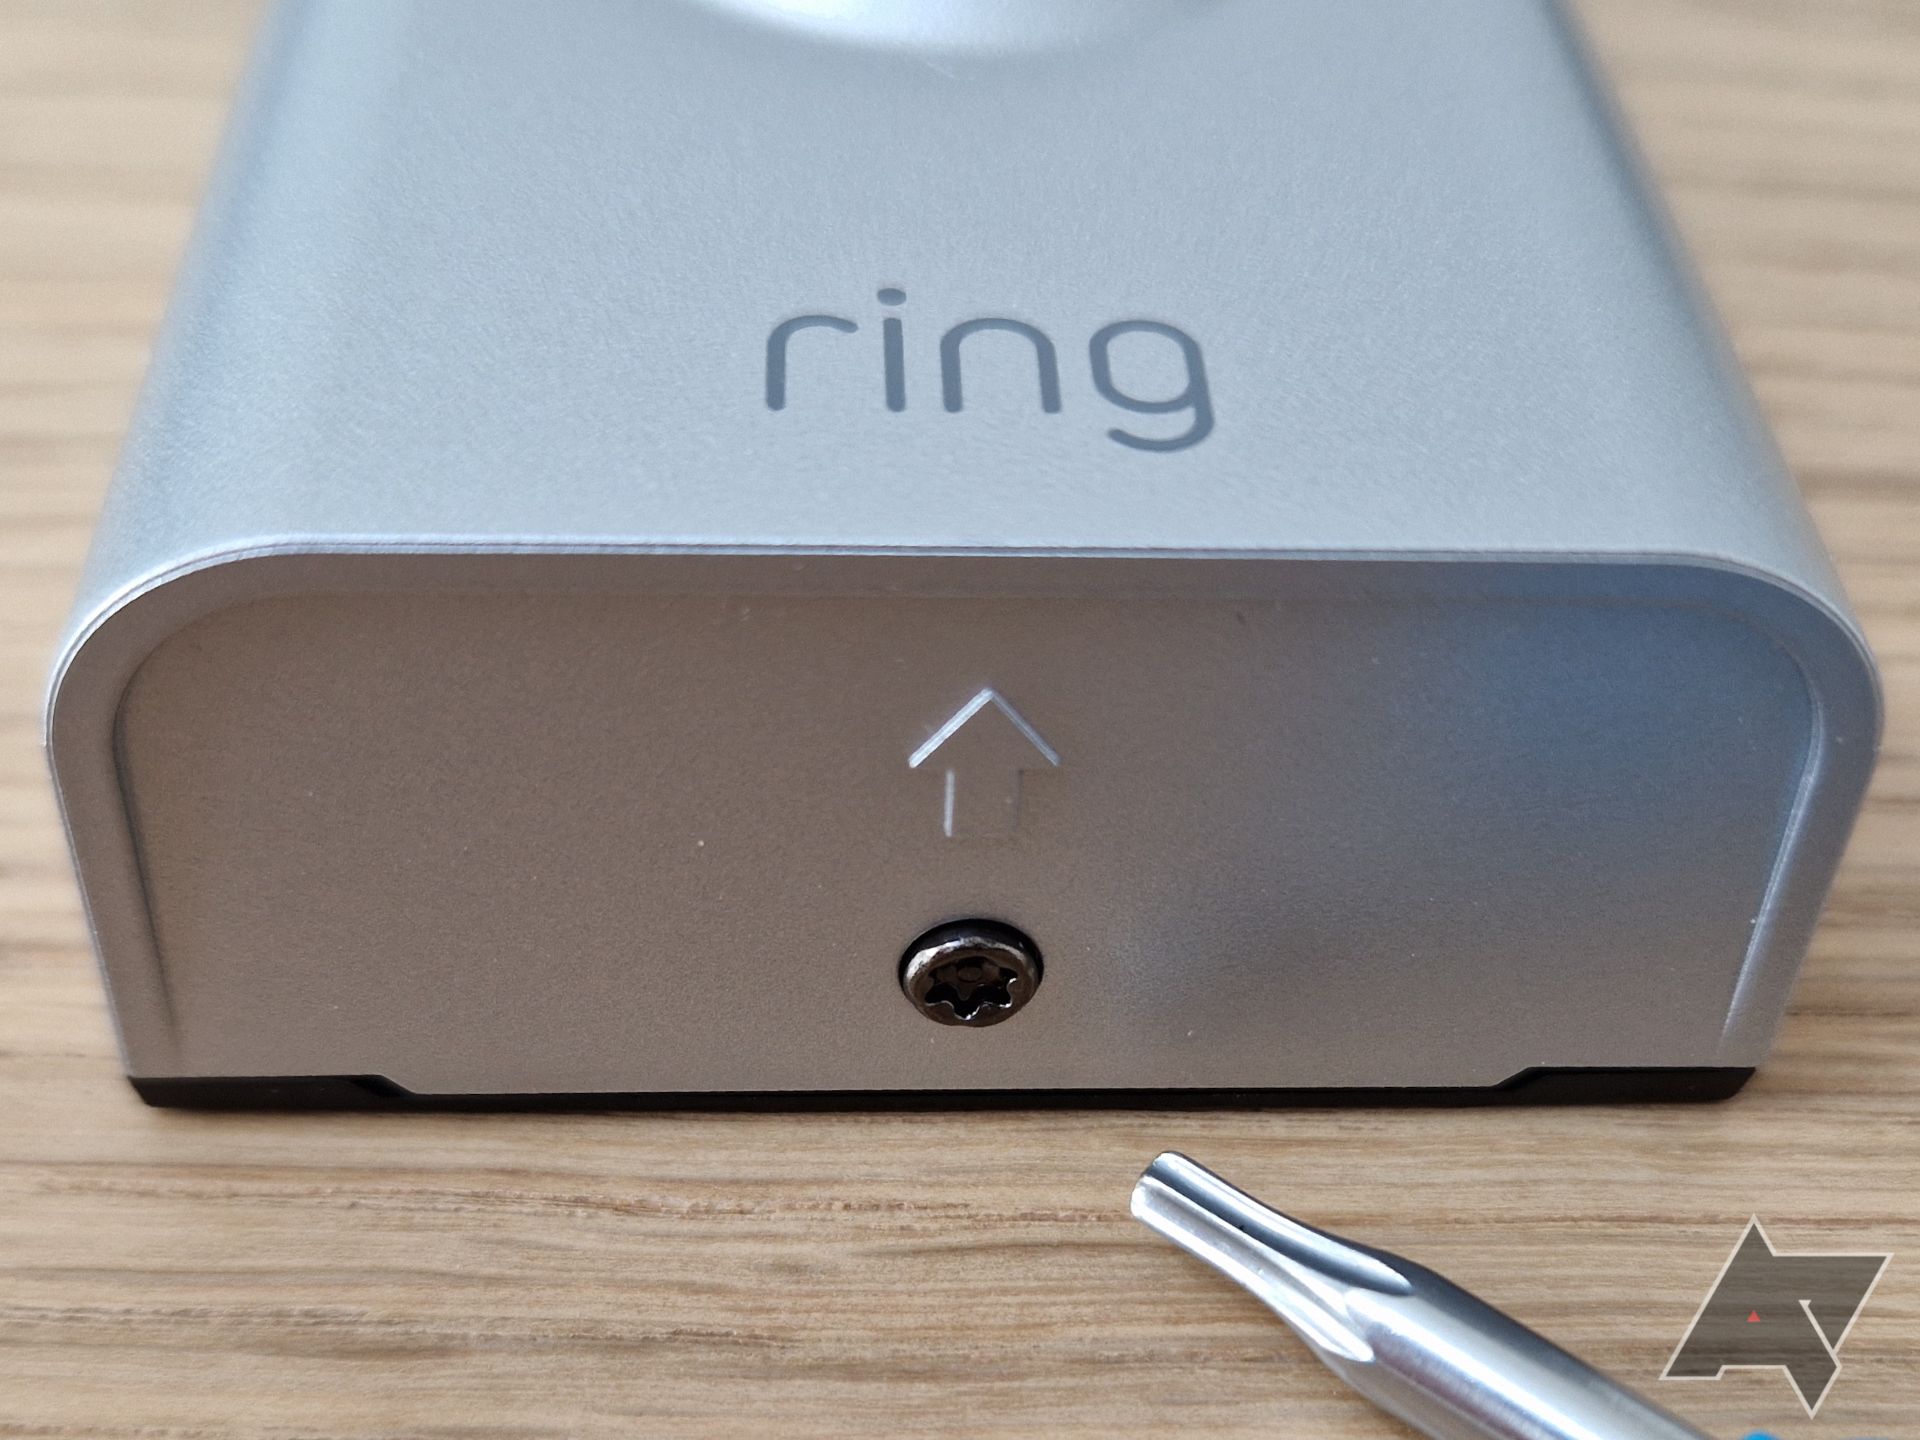
- Tap I’m Ready to Scan and scan the QR code on your doorbell. It’s either beneath the cover, which means removing the faceplate to access it, or on the back of the doorbell.
- Confirm the location and tap the blue Continue button.
- Give your doorbell a name.
- Follow the on-screen instructions to continue the process. Review the mounting instructions, but wait until the end of the setup process before mounting the doorbell.
- When prompted, enter your Wi-Fi password.
- Move closer to the doorbell and tap I am near the device.
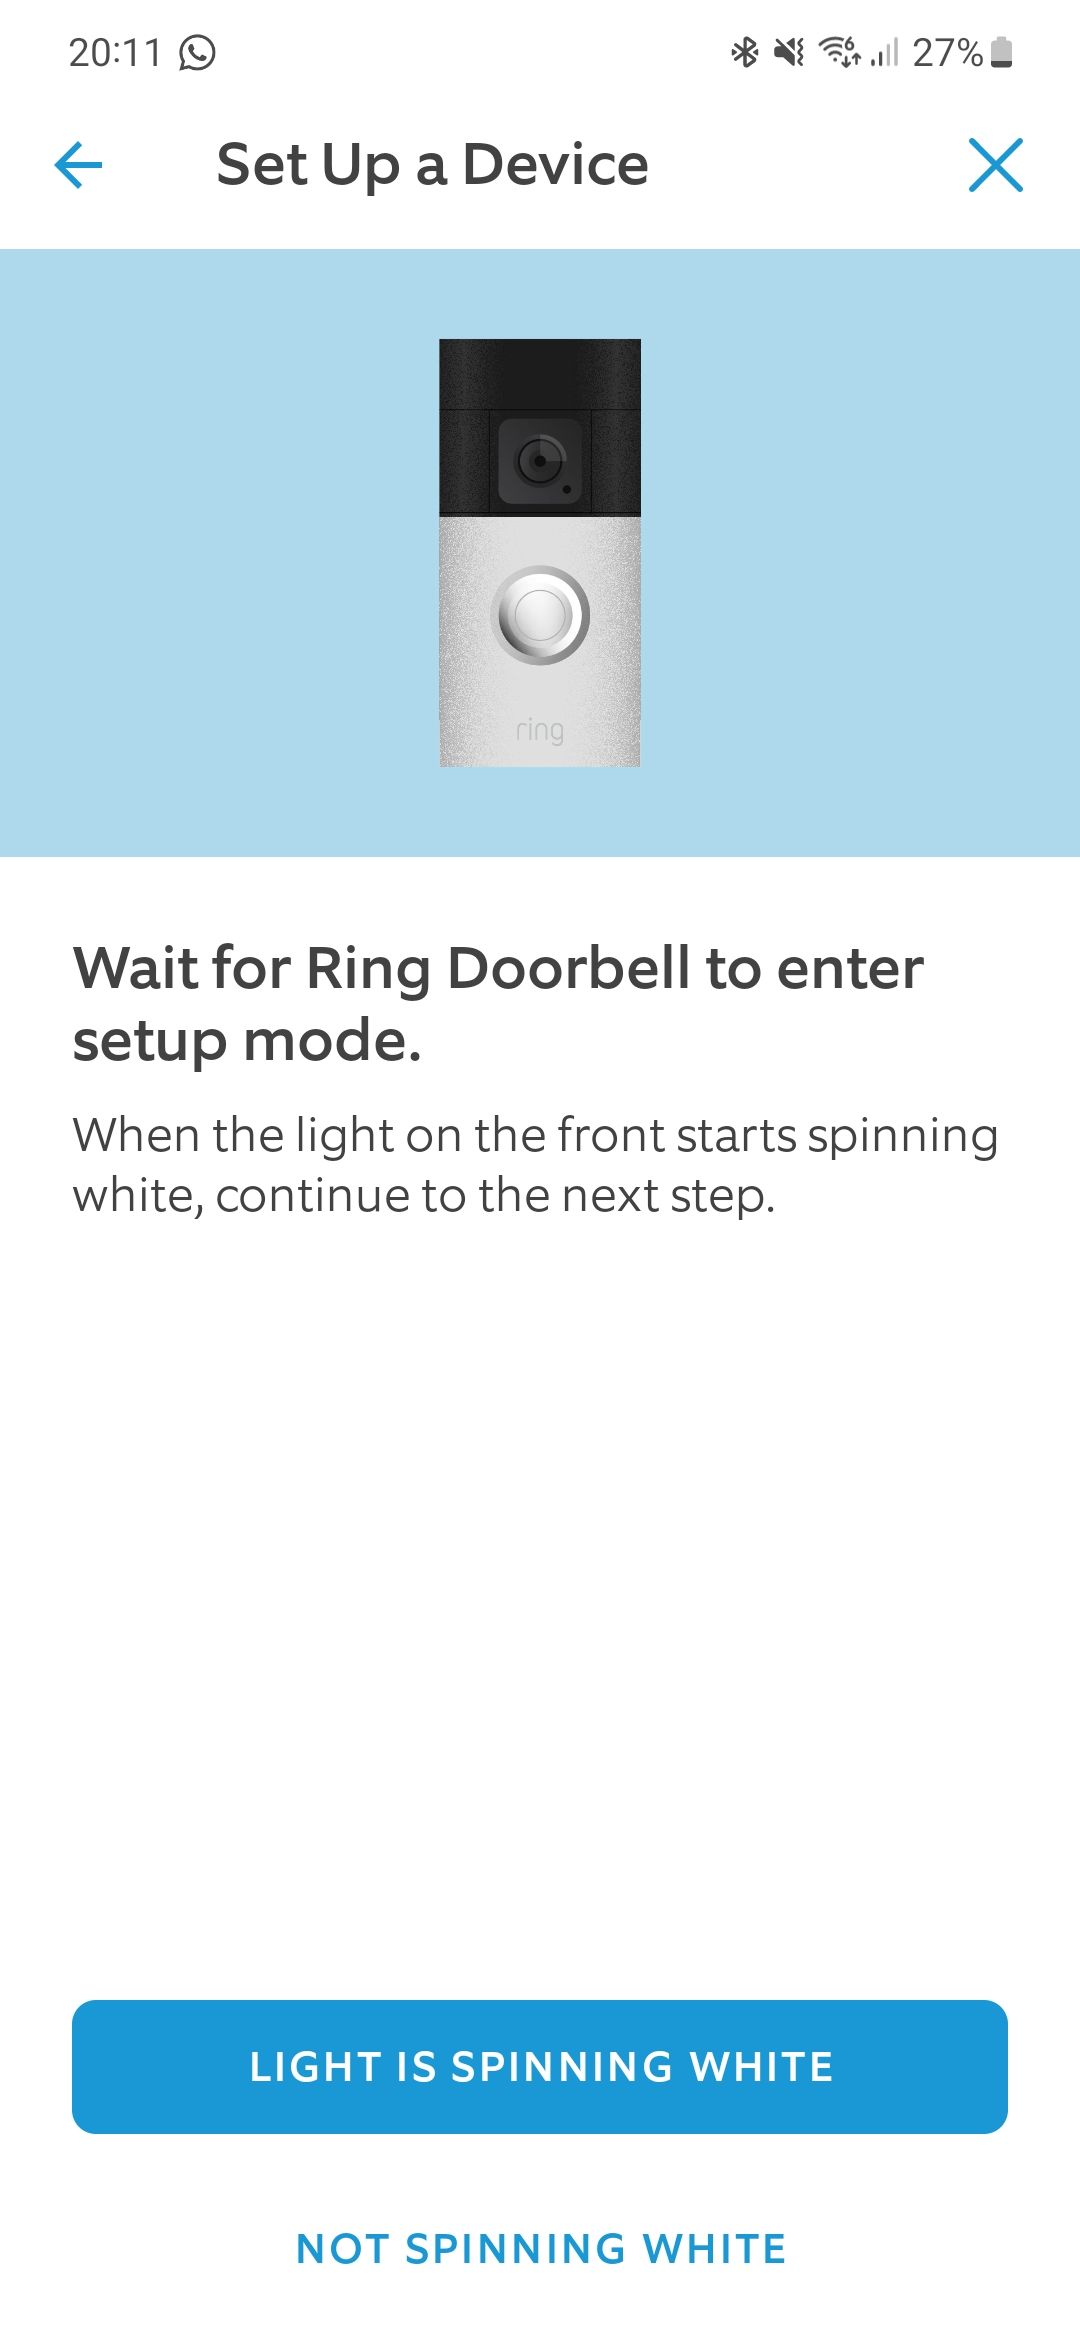
- Wait a few seconds and make sure your doorbell enters pairing mode. Most Ring doorbells display a white spinning light when they’re in pairing mode.
- Tap Light is spinning white, and wait for the doorbell to connect.
- Follow the instructions to add the doorbell to your home.
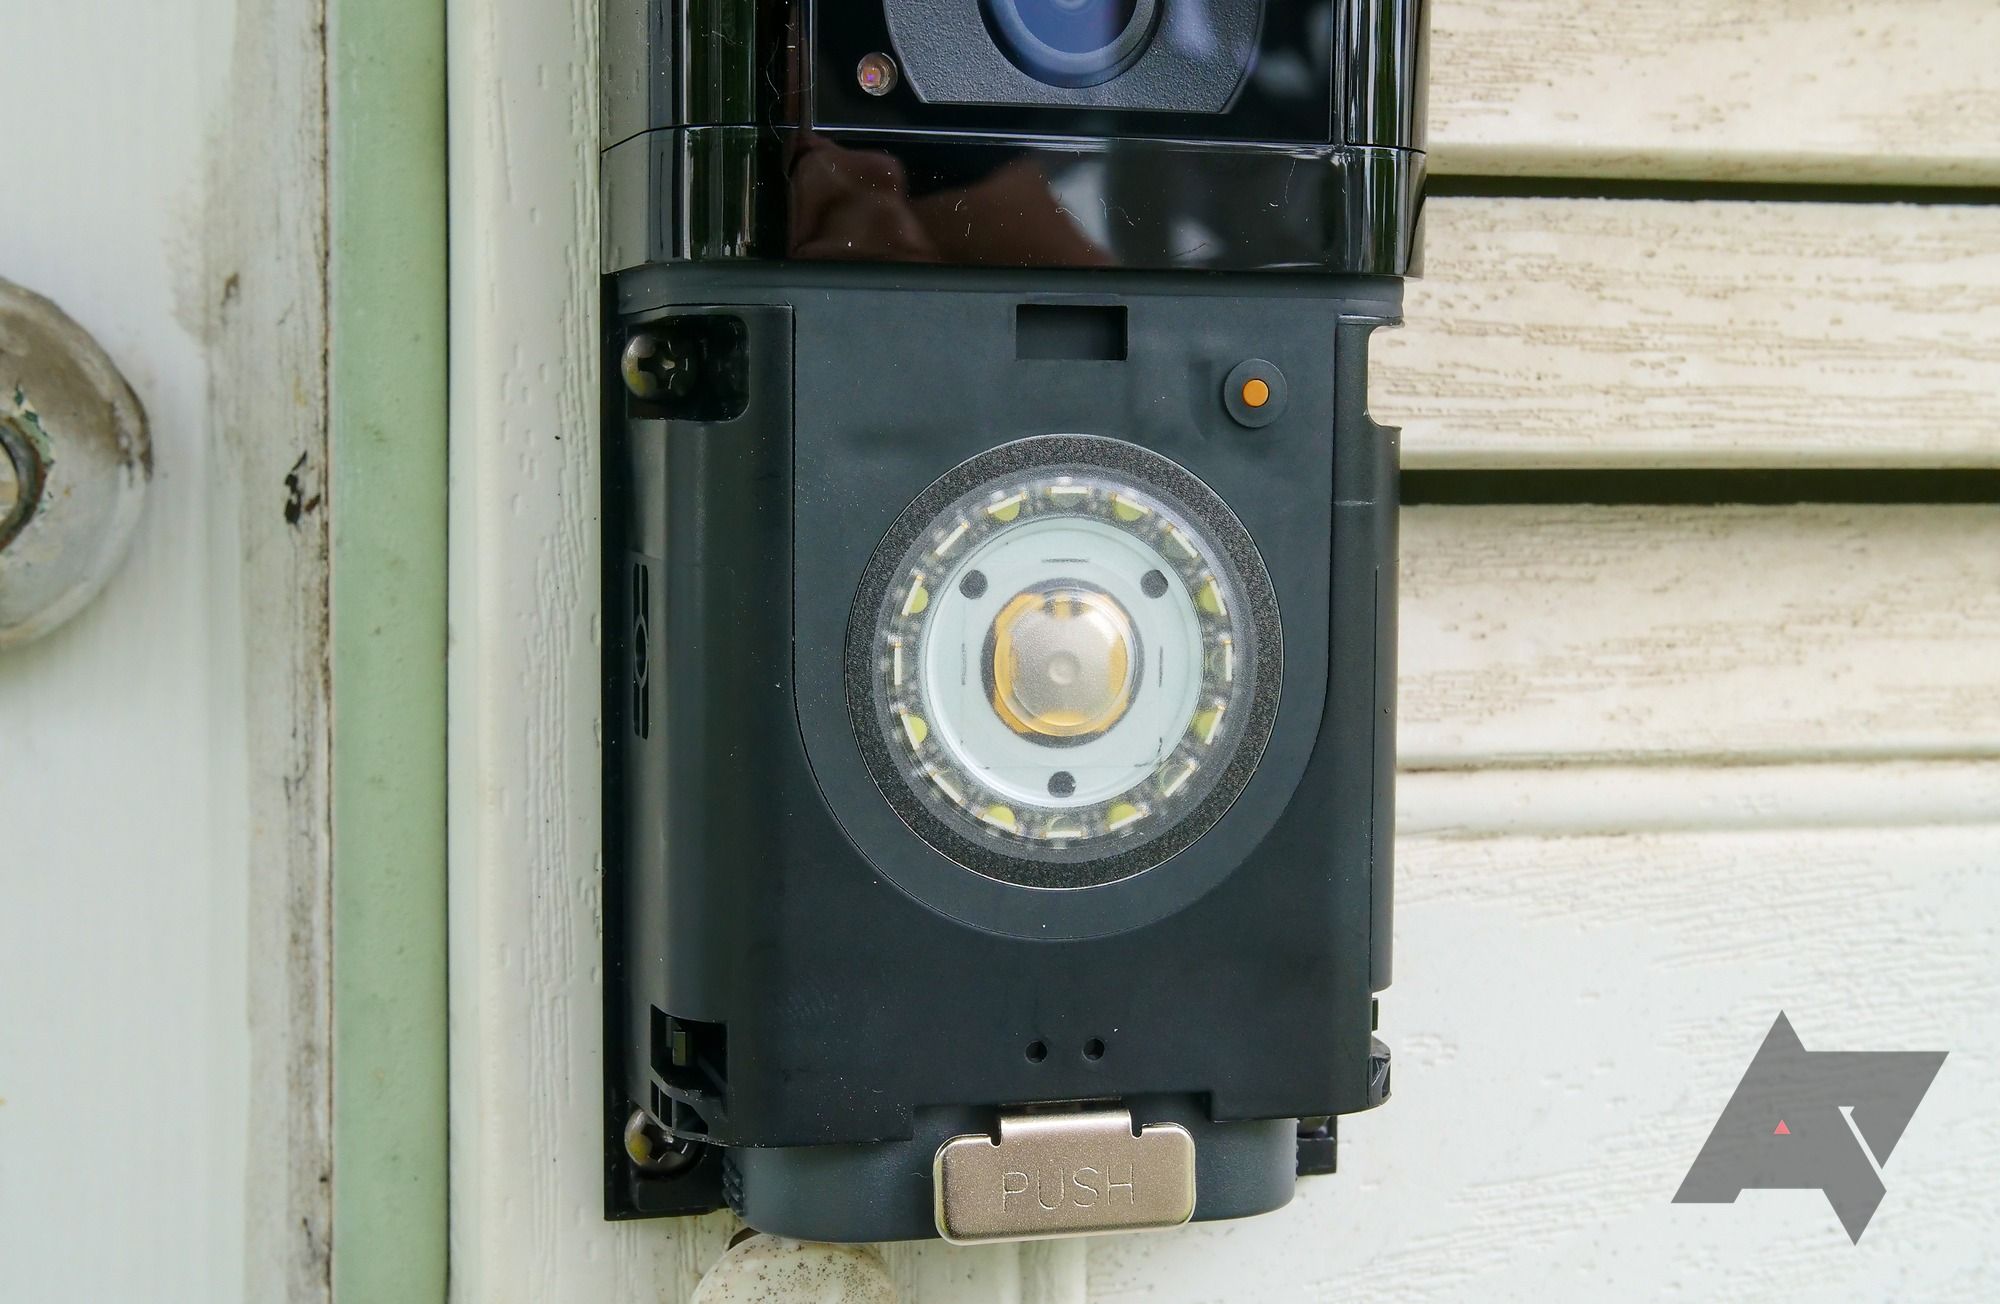
How to mount your Ring doorbell
Now that you’ve paired your doorbell, check its live feed and mark the ideal height and position for mounting it. This doesn’t need to be an exact measurement, but approximately identify where you want to place it. When installing a wired model, ensure there’s enough cable length to connect it easily.
Then, make sure you have the required tools to begin the process. Identify the correct screws and anchors, and, in most cases, take your doorbell’s T15 Torx screwdriver to unmount its faceplate.
When you’re ready, follow the step-by-step process described in the app, especially for wired doorbells. If you didn’t write it down, repeat the steps in the section above to get detailed instructions for your Ring video doorbell.
If you prefer written and printable instructions, go to Ring’s Support website, click Doorbells, select your doorbell model, and click Installing your Ring Doorbell. This is a great option, as the company provides a printable template you can tape to the wall to help you drill the holes precisely.
Identify where to drill the holes before starting the process. When installing a hardwired model, turn off the circuit breaker before beginning the process. After installing the doorbell, restore the power and secure your doorbell by tightening the security screw with the T15 Torx screwdriver.
Make your doorbell smarter
Now that you’ve installed your Ring video doorbell, it’s time to explore its features. Start by making the most of its built-in capabilities. For example, take advantage of its camera motion zones and customize how you’re notified when motion is detected. You can also take things a step further and create advanced automations by creating Alexa Routines with your doorbell, making your life easier and enhancing your home security.
Consider making your Ring video doorbell a part of your DIY home security system, and you won’t need to buy an expensive one. The possibilities are endless, thanks to Ring’s advanced functionality and its integration with Alexa and IFTTT.

Khám phá thêm từ Phụ Kiện Đỉnh
Đăng ký để nhận các bài đăng mới nhất được gửi đến email của bạn.

