

Review sản phẩm
10 Mẹo Hay Cho Người Mới Sử Dụng Điện Thoại & Phụ Kiện Apple tại Queen Mobile!

Th4
## 10 Mẹo Hay Cho Người Mới Sử Dụng Điện Thoại & Phụ Kiện Apple tại Queen Mobile!
MUA NGAY TẠI QUEEN MOBILE!
Bạn mới tậu iPhone, iPad, Apple Watch hay các phụ kiện Apple? Đừng lo lắng, Queen Mobile sẽ giúp bạn làm quen nhanh chóng với những sản phẩm tuyệt vời này. Dưới đây là 10 mẹo và thủ thuật đơn giản nhưng hữu ích dành riêng cho người dùng mới:
1. Tận dụng tối đa Trung tâm Điều khiển: Vuốt xuống từ góc phải trên màn hình (hoặc từ trên xuống dưới trên iPhone X trở lên) để truy cập nhanh vào các cài đặt thường dùng như độ sáng, âm lượng, Wi-Fi, Bluetooth, chế độ máy bay, v.v. Bạn có thể tùy chỉnh các điều khiển này theo sở thích.
2. Siri là người bạn đồng hành lý tưởng: Hãy thử hỏi Siri những câu hỏi đơn giản, chẳng hạn như “Thời tiết hôm nay thế nào?”, “Đặt báo thức lúc 7 giờ sáng”, hoặc “Gửi tin nhắn cho [tên người nhận]”. Siri sẽ giúp bạn tiết kiệm thời gian và công sức đáng kể.
3. Tìm hiểu về tính năng “Chia sẻ gia đình”: Nếu bạn dùng chung Apple ID với gia đình, tính năng này cho phép chia sẻ mua sắm ứng dụng, đăng ký nhạc, phim và nhiều hơn nữa.
4. Khám phá sức mạnh của “Spotlight Search”: Vuốt xuống từ giữa màn hình (hoặc vuốt xuống từ trên xuống dưới trên iPhone X trở lên) để tìm kiếm ứng dụng, liên hệ, email, tin nhắn, và thậm chí cả thông tin trên internet.
5. Quản lý thông báo hiệu quả: Tùy chỉnh các thông báo từ các ứng dụng để tránh bị làm phiền quá mức. Bạn có thể tắt hoàn toàn hoặc chỉ nhận thông báo quan trọng.
6. Học cách sử dụng chế độ “Không làm phiền”: Chế độ này sẽ giúp bạn tập trung vào công việc hoặc nghỉ ngơi mà không bị làm phiền bởi các cuộc gọi, tin nhắn.
7. Tận dụng tính năng chụp ảnh màn hình: Nhấn nút nguồn và nút tăng âm lượng cùng lúc để chụp ảnh màn hình dễ dàng.
8. Sử dụng tính năng “Handoff” để chuyển đổi mượt mà giữa các thiết bị Apple: Bắt đầu một tác vụ trên iPhone và tiếp tục trên iPad hoặc Mac một cách liền mạch.
9. Khám phá App Store để tìm những ứng dụng phù hợp: App Store cung cấp hàng triệu ứng dụng đáp ứng mọi nhu cầu của bạn. Hãy dành thời gian khám phá và tìm những ứng dụng hữu ích.
10. Đừng quên sao lưu dữ liệu: Sao lưu dữ liệu thường xuyên giúp bạn bảo vệ thông tin quan trọng khỏi bị mất mát.
Queen Mobile: Mua ngay iPhone, iPad, Apple Watch chính hãng và các phụ kiện chất lượng cao!
Ghé thăm cửa hàng Queen Mobile gần nhất hoặc truy cập website của chúng tôi để sở hữu những sản phẩm Apple tuyệt vời!
#QueenMobile #Apple #iPhone #iPad #AppleWatch #MẹoHay #ThủThuật #NgườiMớiSửDụng #CôngNghệ #MuaSắm
Giới thiệu 10 simple tips and tricks for new users
: 10 simple tips and tricks for new users
Hãy viết lại bài viết dài kèm hashtag về việc đánh giá sản phẩm và mua ngay tại Queen Mobile bằng tiếng VIệt: 10 simple tips and tricks for new users
Mua ngay sản phẩm tại Việt Nam:
QUEEN MOBILE chuyên cung cấp điện thoại Iphone, máy tính bảng Ipad, đồng hồ Smartwatch và các phụ kiện APPLE và các giải pháp điện tử và nhà thông minh. Queen Mobile rất hân hạnh được phục vụ quý khách….
_____________________________________________________
Mua #Điện_thoại #iphone #ipad #macbook #samsung #xiaomi #poco #oppo #snapdragon giá tốt, hãy ghé [𝑸𝑼𝑬𝑬𝑵 𝑴𝑶𝑩𝑰𝑳𝑬]
✿ 149 Hòa Bình, phường Hiệp Tân, quận Tân Phú, TP HCM
✿ 402B, Hai Bà Trưng, P Tân Định, Q 1, HCM
✿ 287 đường 3/2 P 10, Q 10, HCM
Hotline (miễn phí) 19003190
Thu cũ đổi mới
Rẻ hơn hoàn tiền
Góp 0%
Thời gian làm việc: 9h – 21h.
KẾT LUẬN
Hãy viết đoạn tóm tắt về nội dung bằng tiếng việt kích thích người mua: 10 simple tips and tricks for new users
OpenOffice is a suite of free productivity tools that replaces most of the functionality of Microsoft’s Office platform and adds additional features (though you can’t track stock prices the way you can on Google Sheets). It also works across multiple operating systems, even on the best Chromebooks, and it plays well with existing MS Office documents and spreadsheets.
ANDROID POLICE VIDEO OF THE DAY
SCROLL TO CONTINUE WITH CONTENT
Many of its best features aren’t immediately apparent to new users. We compiled a list of our favorite OpenOffice tips and tricks to help you take advantage of OpenOffice’s versatile offerings.
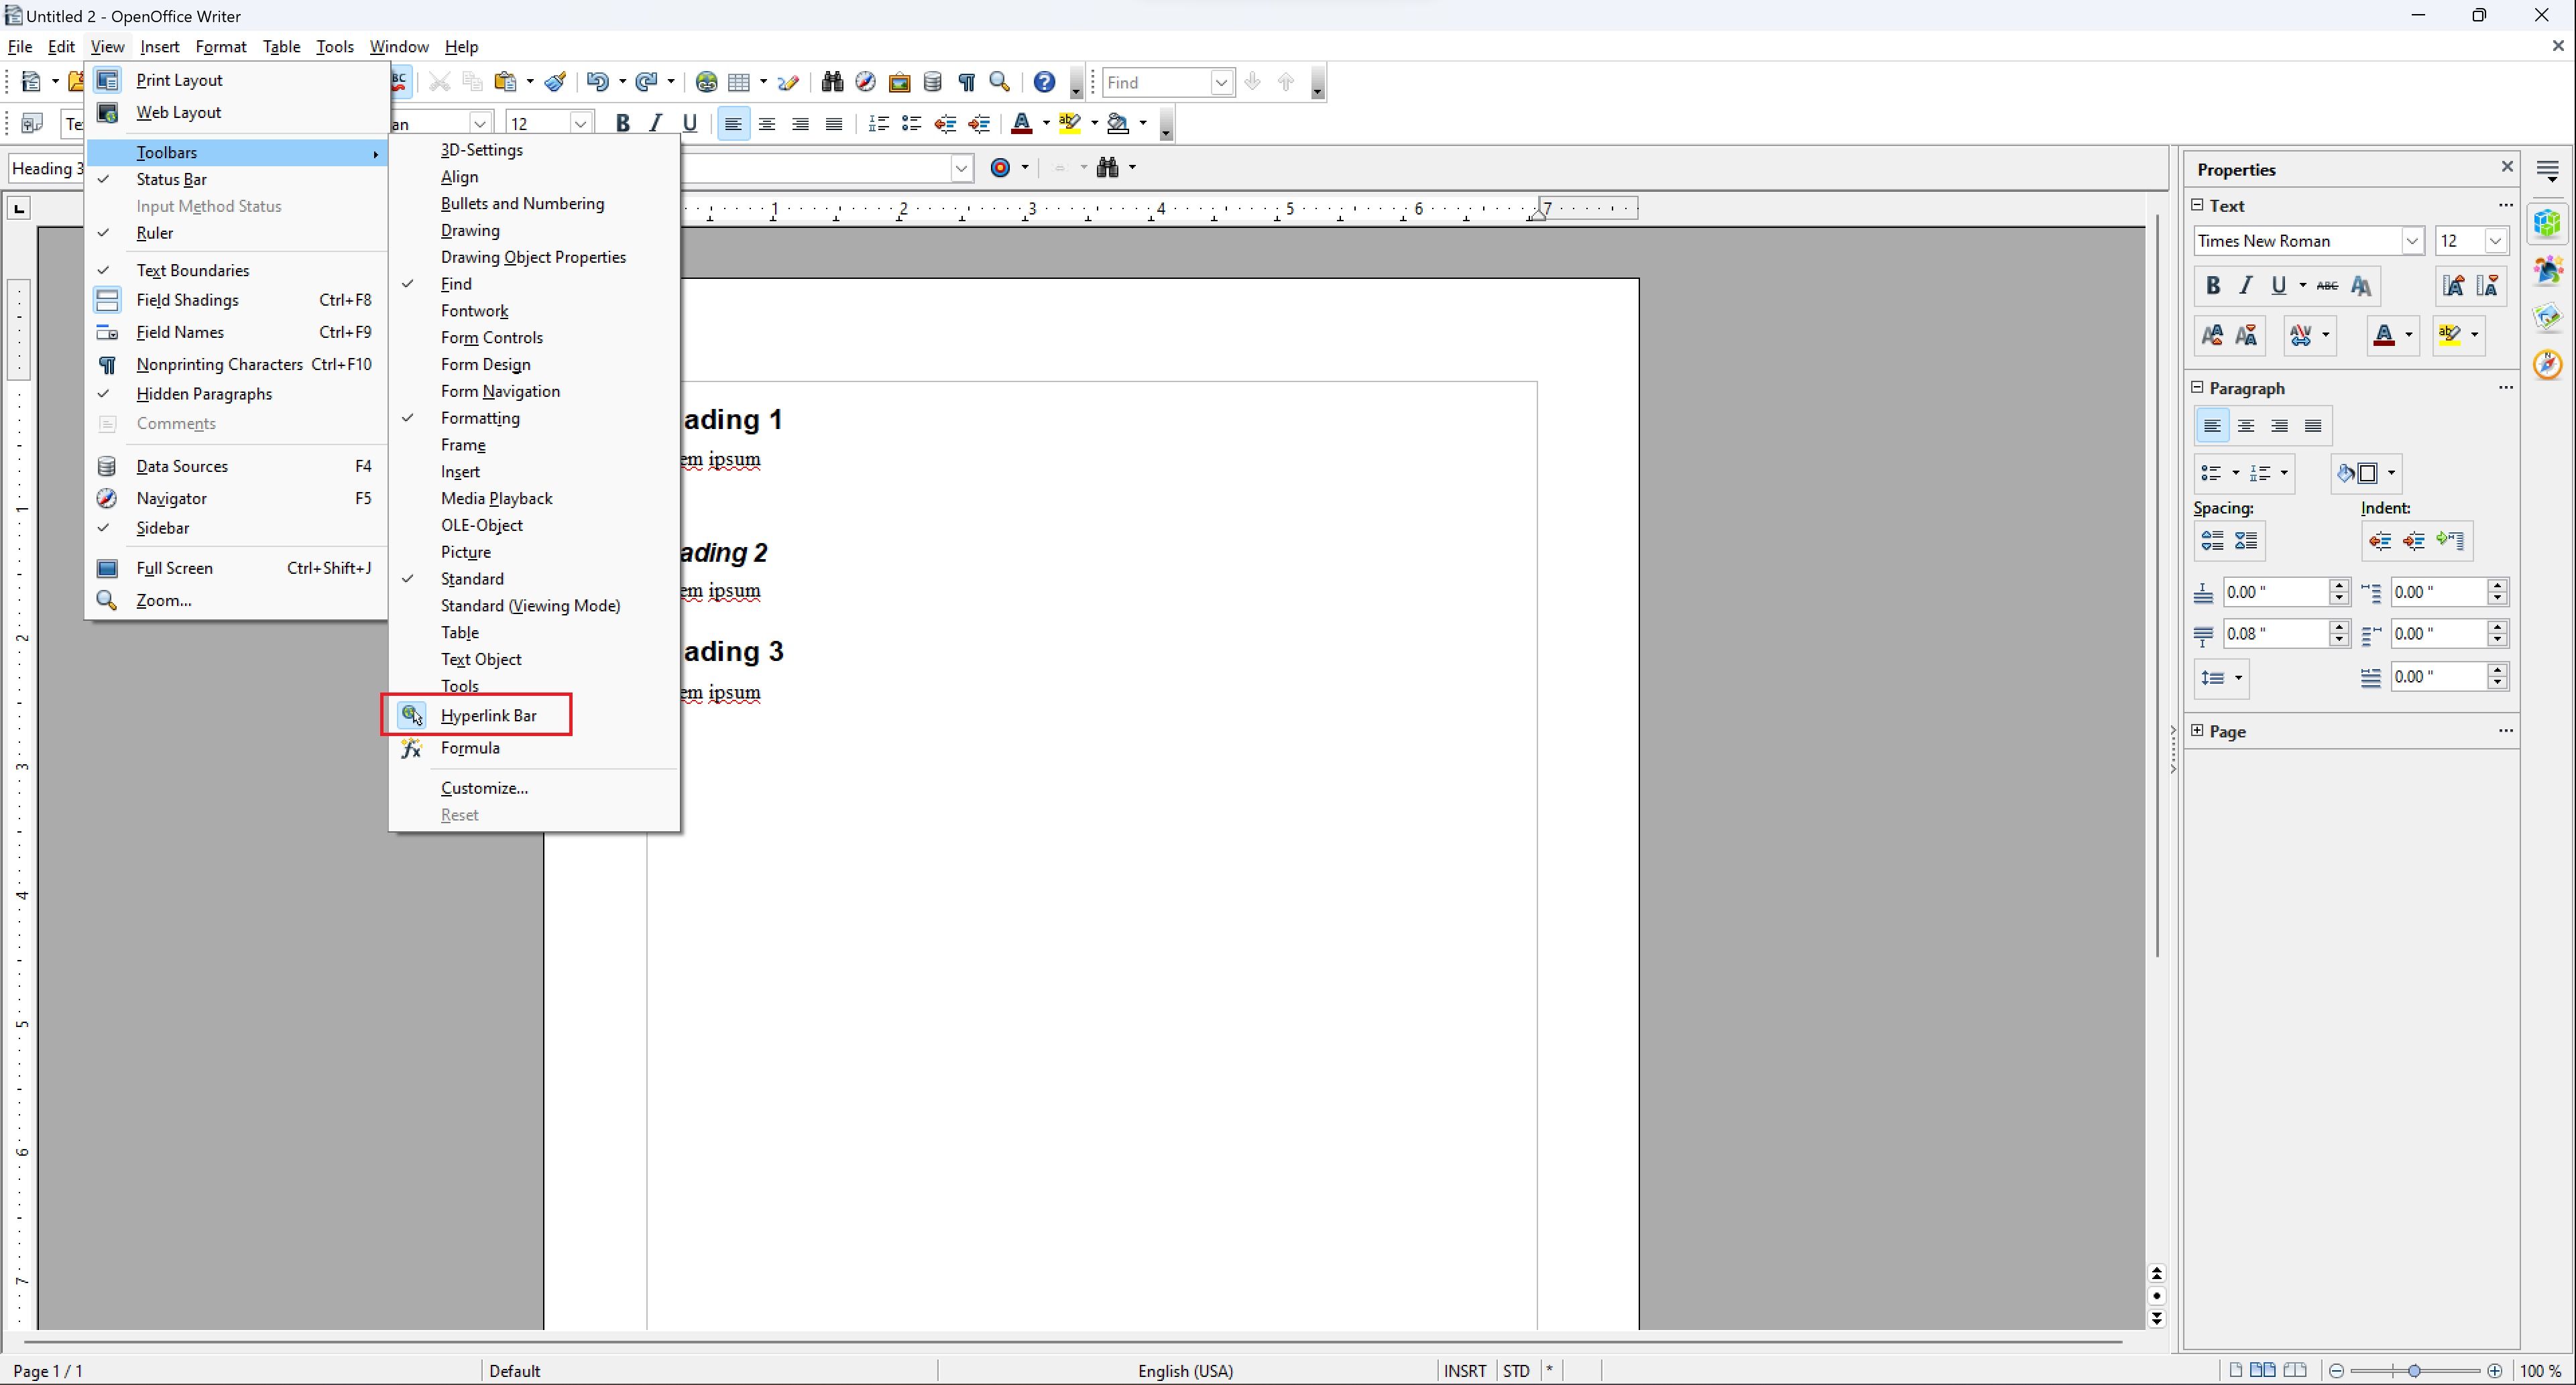
OpenOffice has one of the most broadly customizable interfaces of any software of its kind. You can customize the existing headers and add functions to make them accessible with a single click.
-
Click
View
on the toolbar. -
Select
Toolbars
. -
Go to the
Toolbars
drop-down menu to toggle toolbars on or off, or select
Customize
to alter the content of existing toolbars.

2 Add extensions for more features
OpenOffice comes with an impressive number of tools. One advantage of its open platform is that you can add third-party extensions to fill gaps that exist.
-
Select
Tools
from the toolbar. -
Click
Extension Manager
in the drop-down menu. -
In the Extension Manager window, select
Get more extensions online
. - This opens a browser page where you can search for extensions or browse by categories like operating system or application.
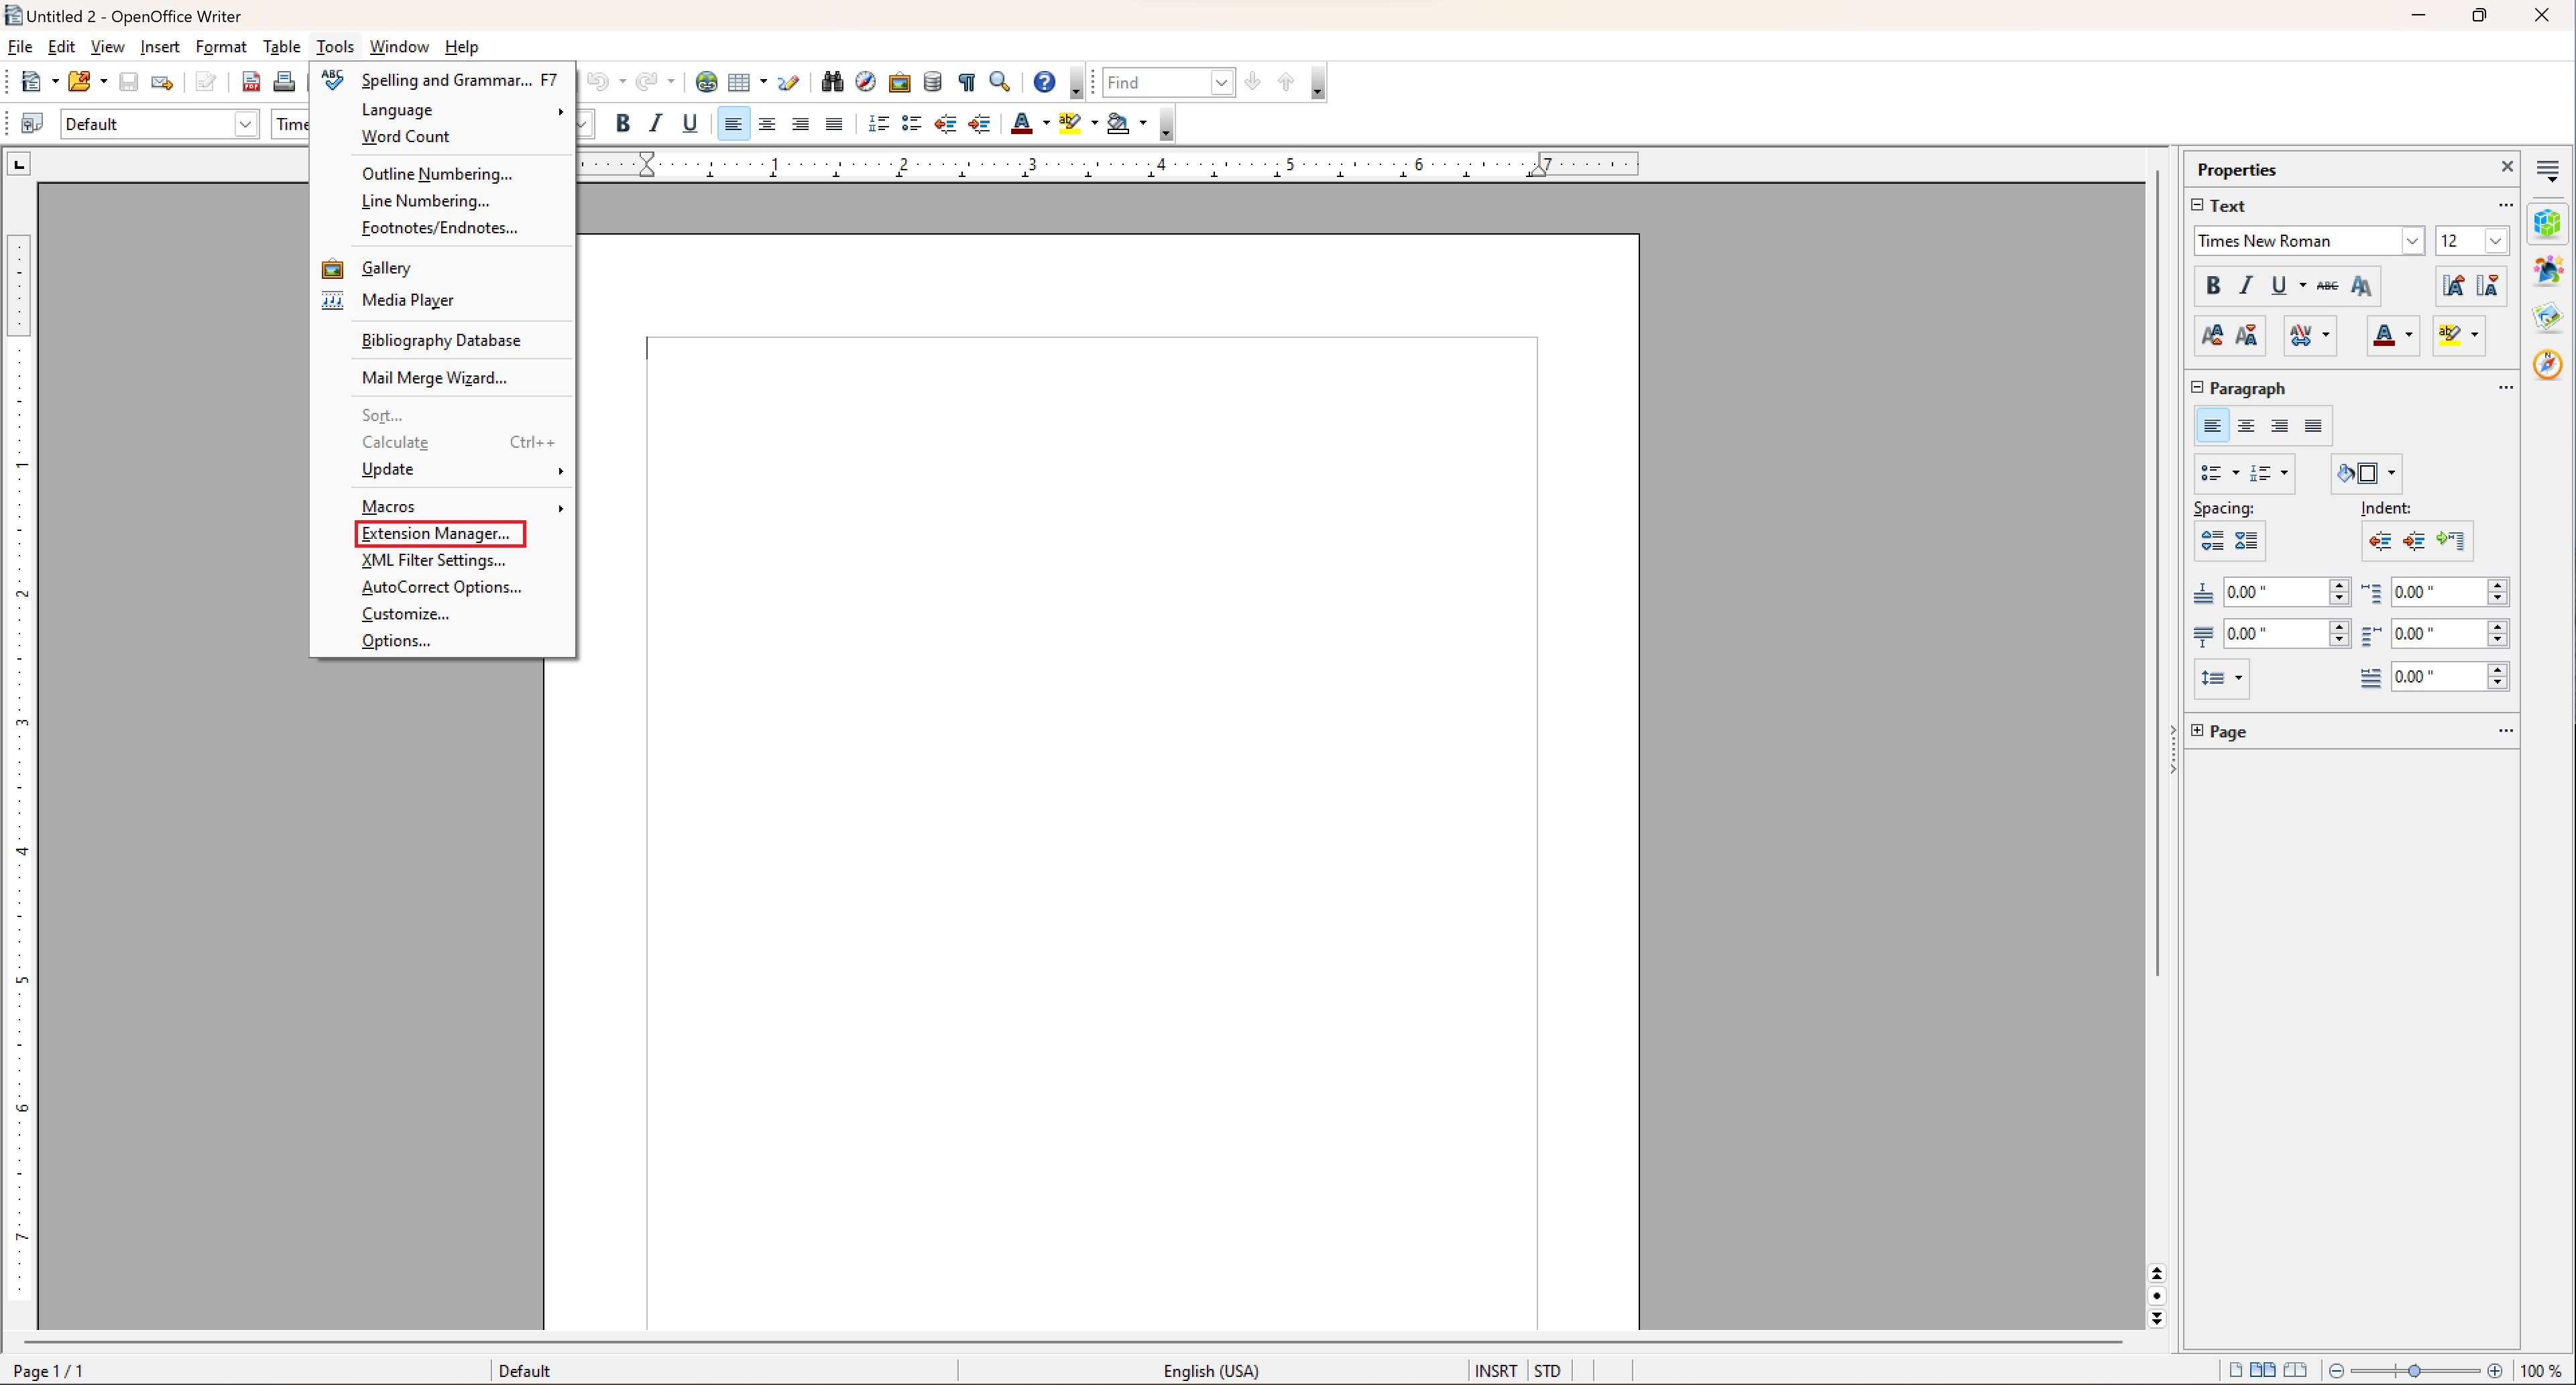
Extensions give you access to dictionaries in other languages, allow you to import and edit PDFs, add new template options, and other useful functions.
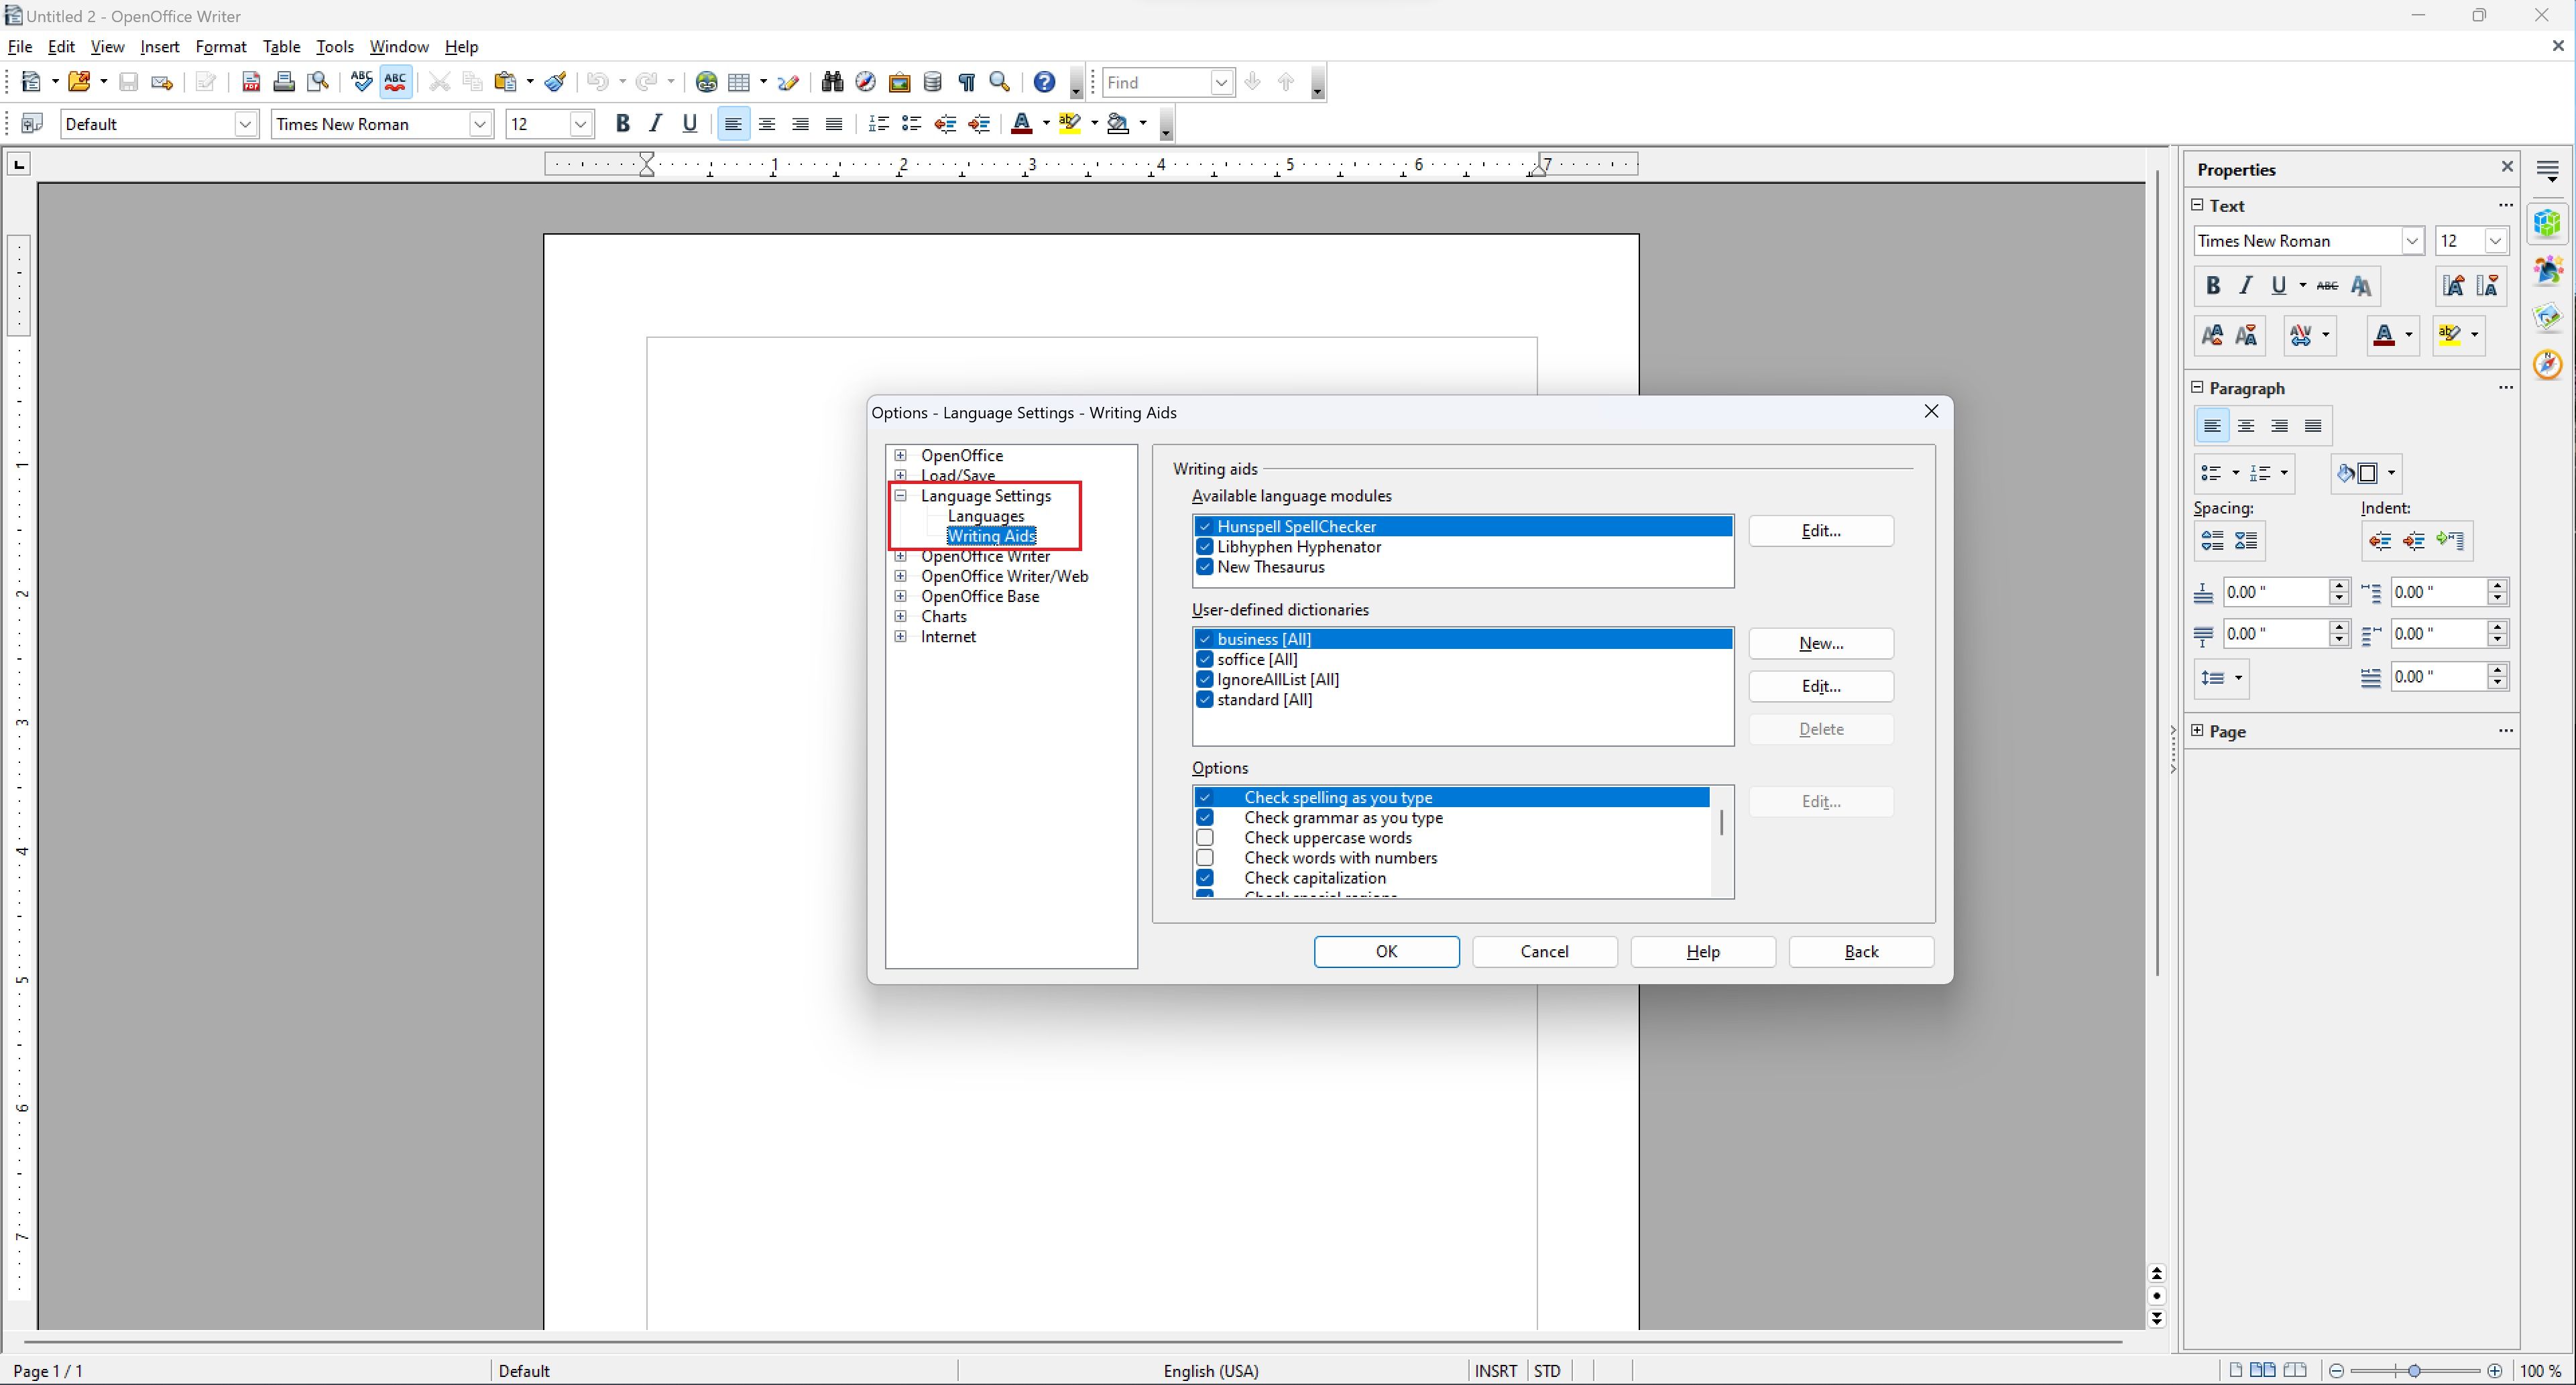
3 Turn on writing assists
OpenOffice has several modules to help you draft clean, grammatically valid text documents. You can activate automatic spellchecking, access a thesaurus, or add non-standard dictionaries.
-
Click
Tools
in the toolbar and select
Options
. -
In the
Options
window, open
Language Settings
and choose
Writing Aids. - Choose the language modules and dictionaries you want to activate and the live spelling and grammatical tools you want to use.
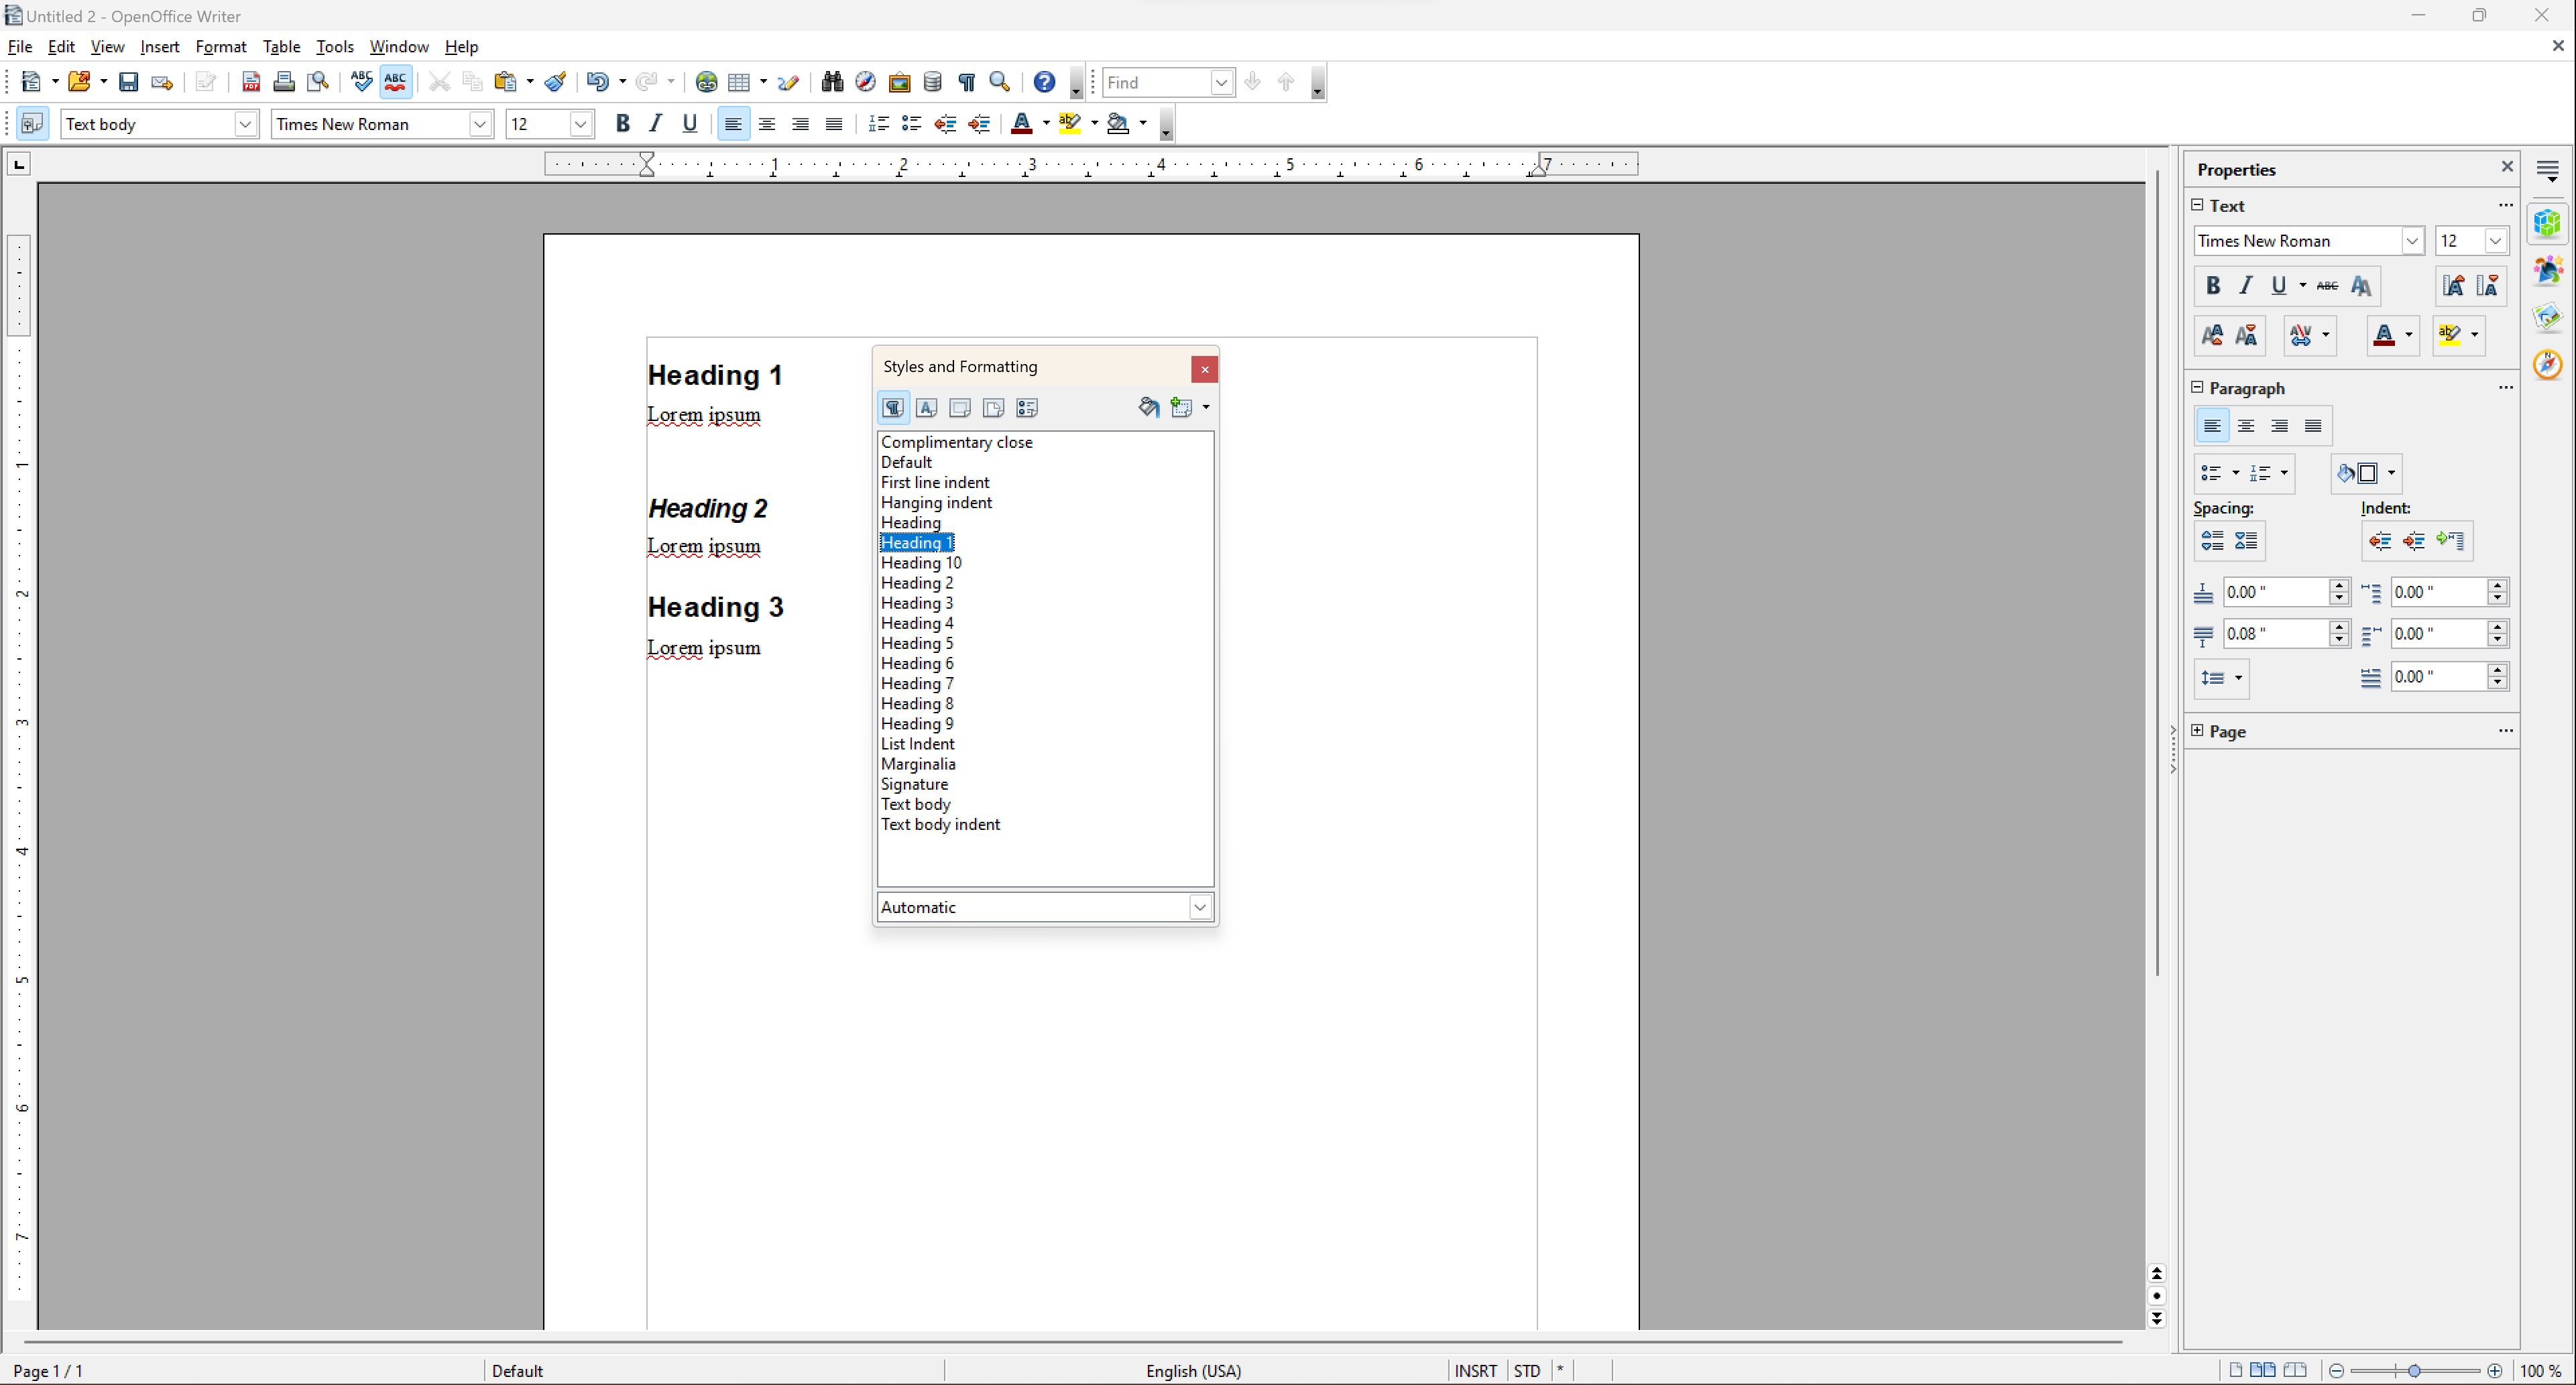
4 Add a table of contents to your document
Add a table of contents to documents with several subsections or longer documents you want to break into digestible sections for easier navigation.
-
A table of contents requires headers. To create a header, click
Format
, then select
Styles and Formatting
. -
Select a header style, click the document where you’d like to place it, and enter the header text.
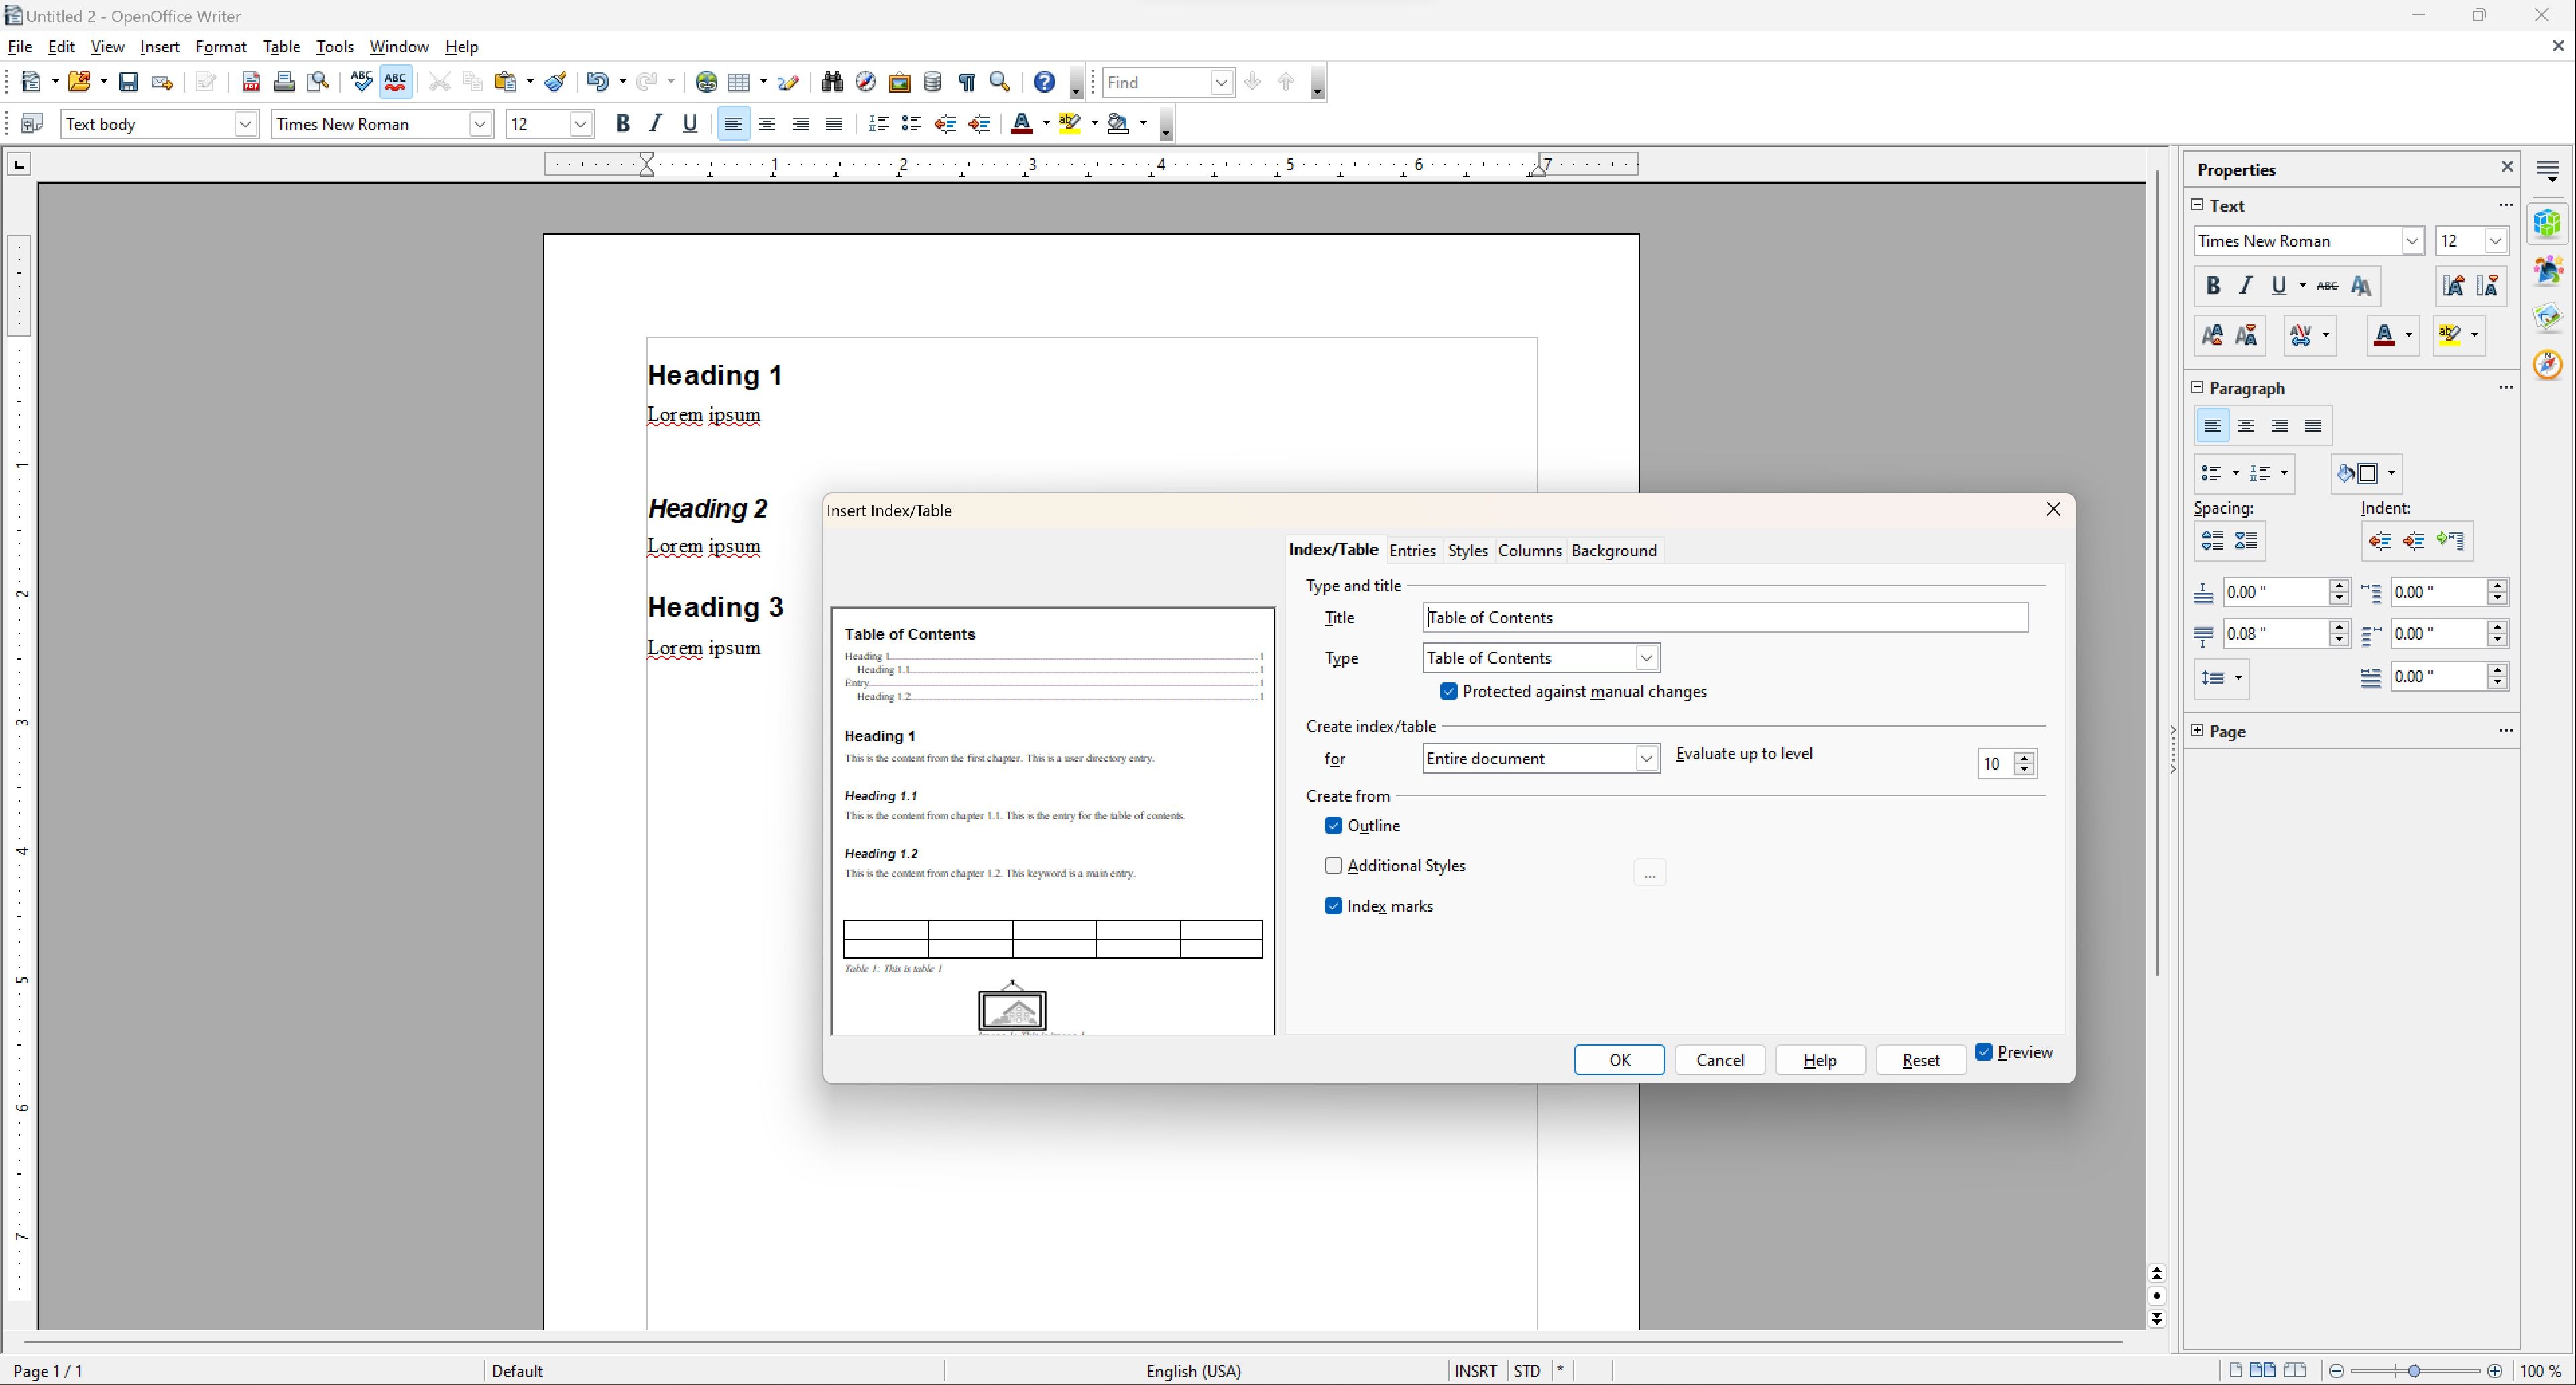
-
To create a table of contents, click
Insert
in the toolbar. Then, choose
Indexes and Tables
and select
Indexes and Tables
from the sub-menu. -
In the
Insert index/table window
, enter a title for your table of contents or leave it as default, and select the
Table of Contents
option in the
Type
drop-down menu. -
If you only want the table of contents to include a certain number of headers, choose
Chapter
in the
Create index/table for
drop-down and set the number of headers you want in the
Evaluate up to level
box. -
To alter the format and style of your table of contents, click
Additional styles
and then select the
ellipsis (…)
to the right of it. -
Click
OK
to add the table of contents to your document.
5 Quickly search the web for keywords in your document
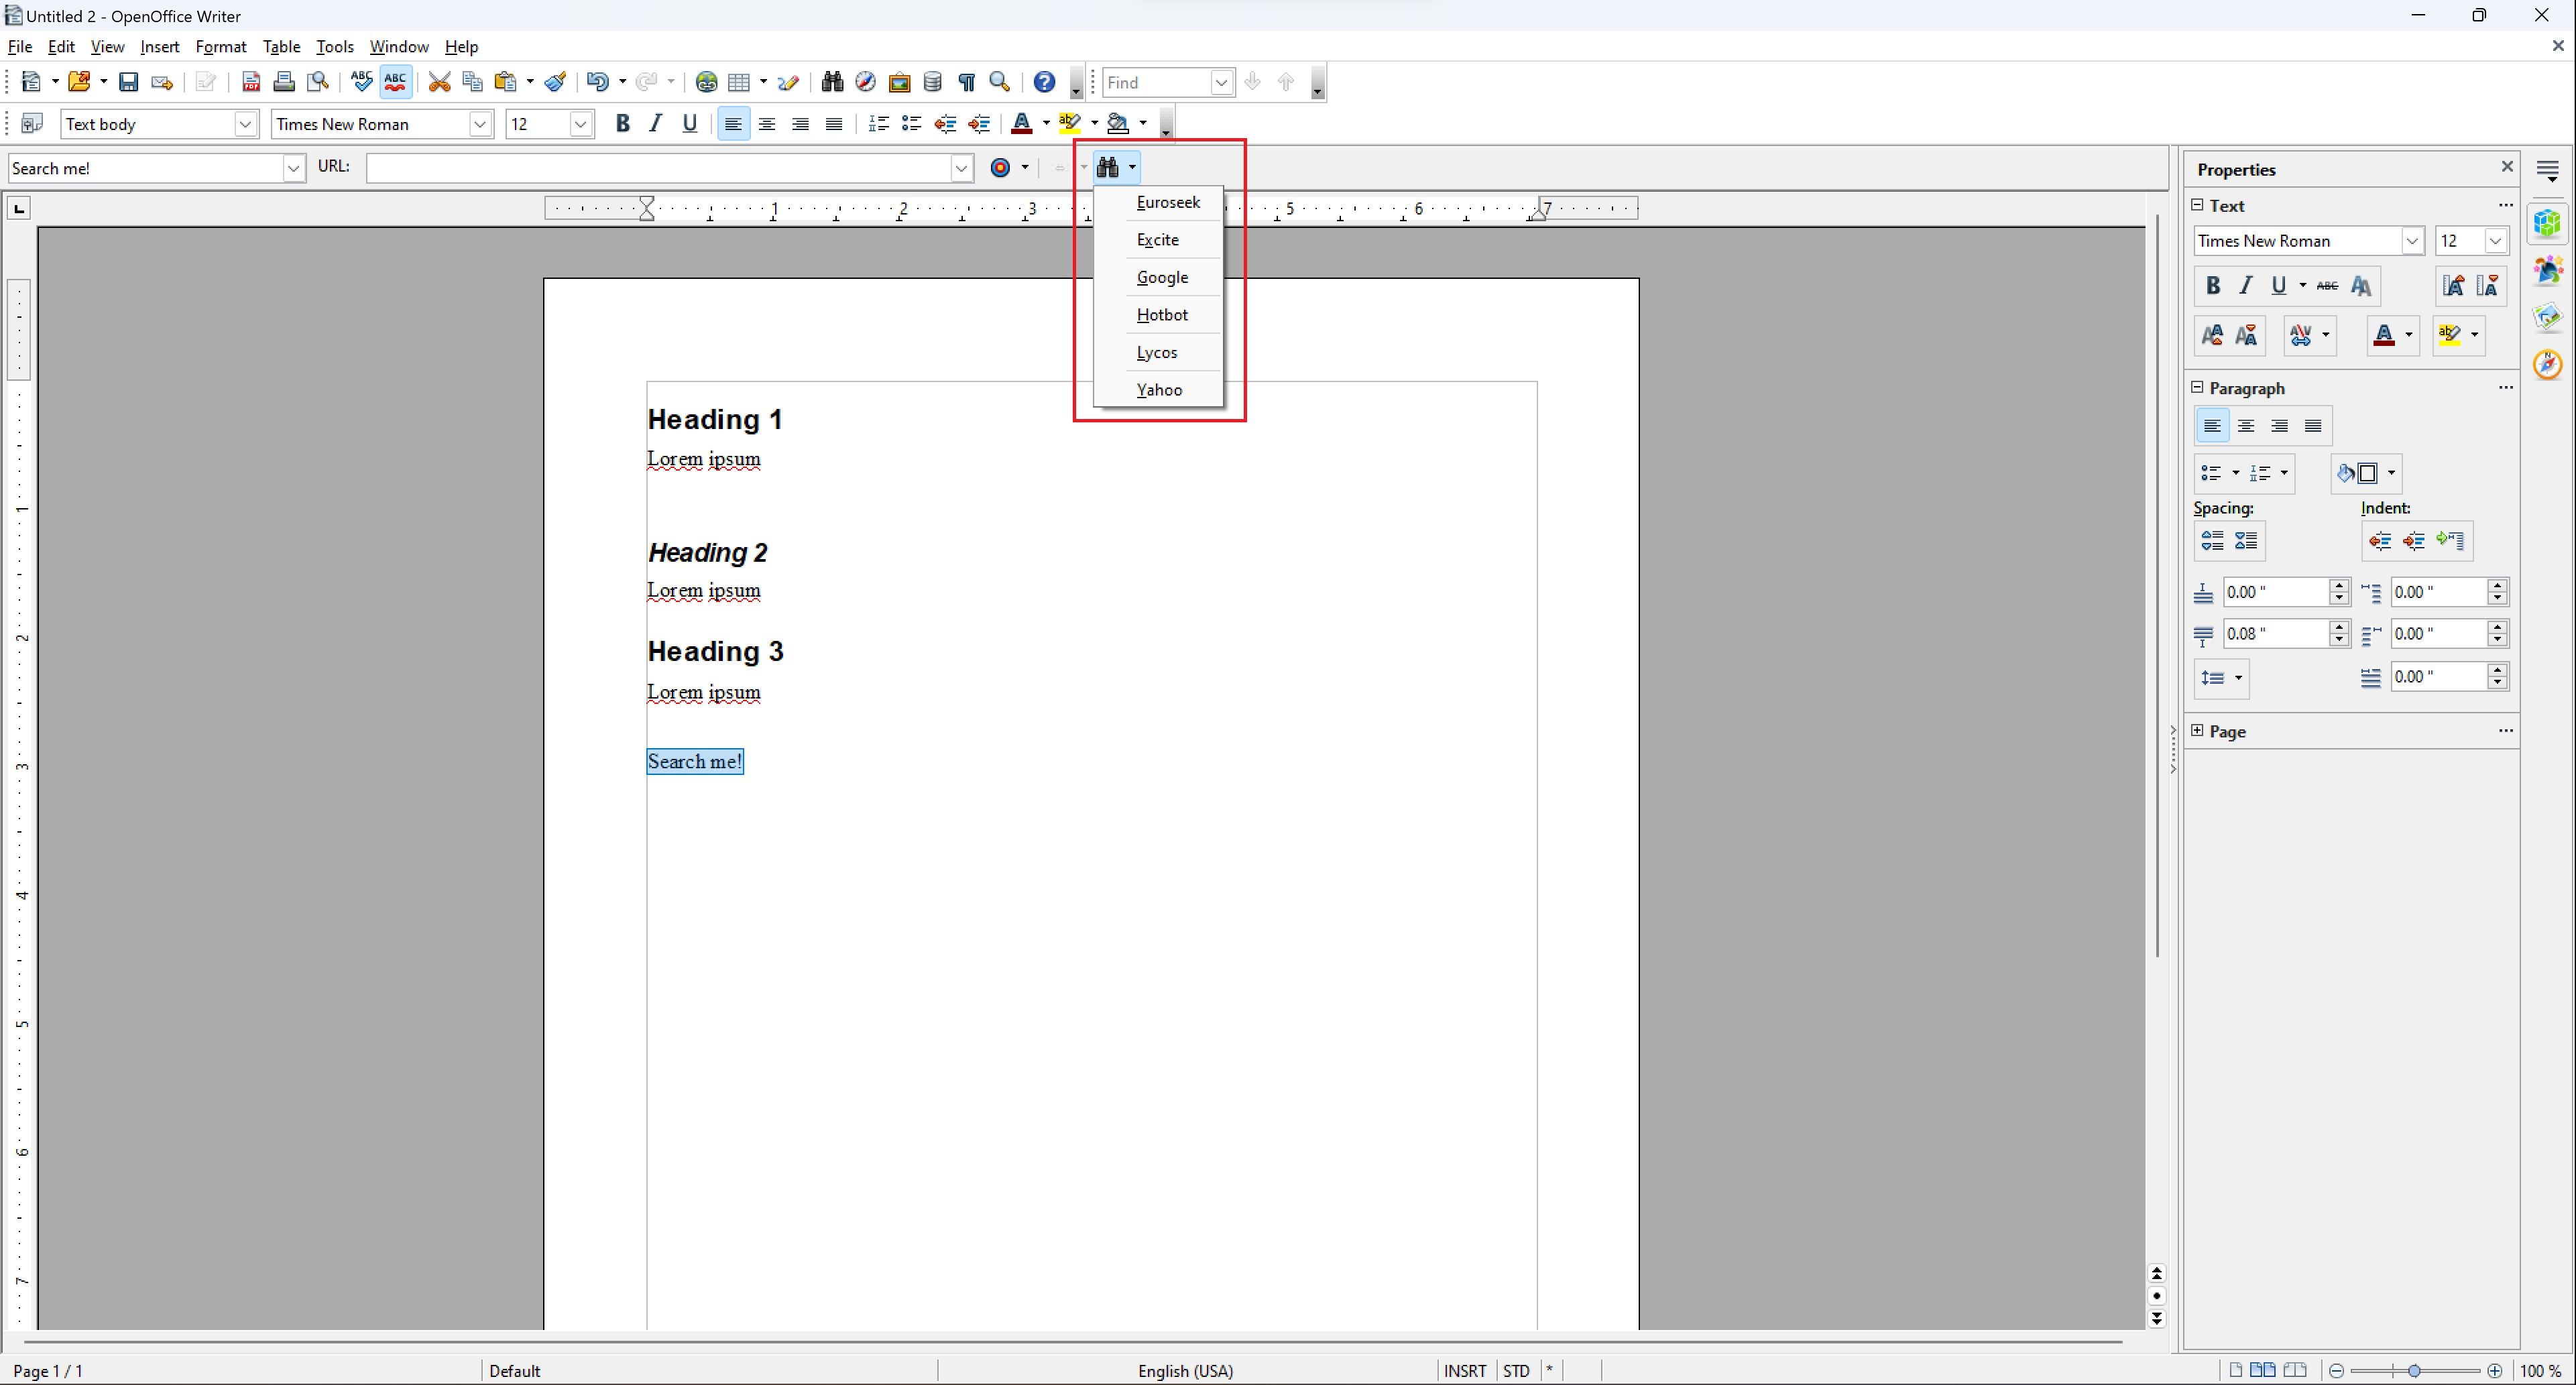
OpenOffice allows you to quickly search the text in your documents on popular search engines like Google, Yahoo, and others. Add this functionality to your toolbar for easy access.
-
Click
View
from the toolbar, choose
Toolbars
, and then toggle on the
Hyperlink Bar
option. -
To search the web for text in your document, highlight it, click the
binoculars
icon, and choose which search engine to use from the drop-down menu.
6 Create a bibliography to cite your sources
OpenOffice offers a built-in tool for citing sources in formal or academic documents.
-
To cite a reference, click
Insert
on the toolbar, choose
Indexes and tables
, and choose
Bibliography entry
. -
Select
From document content
and then click
New
. -
Enter your reference information, choose its
Type
, click
OK
,
and select
Insert
. This inserts the reference into the text in square brackets. -
After creating your references, you’re ready to collate a bibliography. Choose
Insert
, select
Indexes and tables
, select
Indexes and tables
again, and select
Bibliography
.

7 Quickly get a word count
OpenOffice displays the word count in a selected block of text or in the entire document. For the former, select the text you want to count and click Word Count under the Tools menu in the toolbar. To see word and character count in the document, as well as supplementary information, navigate to File > Properties > Statistics.
8 Precisely position text
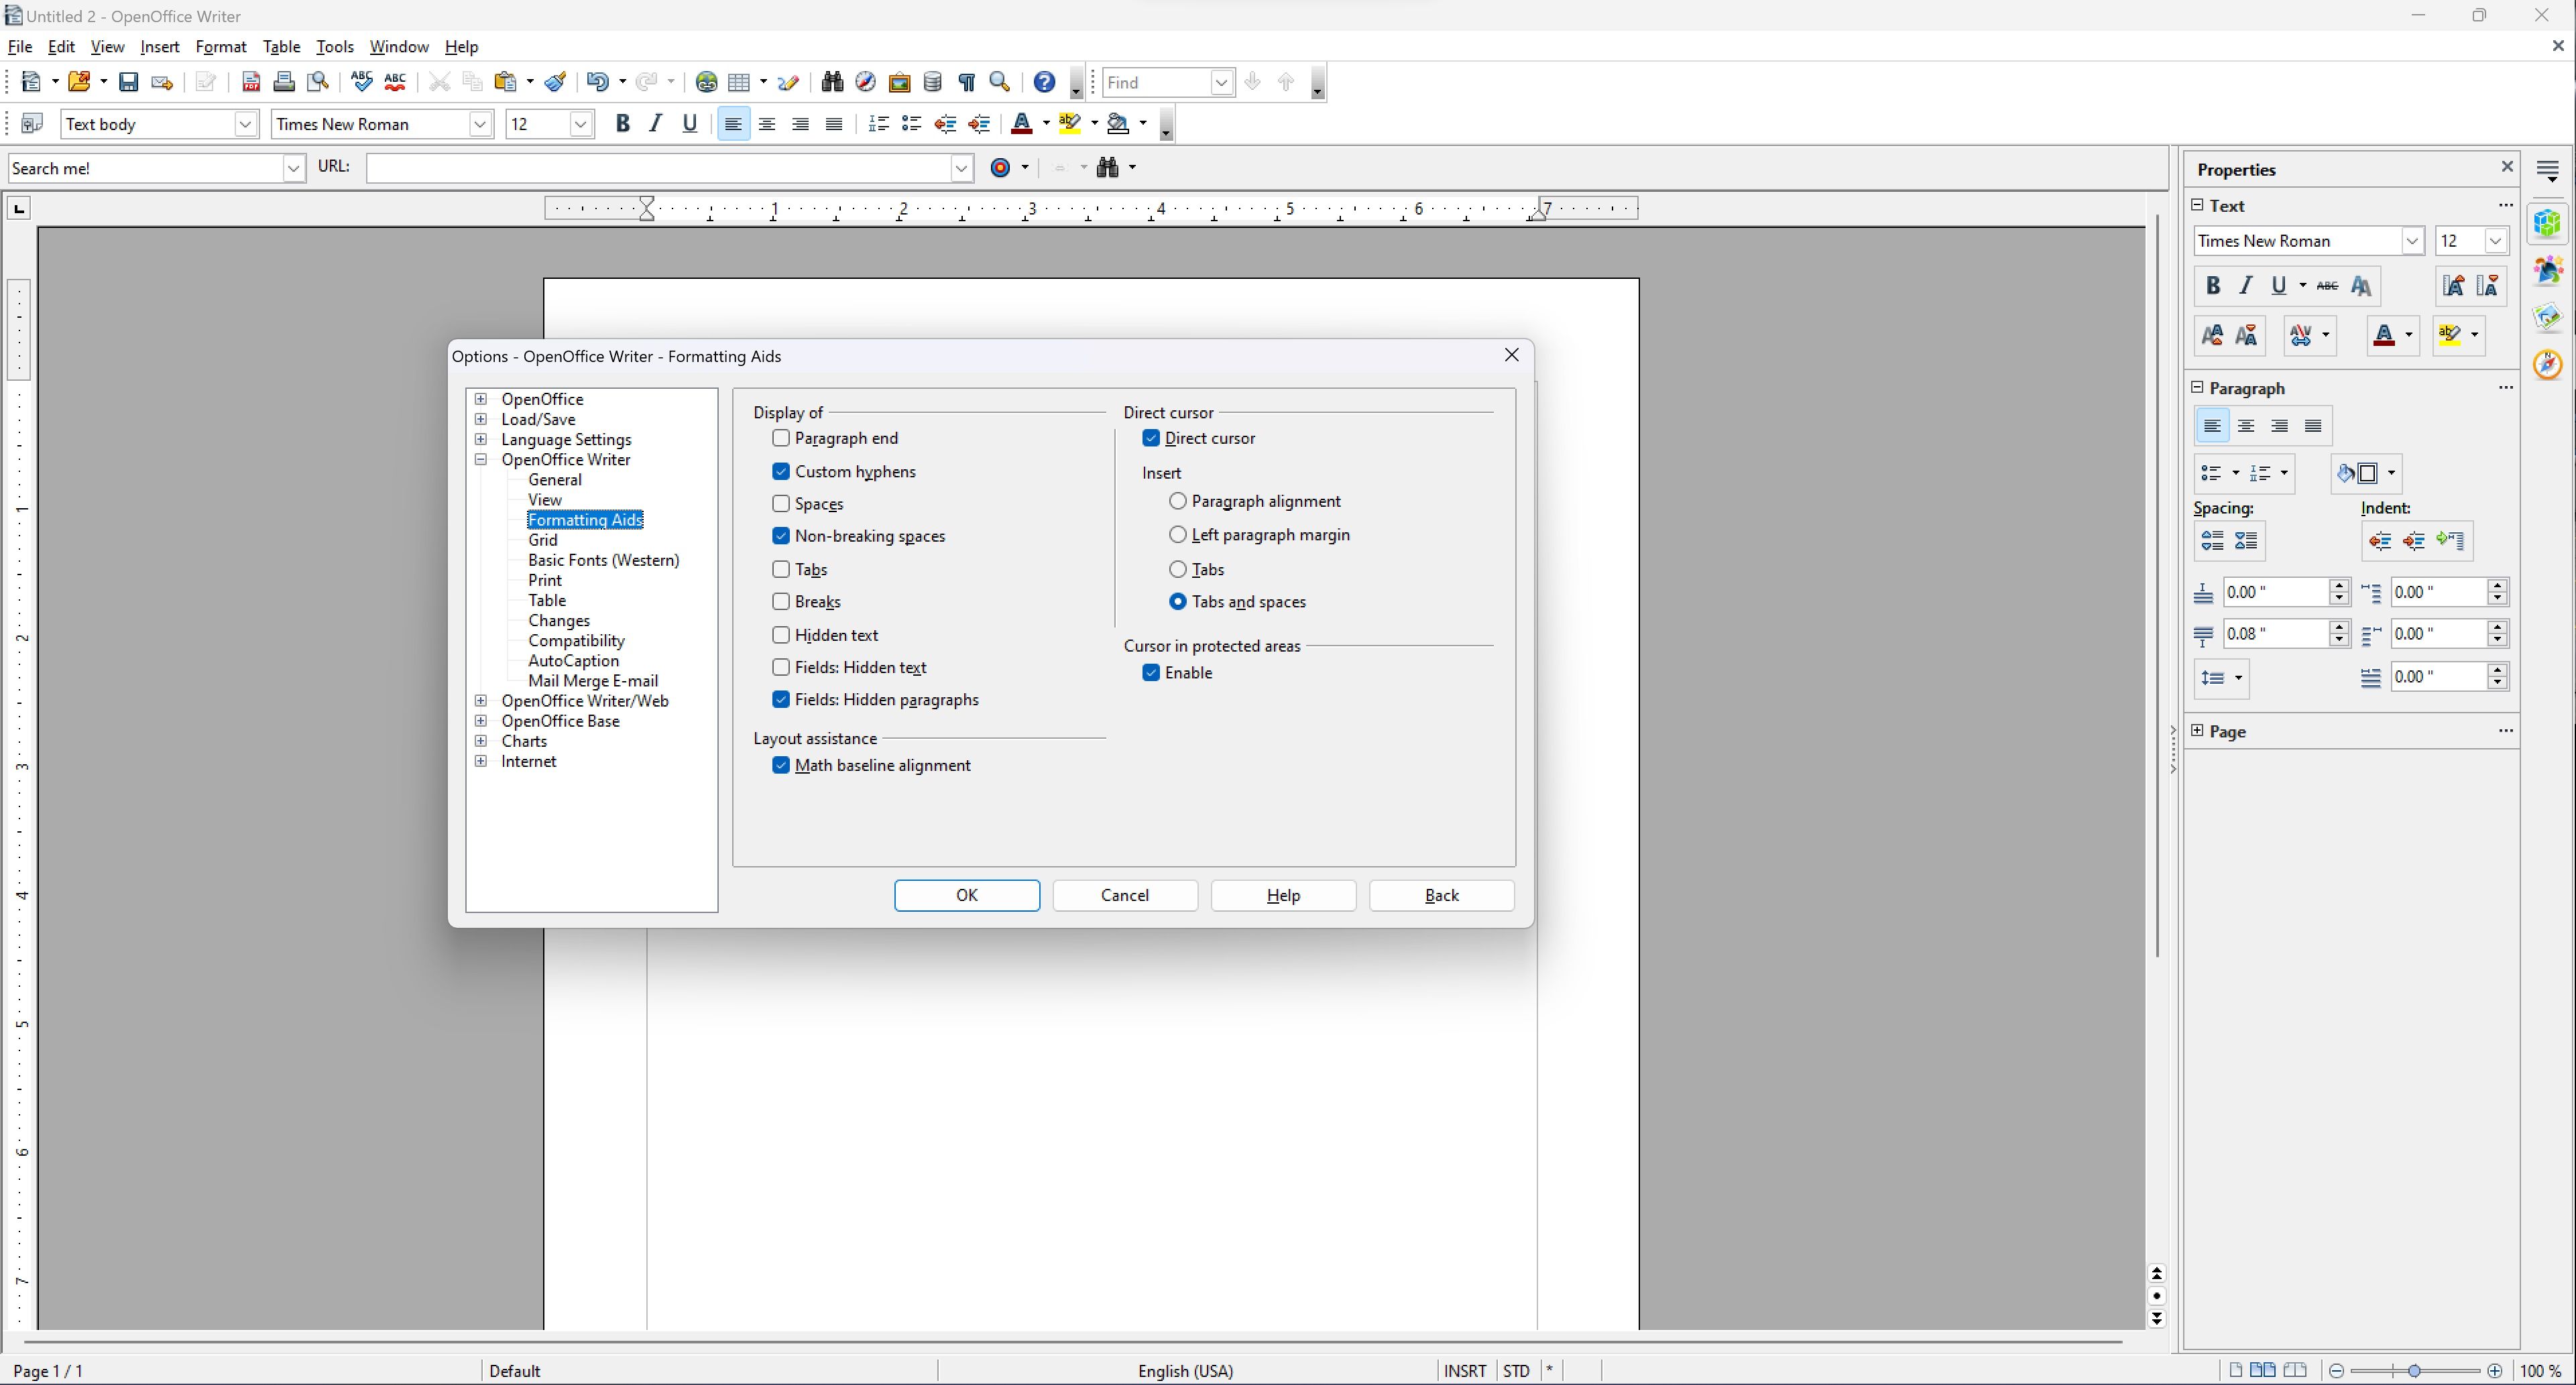
OpenOffice has a Direct cursor feature that allows you to drop text almost anywhere in a document. This feature is especially handy for formatting presentations.
-
Go to
Tools
on the toolbar and select
Options
. -
Open the
OpenOffice Writer
sub-menu and choose
Formatting Aids
in the drop-down menu. -
Check the
Direct cursor
box. You can also choose how you want OpenOffice to determine the position of the Direct cursor. -
To change the color of the Direct cursor, open the
OpenOffice
sub-menu in the
Options
window and select
Appearance
. Then scroll down to
Direct cursor
, and choose the color you want from the
Color setting
menu.
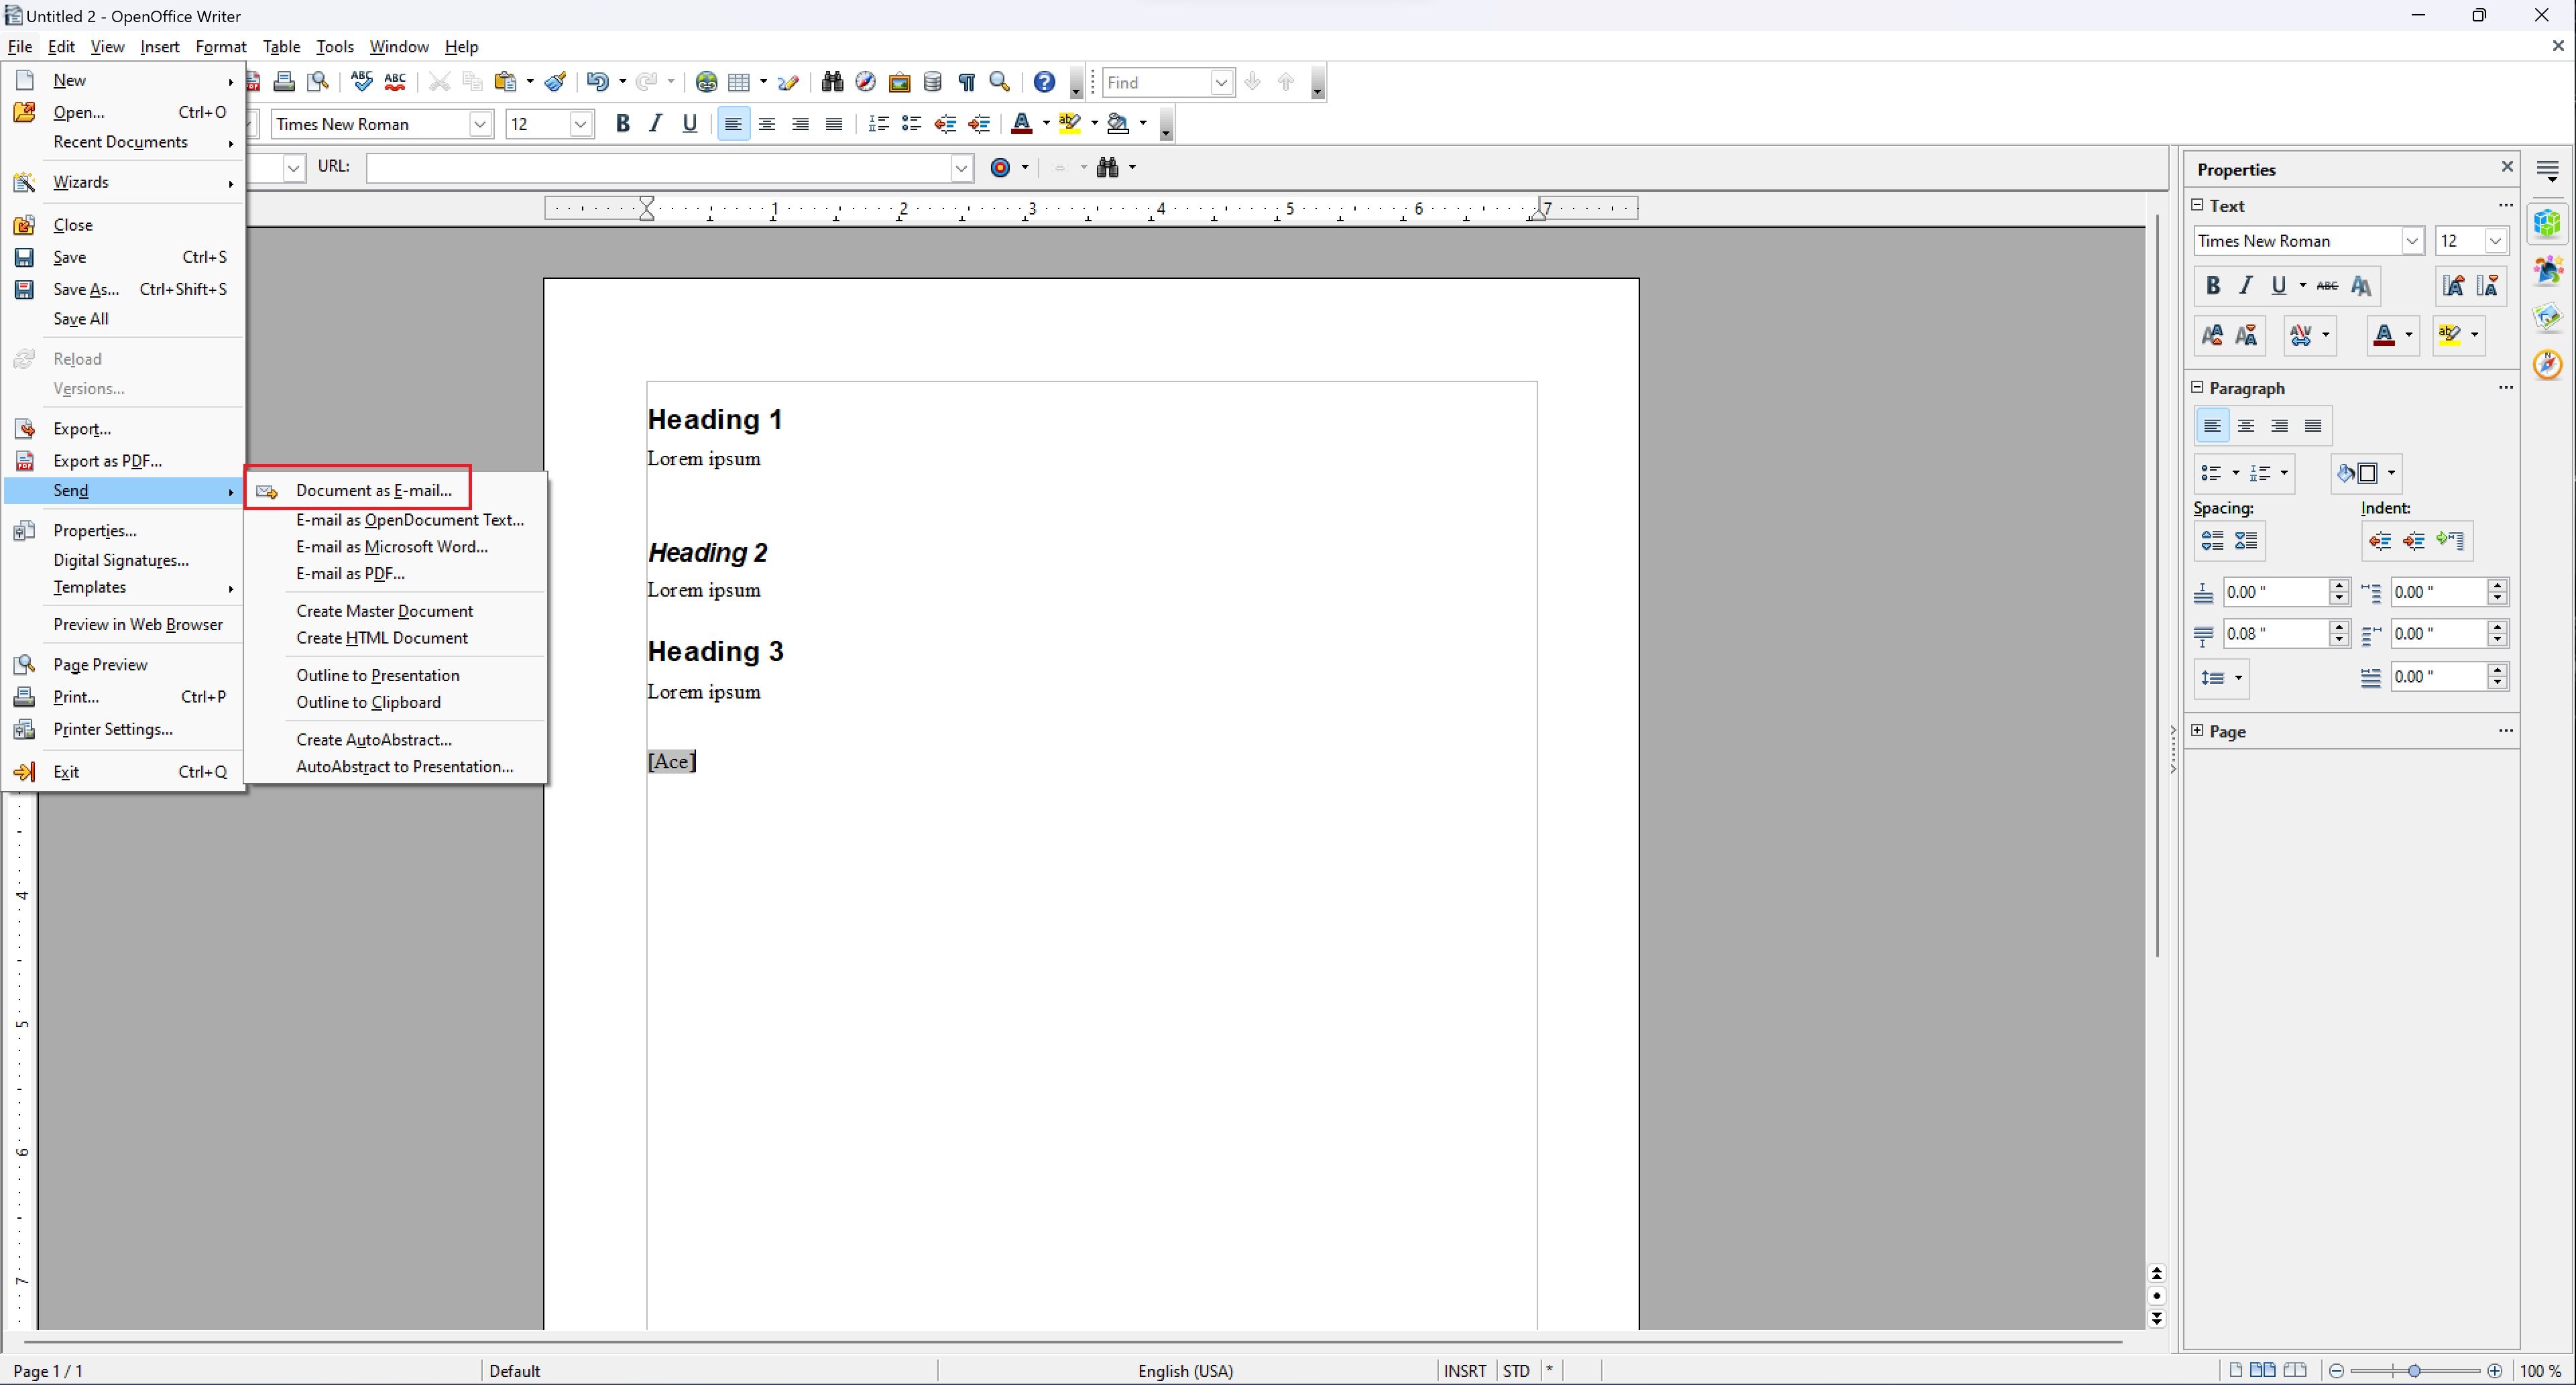
9 Email your document
OpenOffice lets you skip the process of manually attaching a document to an email. Instead, you can send it from the program.
-
Choose
File
, and then select
Send
. -
Select
Document as Email
. - OpenOffice opens your default email client, and the document appears as an attachment.
You can email a document in other formats, like PDF. However, the send document as email feature doesn’t work with web-based email clients like Gmail. To take advantage of it, install a mail program and add your email account to it.
10 OpenOffice Calc spreadsheet tips
Calc is OpenOffice’s equivalent of Microsoft Excel or Google Sheets and lets you build and manage spreadsheets. Here are some quick tips to use some of its most powerful features:
-
Quickly create charts
by clicking
Menu
>
Insert
>
Chart
and choosing the type of chart you want to build. -
Access over 100 functions by clicking
Menu
>
Insert
>
Functions
. -
Take advantage of standard and automatic filters to parse data by clicking
Menu
>
Data
>
Filter
and choosing
Auto
or
Standard Filter
. You can also create an advanced filter and add conditions within the spreadsheet. -
Quickly add a hyperlink by choosing
Insert
>
Hyperlink
, and then customize the link text or insert it inside a frame. -
Save a range of cells and assign a name to them so that you can re-select them later through
Menu
>
Data
>
Define Range
.
Become an OpenOffice Jedi
Like some of the best software, OpenOffice becomes more powerful and intuitive the more you use it. Start with the above as a cheatsheet, and soon you’ll be creating, formatting, and exporting docs and spreadsheets like a champion. If you’re interested in OpenOffice Writer and use Google’s platform for spreadsheets, check out some quick tips for Google Sheets.

Khám phá thêm từ Phụ Kiện Đỉnh
Đăng ký để nhận các bài đăng mới nhất được gửi đến email của bạn.

